Sharing an Internet Connection
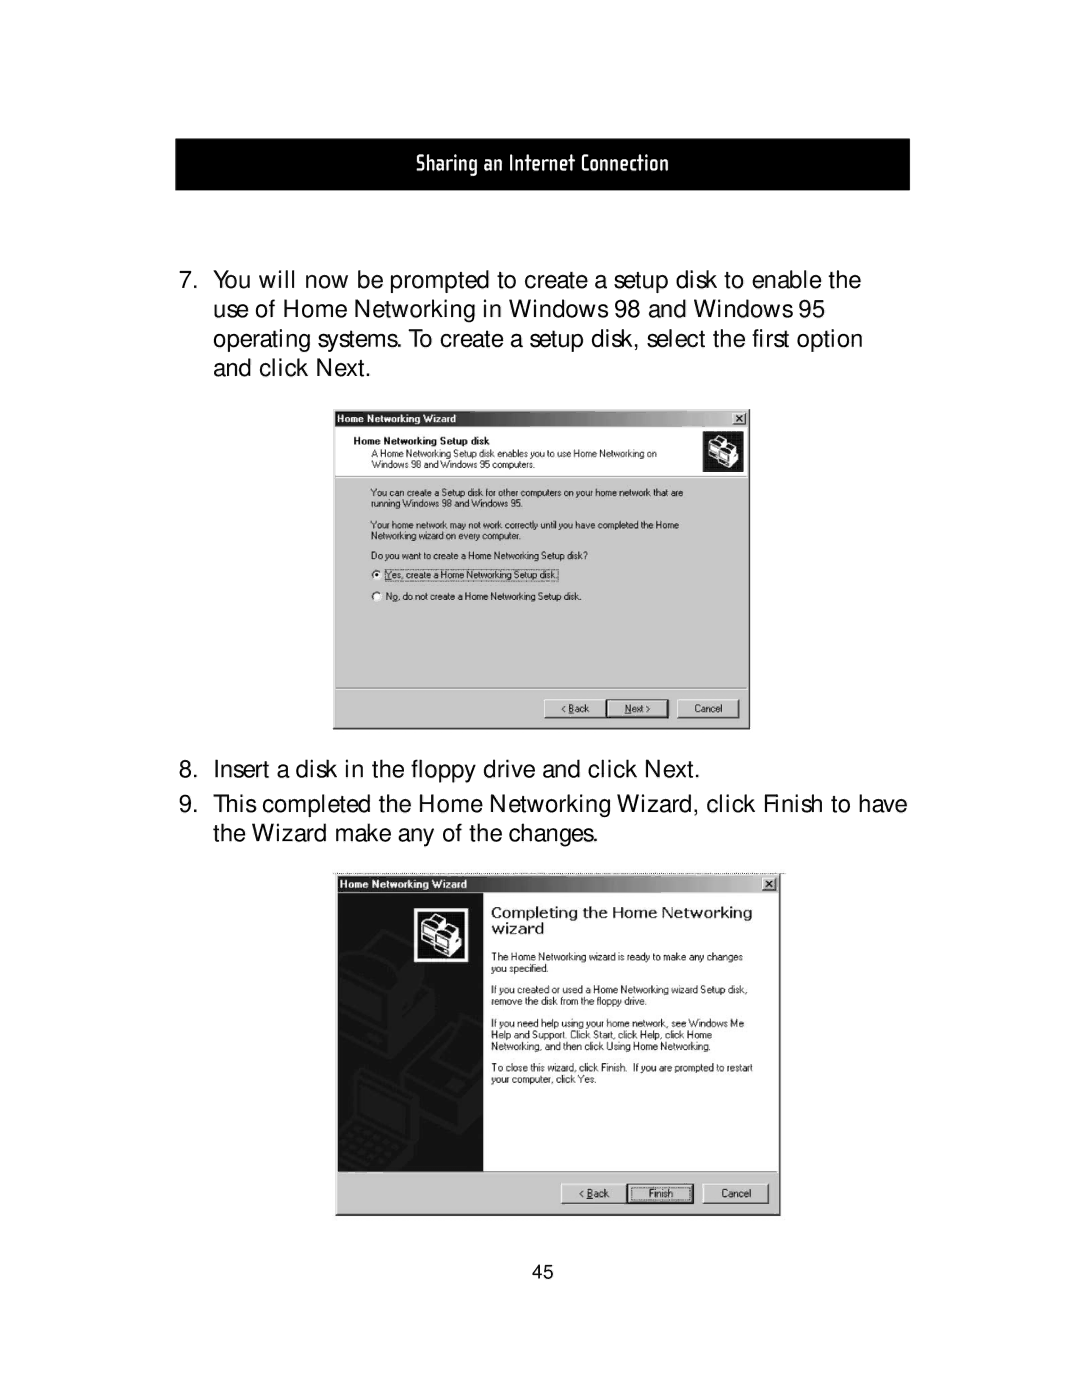
7.You will now be prompted to create a setup disk to enable the use of Home Networking in Windows 98 and Windows 95 operating systems. To create a setup disk, select the first option and click Next.
8.Insert a disk in the floppy drive and click Next.
9.This completed the Home Networking Wizard, click Finish to have the Wizard make any of the changes.
45