Note: A small amount of oil in the system is normal and should not be considered as a reason to replace the desiccant cartridge; oil stained desiccant can function adequately.
2.Visually check for physical damage to the
3.Check mounting bolts for tightness.
4.Perform the Operation & Leakage Tests listed in this publication.
WARNING!
This air dryer is intended to remove moisture and other contaminants normally found in the air brake system. Do not inject alcohol,
D.Location of the air dryer is too close to the air com- pressor. Refer to “Locating
E.In areas where more than a 30 degree range of tem- perature occurs in one day, small amounts of water can temporarily accumulate in the air brake system due to condensation. Under these conditions, the presence of small amounts of moisture is normal and should not be considered as an indication that the dryer is not preforming properly.
OPERATION & LEAKAGE TESTS
1.Install a pressure gauge in the #1 reservoir. Check all lines and fittings leading to and from the air dryer for leakage and integrity. Test the delivery port check valve assembly by building the air system to governor cutout and observing a test air gauge installed in the #1 reservoir. Note the pressure on the air gauge after governor cutout pressure is reached, a rapid loss of pressure could indicate a failed delivery port check valve. This can be confirmed by shutting the engine off, draining system pressure to a point below governor cutin (usually not less than 95 psi), draining residual air pressure in the compressor discharge line. Remove the discharge line at the supply port of the dryer, and use soapy water to determine if air is flowing out of the supply port. Make sure there is no air pressure at the control port, by removing the line from the control port to the governor UNL port. The reservoir needs to have a least 50 PSIG for this test. If a 1” bubble forms within one second, the delivery check valve should be repaired. Remove the test gauge before returning the vehicle to service.
6
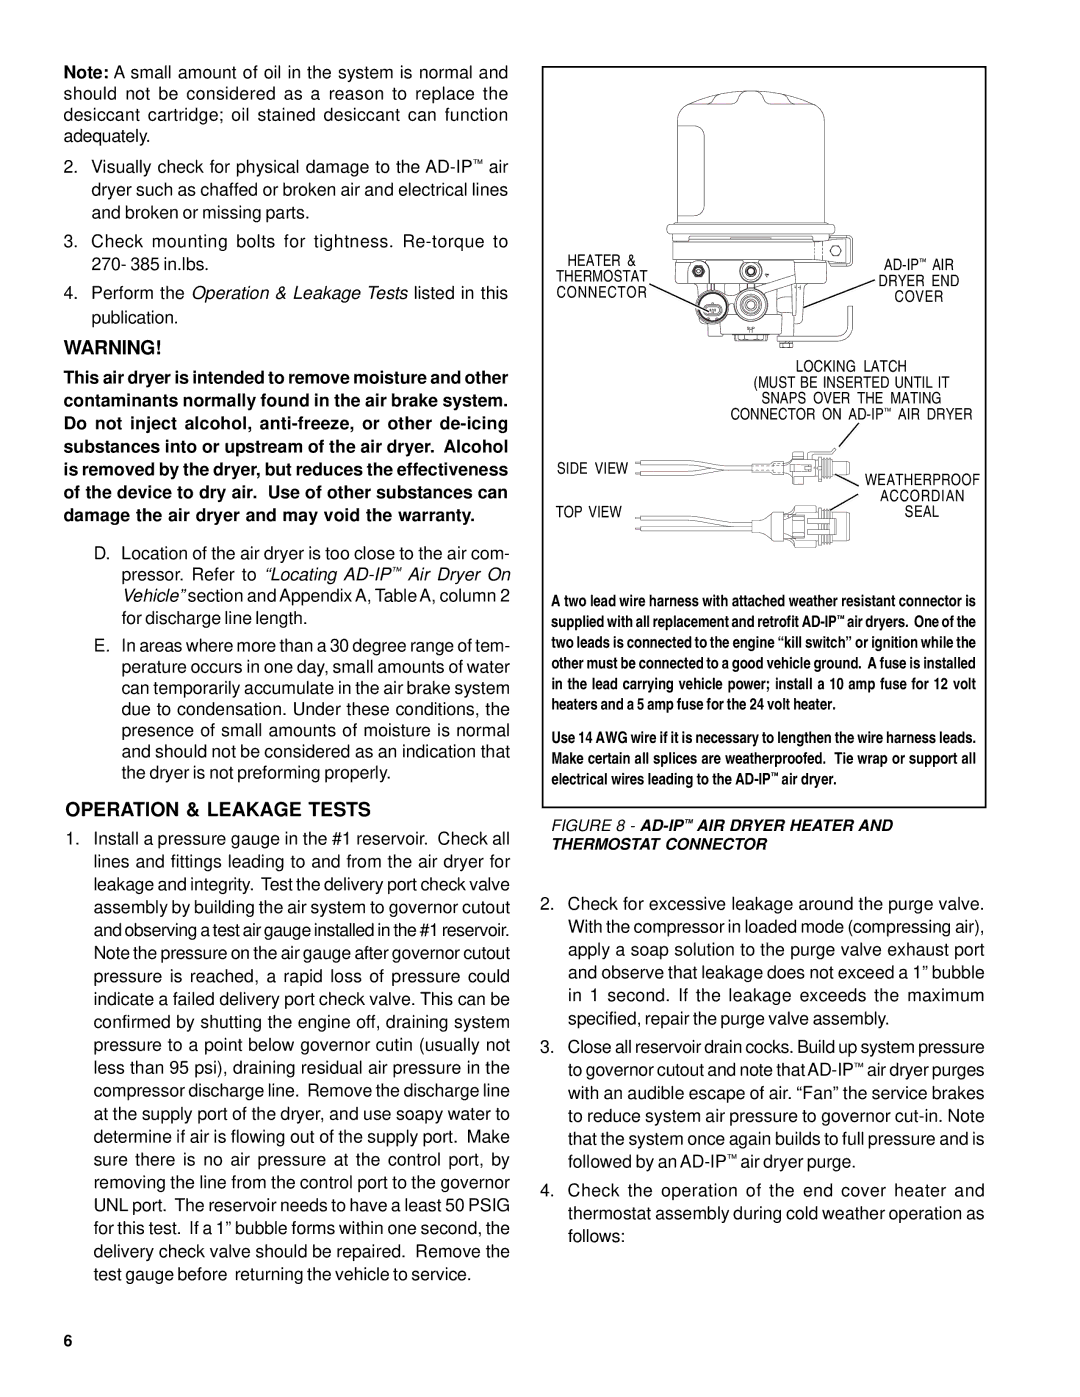
HEATER & | |
THERMOSTAT | DRYER END |
CONNECTOR | COVER |
| LOCKING LATCH |
| (MUST BE INSERTED UNTIL IT |
| SNAPS OVER THE MATING |
| CONNECTOR ON |
SIDE VIEW
 WEATHERPROOF
ACCORDIAN
TOP VIEW | SEAL |
A two lead wire harness with attached weather resistant connector is supplied with all replacement and retrofit
Use 14 AWG wire if it is necessary to lengthen the wire harness leads. Make certain all splices are weatherproofed. Tie wrap or support all electrical wires leading to the
FIGURE 8 - AD-IP™ AIR DRYER HEATER AND
THERMOSTAT CONNECTOR
2.Check for excessive leakage around the purge valve. With the compressor in loaded mode (compressing air), apply a soap solution to the purge valve exhaust port and observe that leakage does not exceed a 1” bubble in 1 second. If the leakage exceeds the maximum specified, repair the purge valve assembly.
3.Close all reservoir drain cocks. Build up system pressure to governor cutout and note that
4.Check the operation of the end cover heater and thermostat assembly during cold weather operation as follows: