TABLE N°4: Burner primary air regulation (indicative)
|
| Burner |
Type of gas | Broiler | |
|
| Inches (mm) |
NG | (Natural Gas) | fully open |
LP | (Propane Gas) | fully open |
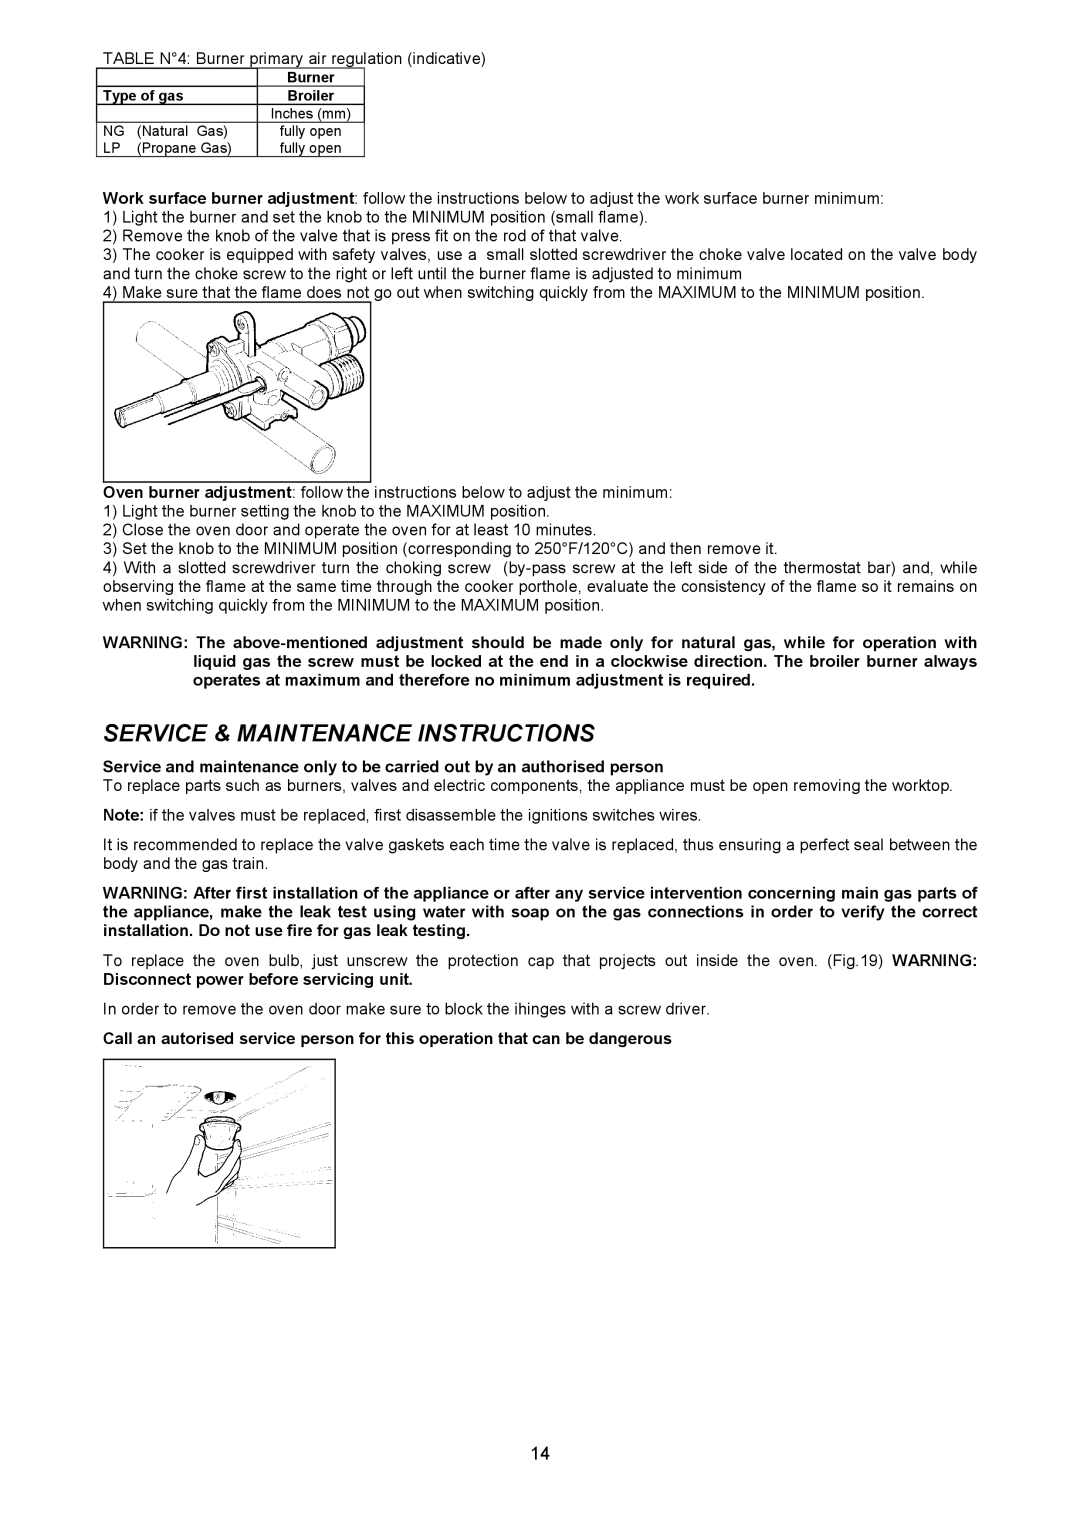
Work surface burner adjustment: follow the instructions below to adjust the work surface burner minimum:
1)Light the burner and set the knob to the MINIMUM position (small flame).
2)Remove the knob of the valve that is press fit on the rod of that valve.
3)The cooker is equipped with safety valves, use a small slotted screwdriver the choke valve located on the valve body and turn the choke screw to the right or left until the burner flame is adjusted to minimum
4)Make sure that the flame does not go out when switching quickly from the MAXIMUM to the MINIMUM position.
Oven burner adjustment: follow the instructions below to adjust the minimum:
1)Light the burner setting the knob to the MAXIMUM position.
2)Close the oven door and operate the oven for at least 10 minutes.
3)Set the knob to the MINIMUM position (corresponding to 250°F/120°C) and then remove it.
4)With a slotted screwdriver turn the choking screw
WARNING: The
SERVICE & MAINTENANCE INSTRUCTIONS
Service and maintenance only to be carried out by an authorised person
To replace parts such as burners, valves and electric components, the appliance must be open removing the worktop. Note: if the valves must be replaced, first disassemble the ignitions switches wires.
It is recommended to replace the valve gaskets each time the valve is replaced, thus ensuring a perfect seal between the body and the gas train.
WARNING: After first installation of the appliance or after any service intervention concerning main gas parts of the appliance, make the leak test using water with soap on the gas connections in order to verify the correct installation. Do not use fire for gas leak testing.
To replace the oven bulb, just unscrew the protection cap that projects out inside the oven. (Fig.19) WARNING:
Disconnect power before servicing unit.
In order to remove the oven door make sure to block the ihinges with a screw driver.
Call an autorised service person for this operation that can be dangerous
14