12.CONNECT THE WIRING
!WARNING
Risk of electrical shock. Electrical wiring must be done by qualified personnel in accordance with all applicable codes and standards. Before connecting wires, switch power off at service panel and lock service disconnecting means to prevent power to be switched on accidentally.
Remove wiring cover from
Connect BLACK to BLACK, WHITE to WHITE and GREEN or bare wire under GREEN ground screw. Reinstall wiring cover.
13.FINISH THE DRYWALL BOX (INSTALLATION WITH DRY WALL TRIM ATDIP SERIES ONLY)
Finish the drywall box. Check fitting with dry wall trim before mounting it to the hood.
14.MOUNT THE DECORATIVE FLUE COVER OR THE DRY WALL TRIM ON THE HOOD
!WARNING
The decorative flue cover AEWIP Series and the dry wall trim ATDIP Series may have sharp edges. Be careful when handling and installing these metal parts.
14.1INSTALLATION WITH DECORATIVE FLUE COVER
AEIWP SERIES
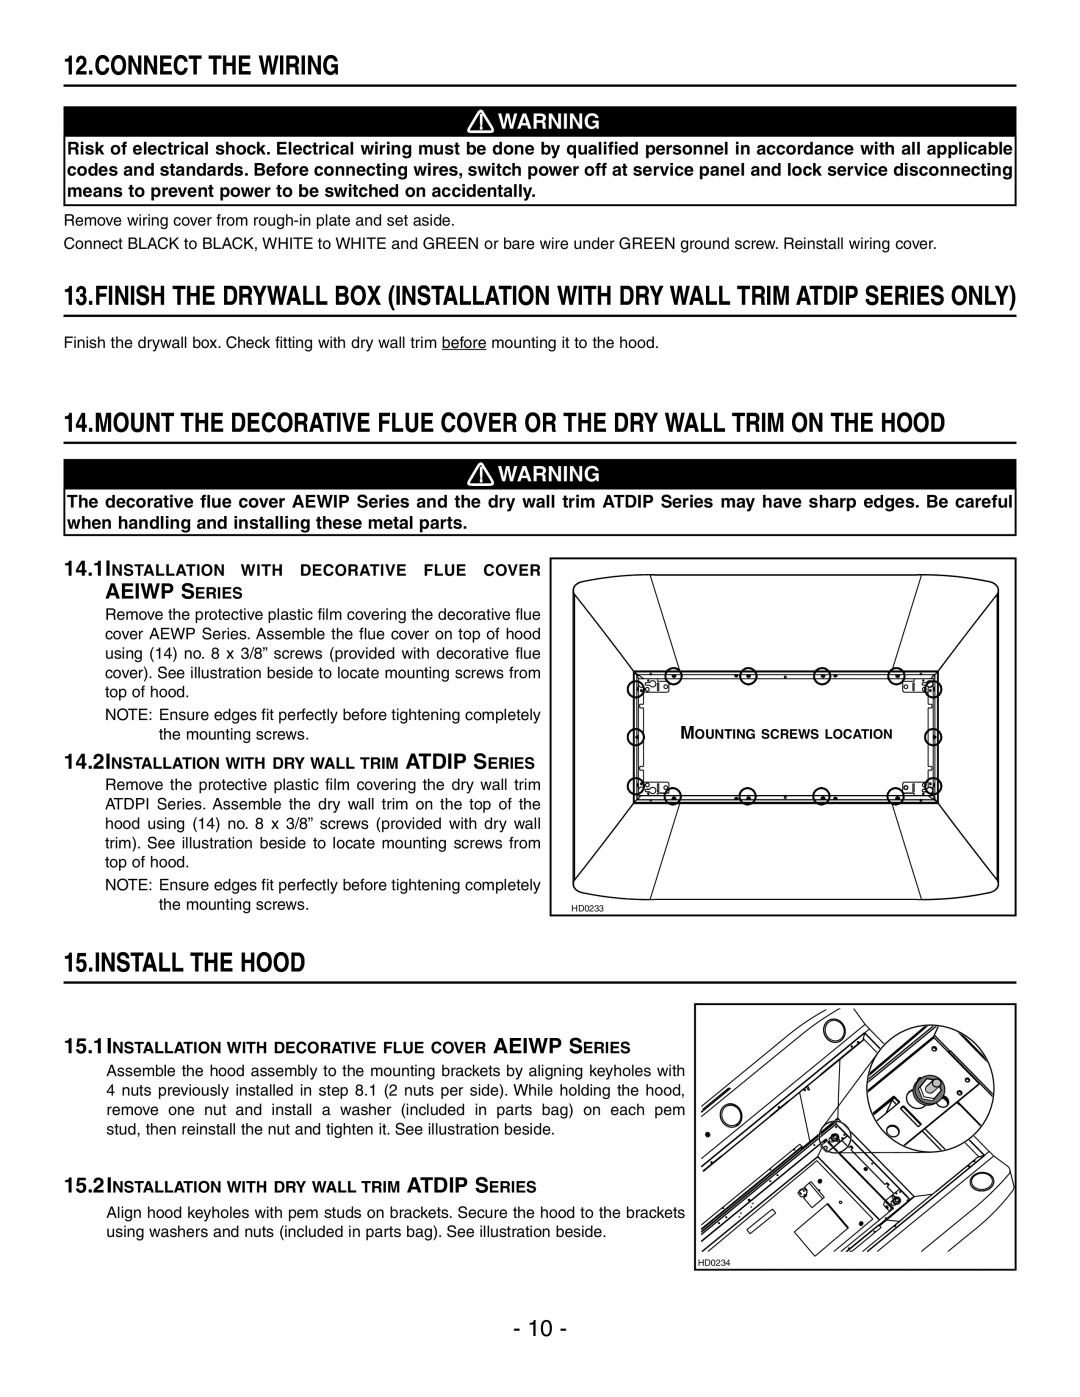
Remove the protective plastic film covering the decorative flue cover AEWP Series. Assemble the flue cover on top of hood using (14) no. 8 x 3/8” screws (provided with decorative flue cover). See illustration beside to locate mounting screws from top of hood.
NOTE: Ensure edges fit perfectly before tightening completely the mounting screws.
14.2INSTALLATION WITH DRY WALL TRIM ATDIP SERIES
Remove the protective plastic film covering the dry wall trim ATDPI Series. Assemble the dry wall trim on the top of the hood using (14) no. 8 x 3/8” screws (provided with dry wall trim). See illustration beside to locate mounting screws from top of hood.
NOTE: Ensure edges fit perfectly before tightening completely the mounting screws.
MOUNTING SCREWS LOCATION |
HD0233 |
15.INSTALL THE HOOD
15.1INSTALLATION WITH DECORATIVE FLUE COVER AEIWP SERIES
Assemble the hood assembly to the mounting brackets by aligning keyholes with 4 nuts previously installed in step 8.1 (2 nuts per side). While holding the hood, remove one nut and install a washer (included in parts bag) on each pem stud, then reinstall the nut and tighten it. See illustration beside.
15.2INSTALLATION WITH DRY WALL TRIM ATDIP SERIES
Align hood keyholes with pem studs on brackets. Secure the hood to the brackets using washers and nuts (included in parts bag). See illustration beside.
HD0234 |
- 10 -