PREPARE THE HOOD
Note: Carefully remove the plastic protective film from all exterior surfaces of the hood and decorative flue, prior to final installation.
1.To avoid demage while forwarding the applicance has been locked by means of four screws to a laminboard panel on the bottom of the packing.
To separate the hood from the panel:
a.Disassemble the central block: rotate the block outside softly (Fig. 4).
b.Remove the 4 screws (Fig. 5).
2.Fit the 2 brackets on the central block in such a way that the two slots are plugged. Each bracket must be fixed with (2) 3.9 x 6 mm mounting screws (Fig. 6).
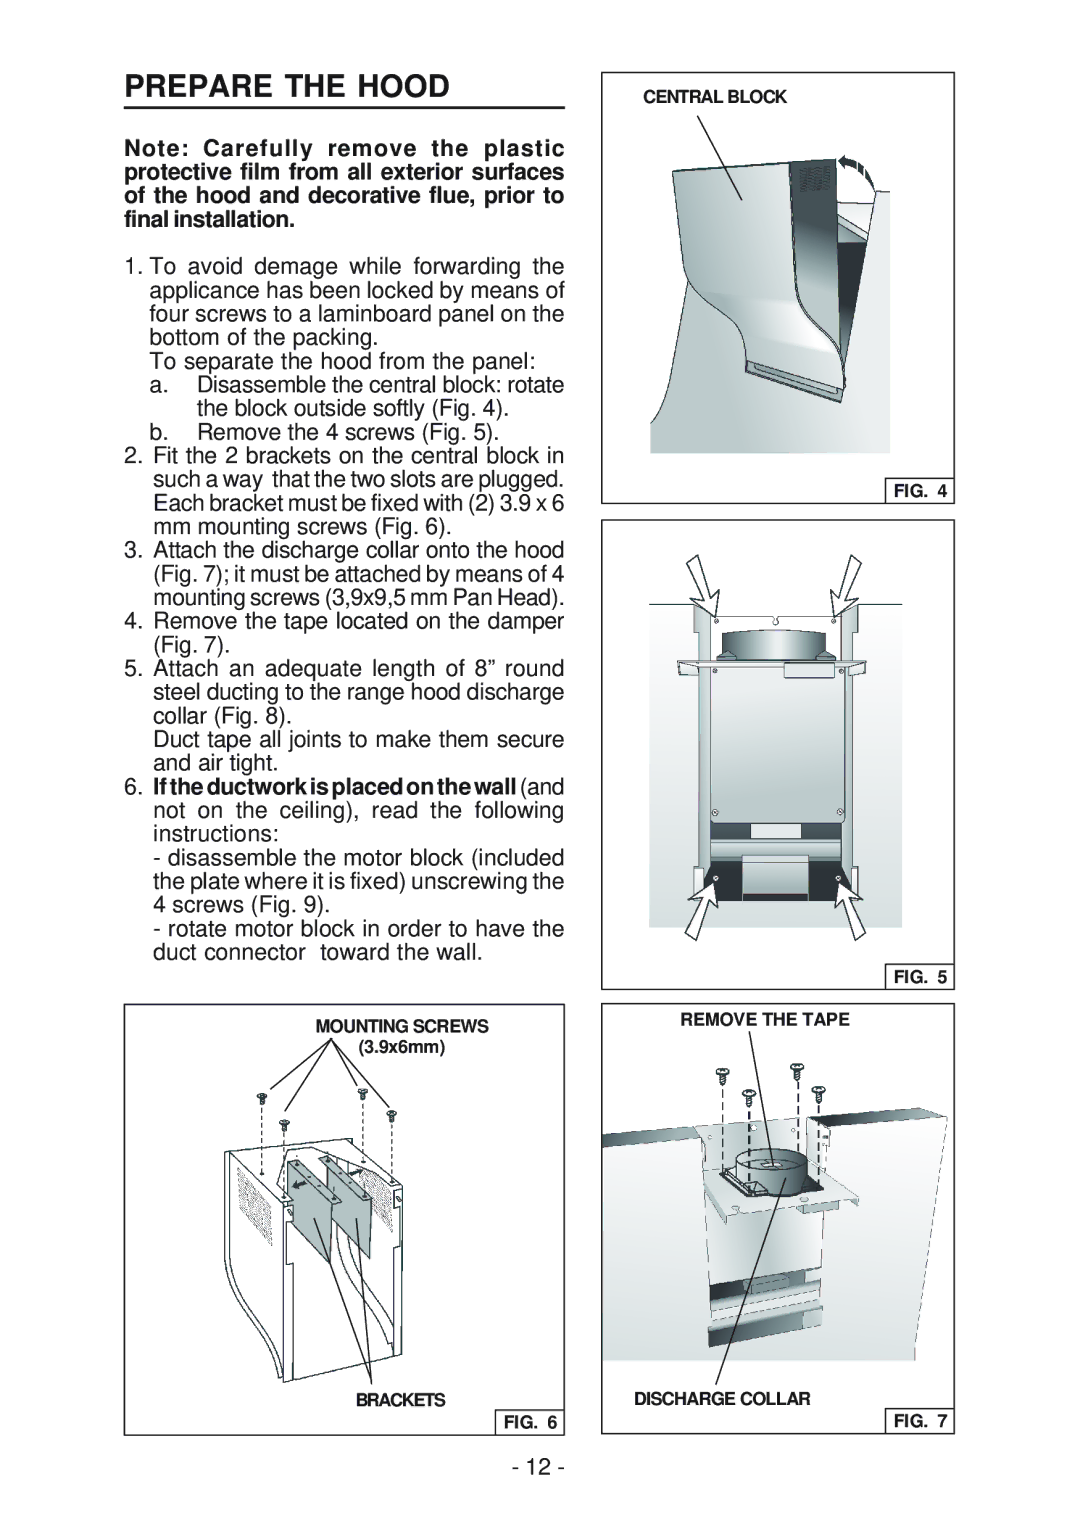
3.Attach the discharge collar onto the hood (Fig. 7); it must be attached by means of 4 mounting screws (3,9x9,5 mm Pan Head).
4.Remove the tape located on the damper (Fig. 7).
5.Attach an adequate length of 8” round steel ducting to the range hood discharge collar (Fig. 8).
Duct tape all joints to make them secure and air tight.
6.If the ductwork is placed on the wall (and not on the ceiling), read the following instructions:
- disassemble the motor block (included the plate where it is fixed) unscrewing the 4 screws (Fig. 9).
- rotate motor block in order to have the duct connector toward the wall.
MOUNTING SCREWS
(3.9x6mm)
BRACKETS
FIG. 6
CENTRAL BLOCK
FIG. 4
FIG. 5
REMOVE THE TAPE
DISCHARGE COLLAR
FIG. 7
- 12 -