INSTALL THE HOOD
Note: at least 3 people will be required to mount the hood.
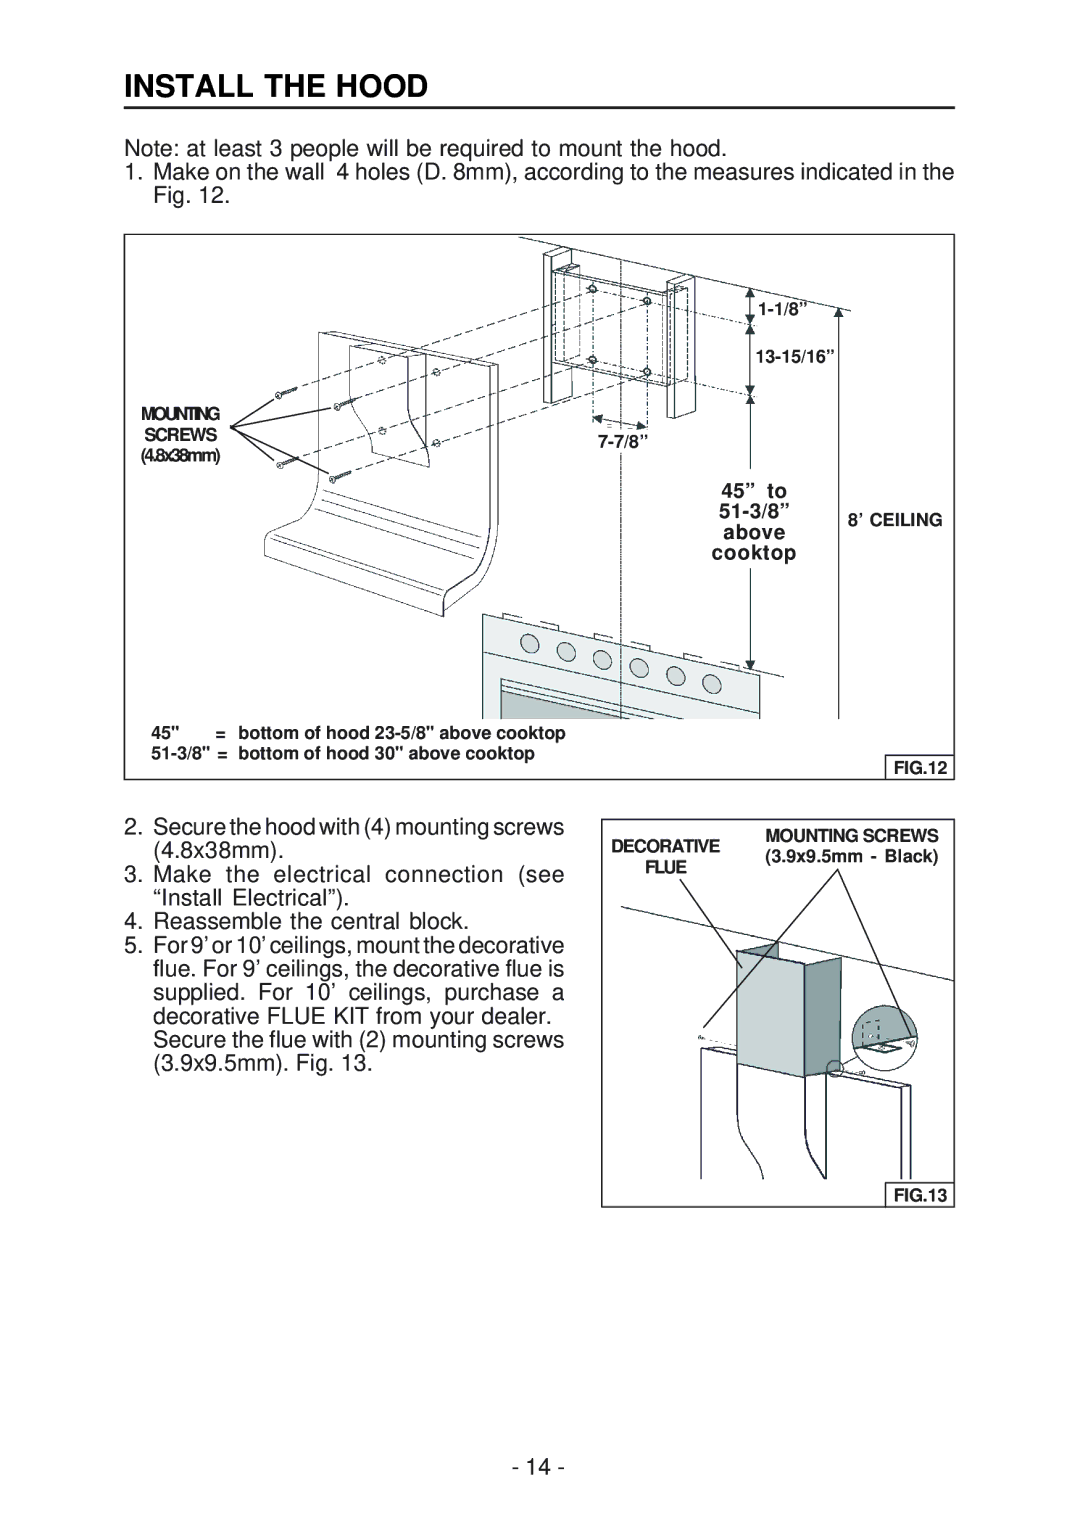
1.Make on the wall 4 holes (D. 8mm), according to the measures indicated in the Fig. 12.
MOUNTING
SCREWS7-7/8” (4.8x38mm)
45” to
cooktop
45" = bottom of hood
|
|
| FIG.12 |
2. | Secure the hood with (4) mounting screws | DECORATIVE | MOUNTING SCREWS |
| (4.8x38mm). | ||
3. | (3.9x9.5mm - Black) | ||
Make the electrical connection (see | FLUE |
| |
| “Install Electrical”). |
|
|
4. | Reassemble the central block. |
|
|
5. | For 9’ or 10’ ceilings, mount the decorative |
|
|
| flue. For 9’ ceilings, the decorative flue is |
|
|
| supplied. For 10’ ceilings, purchase a |
|
|
| decorative FLUE KIT from your dealer. |
|
|
| Secure the flue with (2) mounting screws |
|
|
| (3.9x9.5mm). Fig. 13. |
|
|
|
|
| FIG.13 |
- 14 -