WARNING: Be sure to use appropriate | B |
| B1 |
| |||
protective gear and unplug unit. |
| ||
WARNING: Make sure area is well |
| ||
ventilated and free of flammable vapors. |
|
|
|
ALIGNING THE PICKUP TUBE - |
|
|
|
(FIGURES B AND B1) |
|
|
|
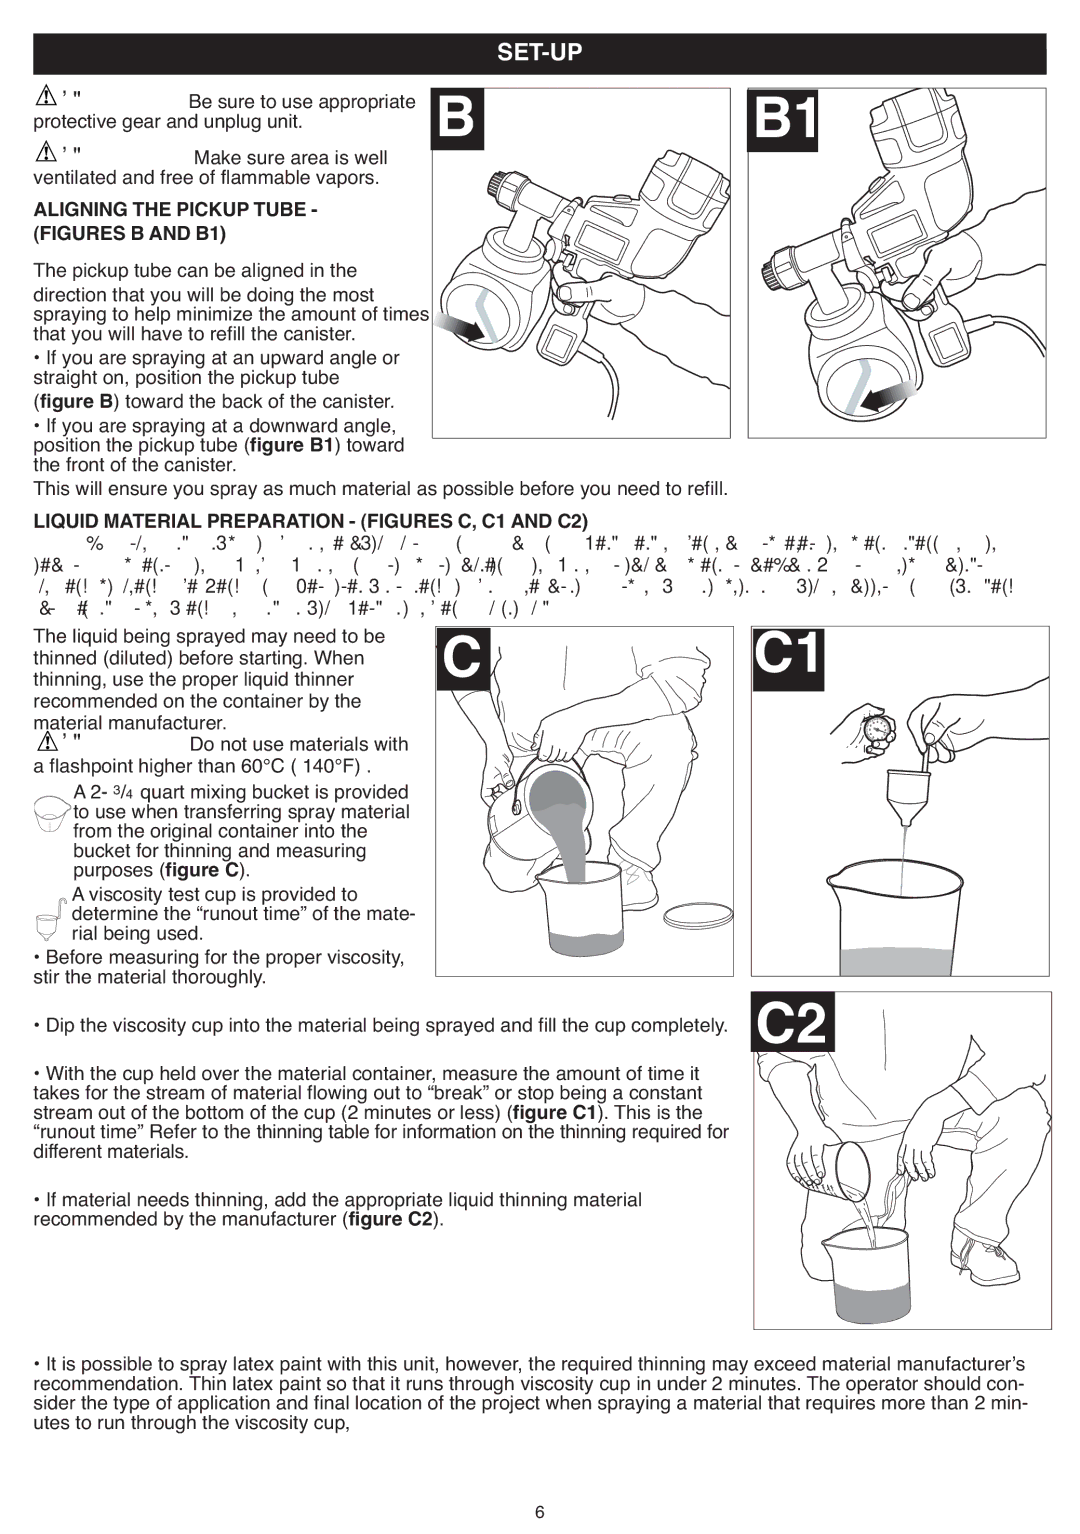
The pickup tube can be aligned in the |
|
|
|
direction that you will be doing the most |
|
|
|
spraying to help minimize the amount of times |
|
|
|
that you will have to refill the canister. |
|
|
|
• If you are spraying at an upward angle or |
|
|
|
straight on, position the pickup tube |
|
|
|
(figure B) toward the back of the canister. |
|
|
|
• If you are spraying at a downward angle, |
|
|
|
position the pickup tube (figure B1) toward |
|
|
|
the front of the canister. |
|
|
|
This will ensure you spray as much material as possible before you need to refill. |
| ||
LIQUID MATERIAL PREPARATION - (FIGURES C, C1 AND C2) |
| ||
TIP: Make sure the type of material you use can be cleaned with either mineral spirits or paint thinner (for | |||
during pouring, mixing, and viscosity testing of materials to be sprayed to protect your floors and anything | |||
else in the spraying area that you wish to remain untouched. |
| ||
The liquid being sprayed may need to be |
|
|
|
thinned (diluted) before starting. When |
|
|
|
thinning, use the proper liquid thinner |
|
|
|
recommended on the container by the |
|
|
|
material manufacturer. |
|
|
|
WARNING: Do not use materials with |
|
|
|
a flashpoint higher than 60°C ( 140°F) . |
|
|
|
A 2- 3/4 quart mixing bucket is provided |
|
|
|
to use when transferring spray material |
|
|
|
from the original container into the |
|
|
|
bucket for thinning and measuring |
|
|
|
purposes (figure C). |
|
|
|
A viscosity test cup is provided to |
|
|
|
determine the “runout time” of the mate- |
|
|
|
rial being used. |
|
| C2 |
• Before measuring for the proper viscosity, |
|
| |
stir the material thoroughly. |
|
| |
• Dip the viscosity cup into the material being sprayed and fill the cup completely. | |||
• With the cup held over the material container, measure the amount of time it | |||
takes for the stream of material flowing out to “break” or stop being a constant |
| ||
stream out of the bottom of the cup (2 minutes or less) (figure C1). This is the |
| ||
“runout time” Refer to the thinning table for information on the thinning required for |
| ||
different materials. |
|
|
|
• If material needs thinning, add the appropriate liquid thinning material |
| ||
recommended by the manufacturer (figure C2). |
|
| |
•It is possible to spray latex paint with this unit, however, the required thinning may exceed material manufacturerʼs recommendation. Thin latex paint so that it runs through viscosity cup in under 2 minutes. The operator should con- sider the type of application and final location of the project when spraying a material that requires more than 2 min- utes to run through the viscosity cup,
6
