
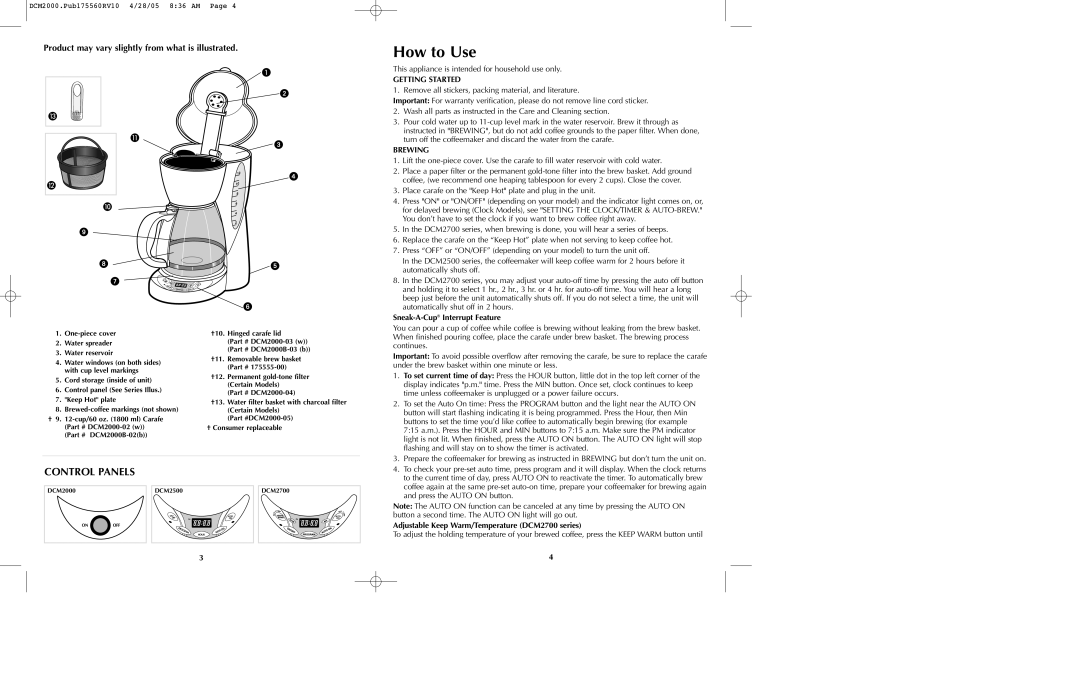
DCM2075, DCM2000, DCM2000B, DCM2050 specifications
The Black & Decker DCM2050, DCM2000B, DCM2000, and DCM2075 coffee makers are part of a reputable lineup known for their convenience, reliability, and quality brewing. Designed for coffee enthusiasts, these models each bring unique features that cater to varying preferences and lifestyles.The DCM2050 is particularly notable for its sleek design and user-friendly interface. It boasts a 12-cup capacity, making it ideal for families or offices. One of its standout features is the QuickTouch programming, which allows users to set brew times up to 24 hours in advance. This ensures that fresh coffee is ready when you are, with a simple and intuitive control panel that includes large buttons. Additionally, the DCM2050 features a brew-pause function, letting you pour a cup mid-brew without making a mess, and a non-stick “keep hot” carafe plate that keeps coffee warm for extended periods.
The DCM2000B is tailored for those who prefer a more compact design without sacrificing functionality. With its 12-cup capacity and sleek black finish, it complements modern kitchens perfectly. This model also employs a filter basket that simplifies cleanup, compatible with both paper and permanent filters. Its brewing system ensures a robust and flavorful cup of coffee, enhancing the overall brewing experience.
The DCM2000 shares similar characteristics with the DCM2000B but emphasizes brew strength options, allowing users to control the intensity of their coffee. This feature is particularly beneficial for those who appreciate a stronger brew in the morning. The DCM2000's durable construction and compact size make it an ideal choice for smaller spaces.
On the other hand, the DCM2075 is designed for those who value a coffee maker that can do more than just brew. It features a unique thermal carafe that retains heat longer, eliminating the need for a warming plate. The DCM2075 also includes a built-in grinder, allowing users to brew fresh coffee with whole beans, providing a fresher taste and aroma. Its programmable functions and auto shut-off features promote energy efficiency and safety in the kitchen.
In summary, the Black & Decker DCM series delivers an array of options to meet diverse brewing needs. With features like programmable settings, customize brew strength, and durable designs, these coffee makers stand out for their practicality, enabling users to enjoy their perfect cup of coffee effortlessly. Whether you're looking for convenience, a compact design, or advanced brewing features, this lineup offers something for everyone.