Figure A1 - Flush Bottom
Figure A2 - Overhang Bottom
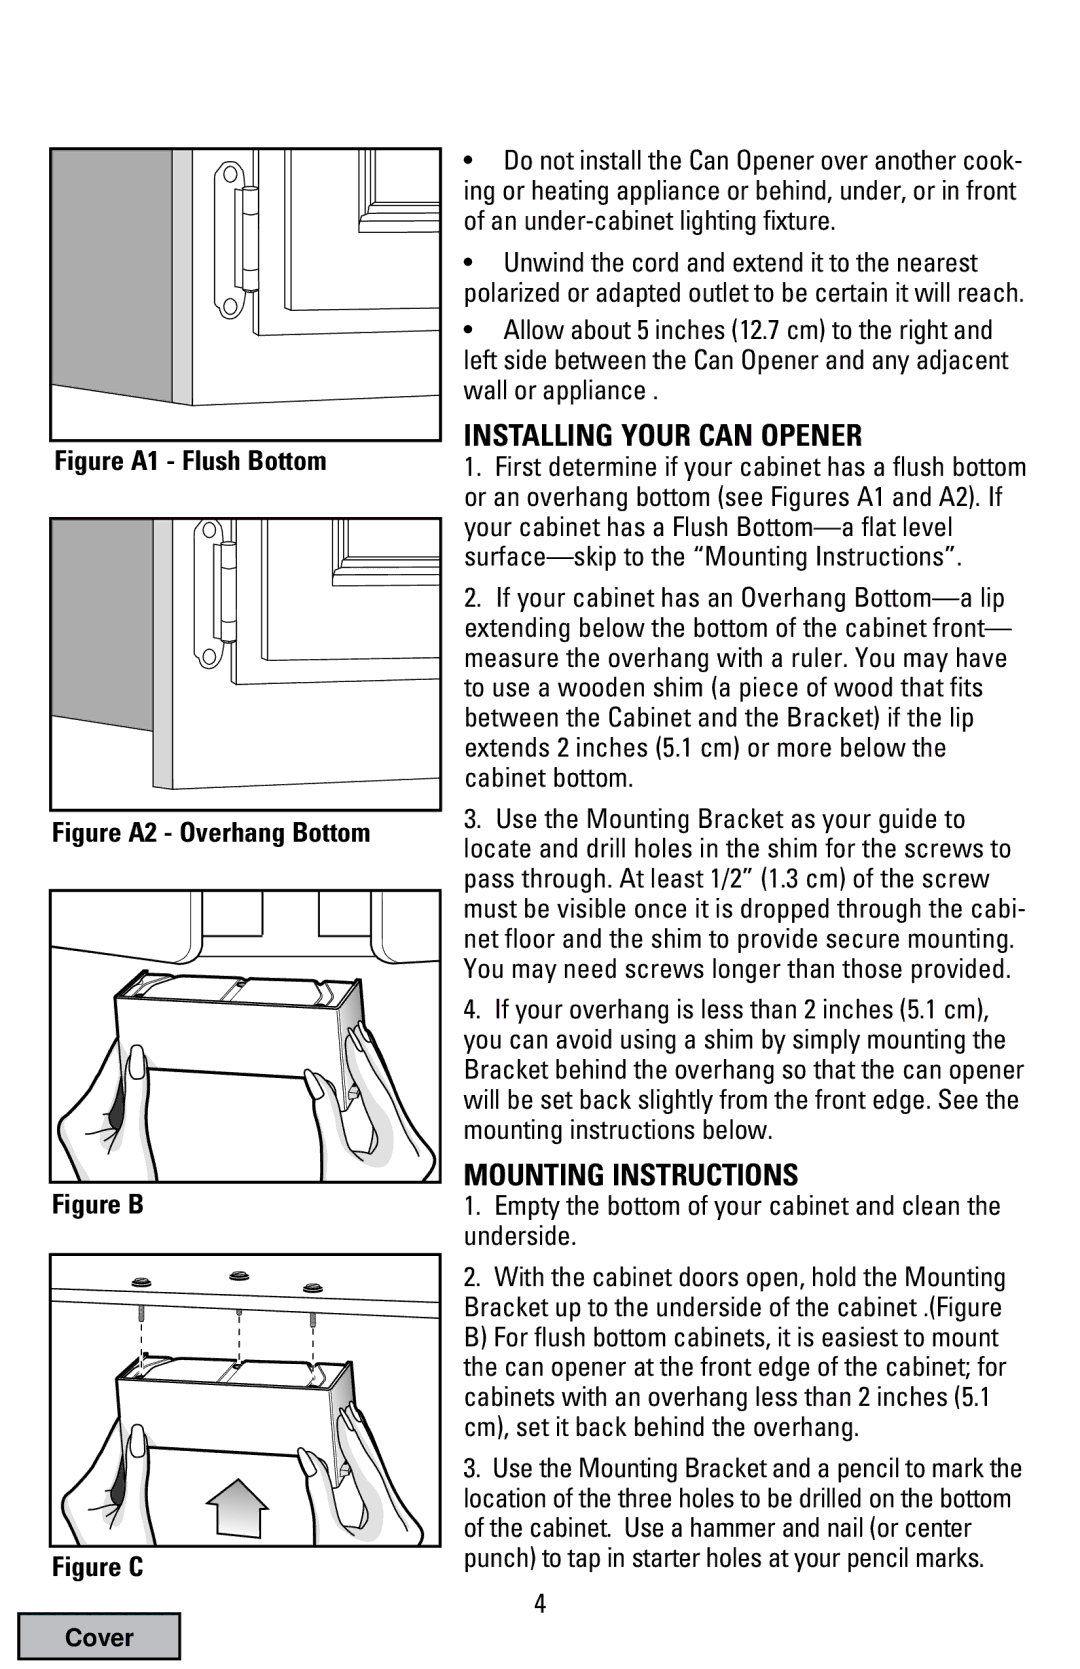
Figure B
Figure C
Cover
•Do not install the Can Opener over another cook- ing or heating appliance or behind, under, or in front of an
•Unwind the cord and extend it to the nearest polarized or adapted outlet to be certain it will reach.
•Allow about 5 inches (12.7 cm) to the right and left side between the Can Opener and any adjacent wall or appliance .
INSTALLING YOUR CAN OPENER
1.First determine if your cabinet has a flush bottom or an overhang bottom (see Figures A1 and A2). If your cabinet has a Flush
2.If your cabinet has an Overhang
3.Use the Mounting Bracket as your guide to locate and drill holes in the shim for the screws to pass through. At least 1/2” (1.3 cm) of the screw must be visible once it is dropped through the cabi- net floor and the shim to provide secure mounting. You may need screws longer than those provided.
4.If your overhang is less than 2 inches (5.1 cm), you can avoid using a shim by simply mounting the Bracket behind the overhang so that the can opener will be set back slightly from the front edge. See the mounting instructions below.
MOUNTING INSTRUCTIONS
1.Empty the bottom of your cabinet and clean the underside.
2.With the cabinet doors open, hold the Mounting Bracket up to the underside of the cabinet .(Figure B) For flush bottom cabinets, it is easiest to mount the can opener at the front edge of the cabinet; for cabinets with an overhang less than 2 inches (5.1 cm), set it back behind the overhang.
3.Use the Mounting Bracket and a pencil to mark the location of the three holes to be drilled on the bottom of the cabinet. Use a hammer and nail (or center punch) to tap in starter holes at your pencil marks.
4