CAUTION: It is strongly recommended that you wear suitable eye protection such as goggles to prevent injury from shavings when using a drill.
4.With a 1/4”(6mm) drill bit, drill straight up through the bottom of the cabinet at your starter holes. Sandpaper or file splinters or rough edges on cabinets.
5.Slip the washers onto the screws so that they rest on the cabinet interior . (Figure C)
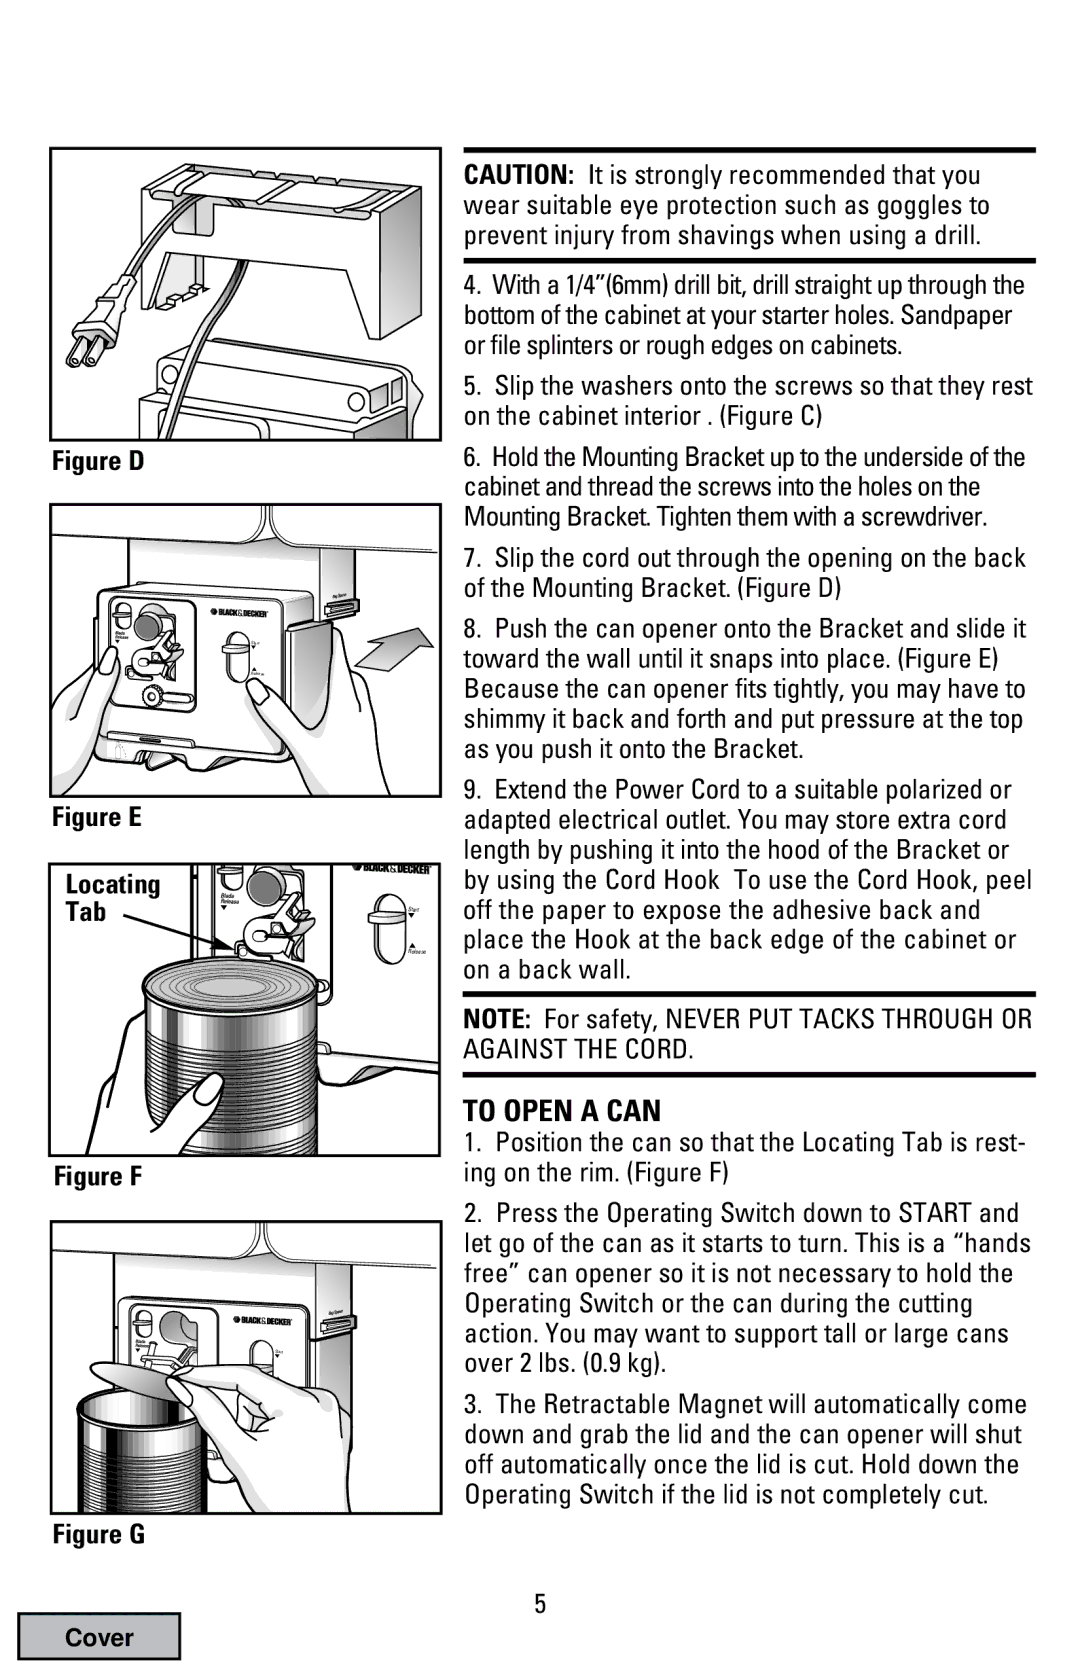
Figure D
Start |
Release |
Figure E
Locating |
|
Tab | Start |
| Release |
6.Hold the Mounting Bracket up to the underside of the cabinet and thread the screws into the holes on the Mounting Bracket. Tighten them with a screwdriver.
7.Slip the cord out through the opening on the back of the Mounting Bracket. (Figure D)
8.Push the can opener onto the Bracket and slide it toward the wall until it snaps into place. (Figure E) Because the can opener fits tightly, you may have to shimmy it back and forth and put pressure at the top as you push it onto the Bracket.
9.Extend the Power Cord to a suitable polarized or adapted electrical outlet. You may store extra cord length by pushing it into the hood of the Bracket or by using the Cord Hook To use the Cord Hook, peel off the paper to expose the adhesive back and place the Hook at the back edge of the cabinet or on a back wall.
| NOTE: For safety, NEVER PUT TACKS THROUGH OR |
| AGAINST THE CORD. |
| TO OPEN A CAN |
| 1. Position the can so that the Locating Tab is rest- |
Figure F | ing on the rim. (Figure F) |
Start |
Release |
2.Press the Operating Switch down to START and let go of the can as it starts to turn. This is a “hands free” can opener so it is not necessary to hold the Operating Switch or the can during the cutting action. You may want to support tall or large cans over 2 lbs. (0.9 kg).
3.The Retractable Magnet will automatically come down and grab the lid and the can opener will shut off automatically once the lid is cut. Hold down the Operating Switch if the lid is not completely cut.
Figure G
Cover
5