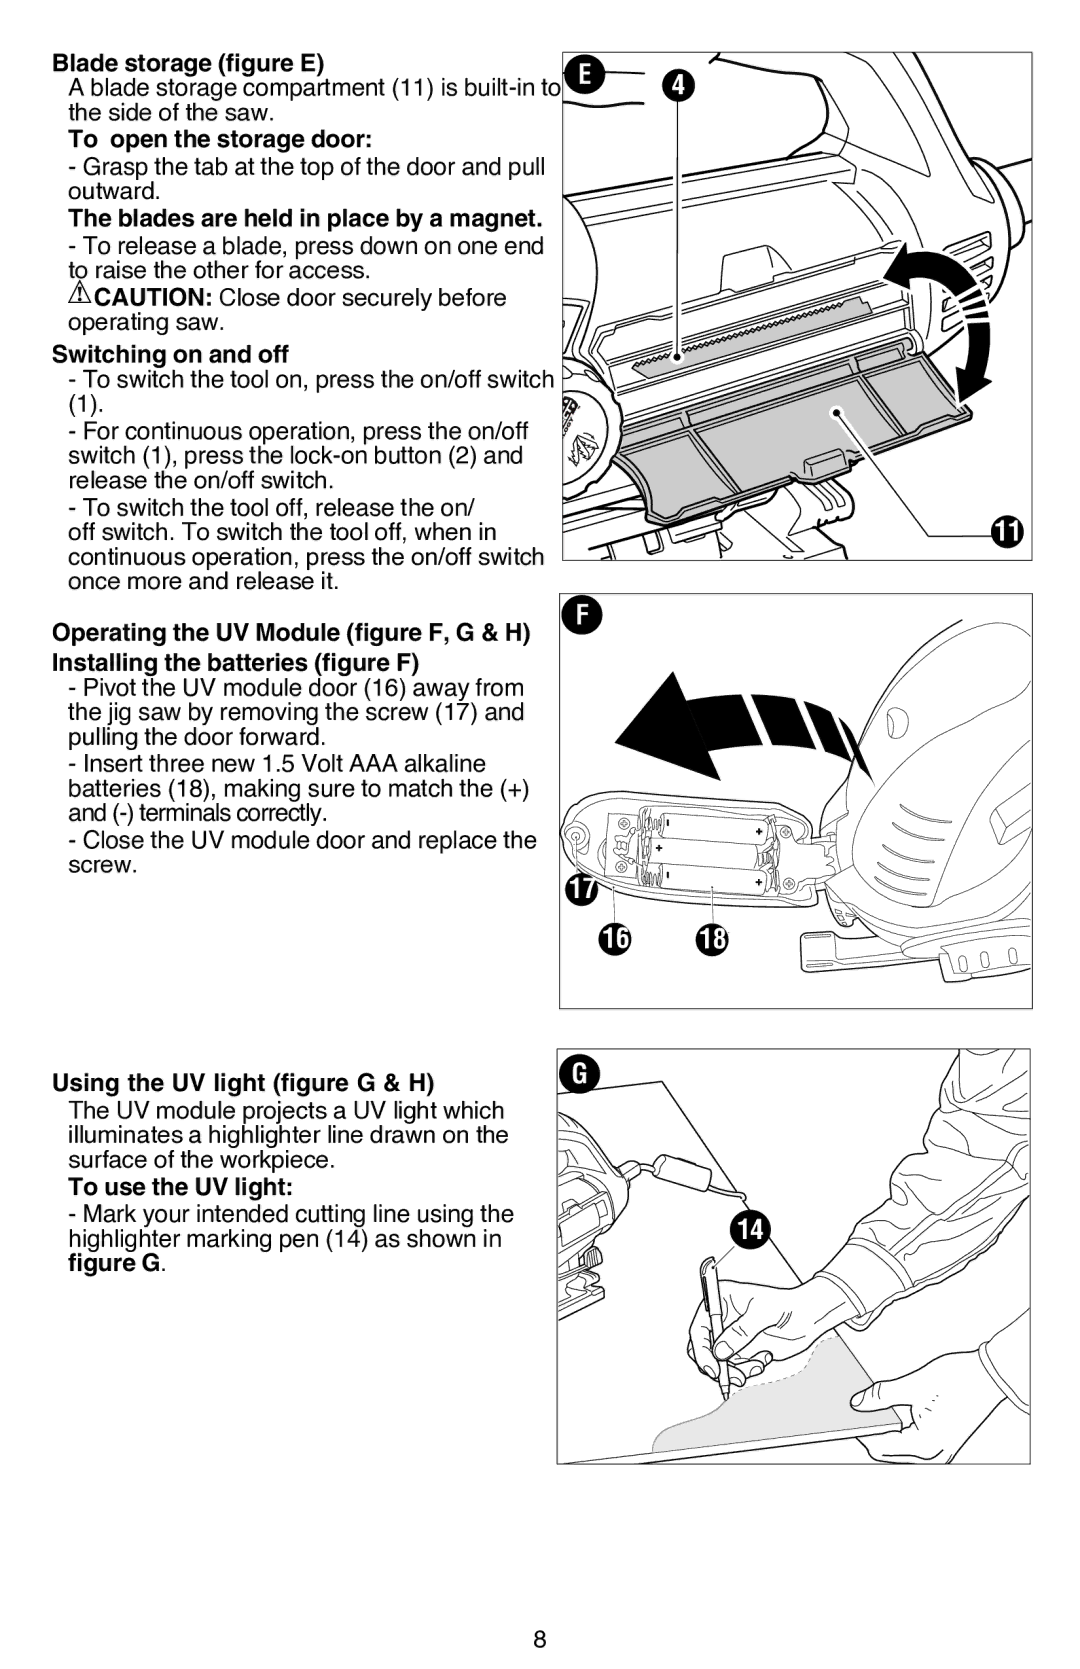
Blade storage (figure E) |
|
| |
E | 4 | ||
A blade storage compartment (11) is | |||
the side of the saw. |
|
| |
To open the storage door: |
|
| |
- Grasp the tab at the top of the door and pull |
|
| |
outward. |
|
|
The blades are held in place by a magnet. - To release a blade, press down on one end to raise the other for access.
![]() CAUTION: Close door securely before operating saw.
CAUTION: Close door securely before operating saw.
Switching on and off |
|
|
- To switch the tool on, press the on/off switch |
|
|
(1). |
|
|
- For continuous operation, press the on/off |
|
|
switch (1), press the |
|
|
release the on/off switch. |
|
|
- To switch the tool off, release the on/ |
| 11 |
off switch. To switch the tool off, when in |
| |
continuous operation, press the on/off switch |
|
|
once more and release it. | F |
|
Operating the UV Module (figure F, G & H) |
| |
|
| |
Installing the batteries (figure F) |
|
|
- Pivot the UV module door (16) away from |
|
|
the jig saw by removing the screw (17) and |
|
|
pulling the door forward. |
|
|
- Insert three new 1.5 Volt AAA alkaline |
|
|
batteries (18), making sure to match the (+) |
|
|
and |
|
|
- Close the UV module door and replace the |
|
|
screw. | 17 |
|
|
| |
| 16 | 18 |
Using the UV light (figure G & H) | G |
|
The UV module projects a UV light which |
|
|
illuminates a highlighter line drawn on the |
|
|
surface of the workpiece. |
|
|
To use the UV light: |
|
|
- Mark your intended cutting line using the |
| 14 |
highlighter marking pen (14) as shown in |
| |
figure G. |
|
|
8
