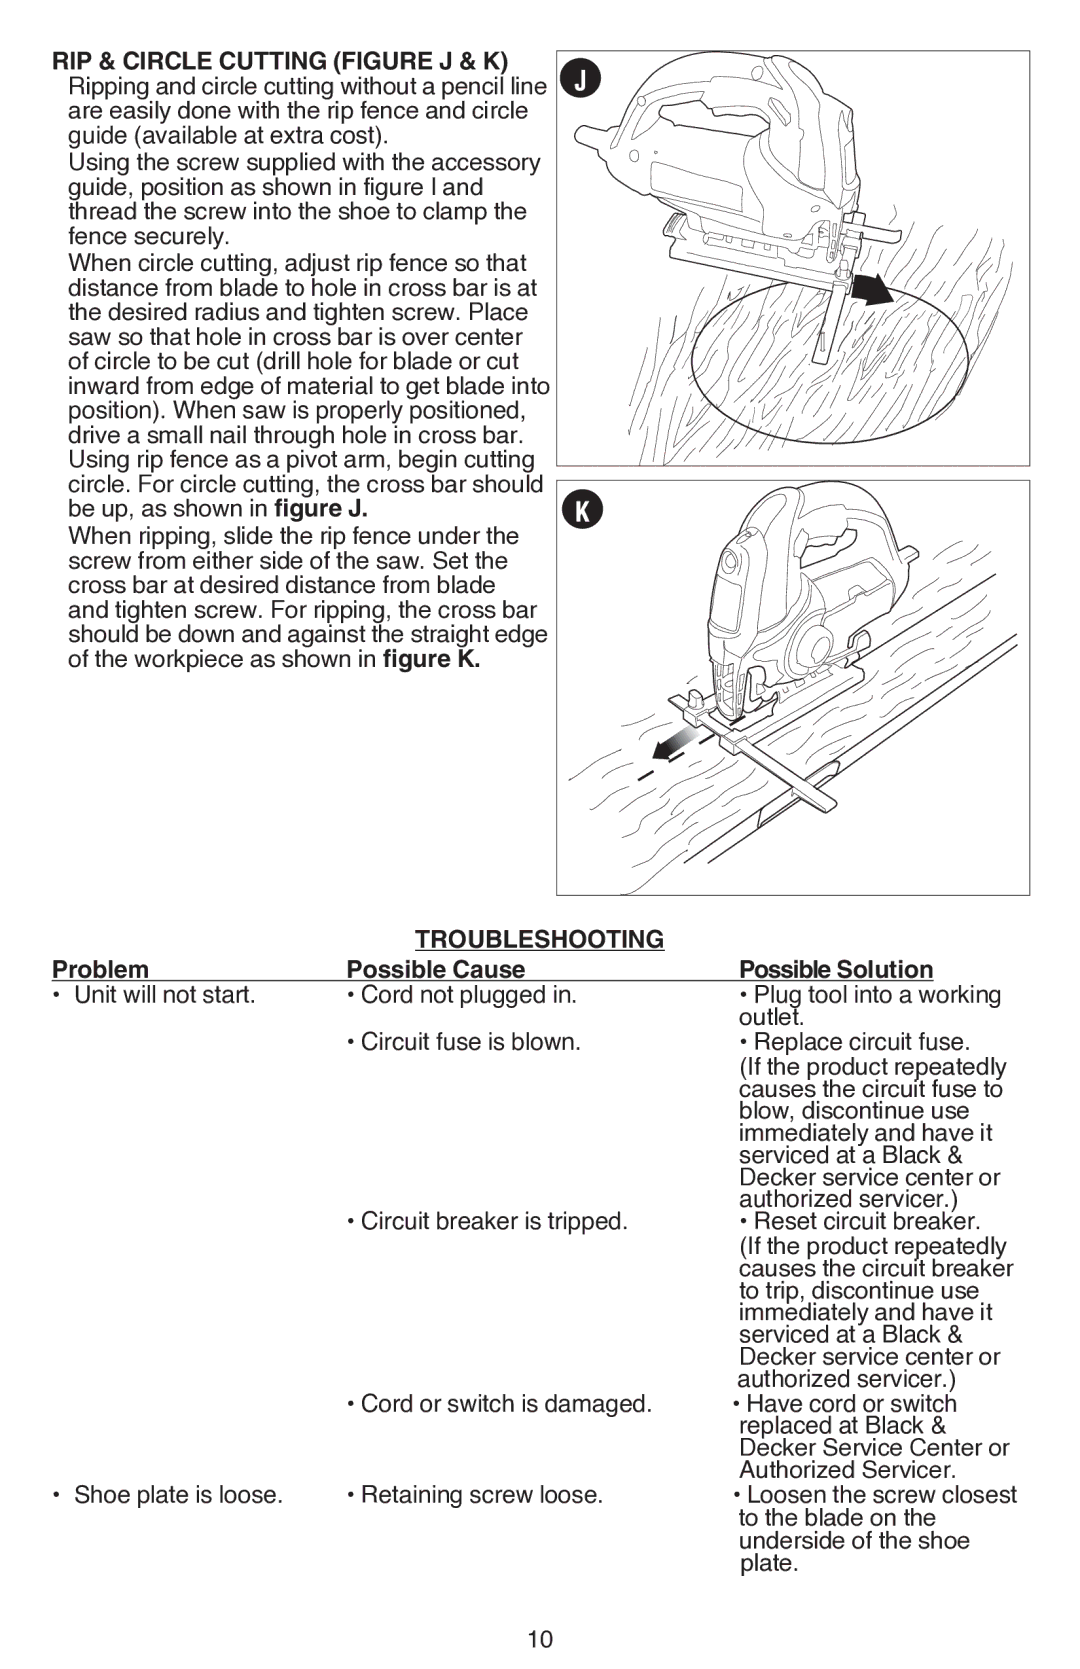
Rip & Circle Cutting (figure J & K) Ripping and circle cutting without a pencil line are easily done with the rip fence and circle guide (available at extra cost).
Using the screw supplied with the accessory guide, position as shown in figure I and thread the screw into the shoe to clamp the fence securely.
When circle cutting, adjust rip fence so that distance from blade to hole in cross bar is at the desired radius and tighten screw. Place saw so that hole in cross bar is over center of circle to be cut (drill hole for blade or cut inward from edge of material to get blade into position). When saw is properly positioned, drive a small nail through hole in cross bar. Using rip fence as a pivot arm, begin cutting circle. For circle cutting, the cross bar should be up, as shown in figure J.
When ripping, slide the rip fence under the screw from either side of the saw. Set the cross bar at desired distance from blade and tighten screw. For ripping, the cross bar should be down and against the straight edge of the workpiece as shown in figure K.
J
K |
|
| Troubleshooting |
|
|
Problem | Possible Cause | Possible Solution | ||
• | Unit will not start. | • Cord not plugged in. | • Plug tool into a | working |
|
| • Circuit fuse is blown. | outlet. | |
|
| • Replace circuit fuse. | ||
|
|
| (If the product repeatedly | |
|
|
| causes the circuit fuse to | |
|
|
| blow, discontinue use | |
|
|
| immediately and have it | |
|
|
| serviced at a Black & | |
|
|
| Decker service center or | |
|
| • Circuit breaker is tripped. | authorized servicer.) | |
|
| • Reset circuit breaker. | ||
|
|
| (If the product repeatedly | |
|
|
| causes the circuit breaker | |
|
|
| to trip, discontinue use | |
|
|
| immediately and have it | |
|
|
| serviced at a Black & | |
|
|
| Decker service center or | |
|
| • Cord or switch is damaged. | authorized servicer.) | |
|
| • Have cord or switch | ||
|
|
| replaced at Black & | |
|
|
| Decker Service Center or | |
• | Shoe plate is loose. | • Retaining screw loose. | Authorized Servicer. | |
• Loosen the screw closest | ||||
|
|
| to the blade on the | |
underside of the shoe plate.
10