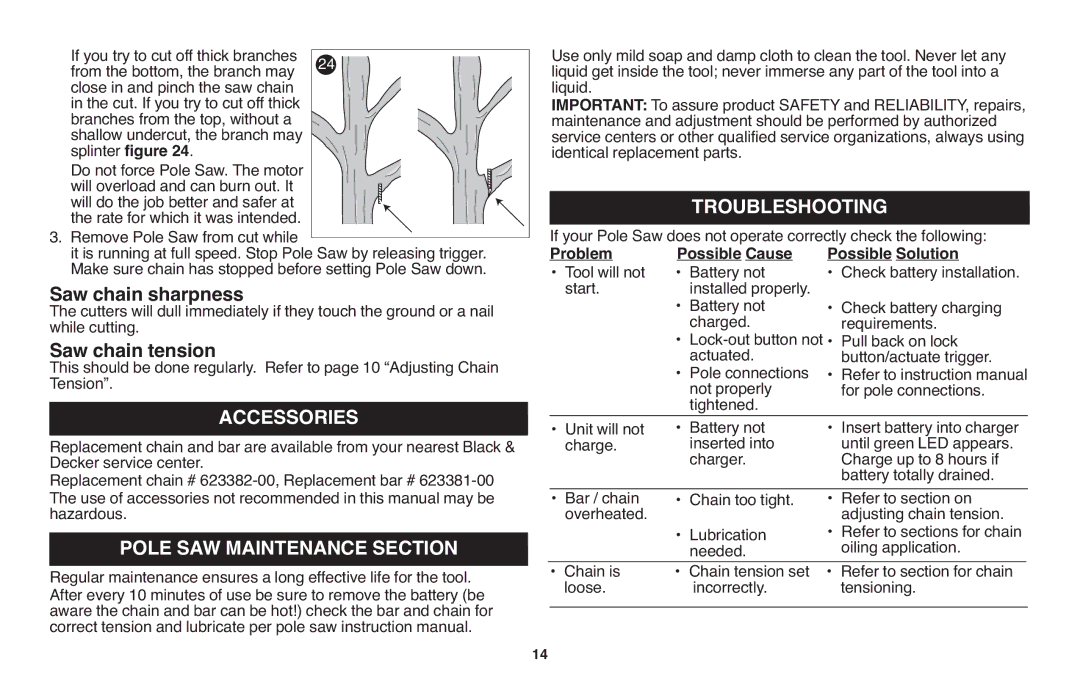
If you try to cut off thick branches |
|
|
|
|
| |
24 |
|
|
|
| ||
from the bottom, the branch may |
|
|
|
| ||
close in and pinch the saw chain |
|
|
|
|
| |
in the cut. If you try to cut off thick |
|
|
|
|
| |
|
|
|
|
| ||
branches from the top, without a |
|
|
|
|
| |
shallow undercut, the branch may |
|
|
|
|
| |
|
|
|
|
| ||
splinter figure 24. |
|
|
|
|
|
|
|
|
|
|
|
| |
Do not force Pole Saw. The motor |
|
|
|
|
| |
will overload and can burn out. It |
|
|
|
|
| |
will do the job better and safer at |
|
|
|
|
| |
the rate for which it was intended. |
|
|
|
|
| |
3. Remove Pole Saw from cut while |
|
|
|
|
| |
|
|
|
|
| ||
it is running at full speed. Stop Pole Saw by releasing trigger. | ||||||
Make sure chain has stopped before setting Pole Saw down. | ||||||
Saw chain sharpness |
|
|
|
|
| |
The cutters will dull immediately if they touch the ground or a nail | ||||||
while cutting. |
|
|
|
|
|
|
Saw chain tension |
|
|
|
|
|
|
This should be done regularly. Refer to page 10 “Adjusting Chain | ||||||
Tension”. | ACCESSORIES | |||||
| ||||||
Replacement chain and bar are available from your nearest Black & | ||||||
Decker service center. |
|
|
|
|
|
|
Replacement chain # | ||||||
The use of accessories not recommended in this manual may be | ||||||
hazardous. |
|
|
|
|
|
|
POLE SAW MAINTENANCE SECTION | ||||||
Regular maintenance ensures a long effective life for the tool. | ||||||
After every 10 minutes of use be sure to remove the battery (be | ||||||
aware the chain and bar can be hot!) check the bar and chain for | ||||||
correct tension and lubricate per pole saw instruction manual. | ||||||
Use only mild soap and damp cloth to clean the tool. Never let any liquid get inside the tool; never immerse any part of the tool into a liquid.
IMPORTANT: Toassure product SAFETY and RELIABILITY,repairs, maintenance and adjustment should be performed by authorized service centers or other qualified service organizations, always using identical replacement parts.
|
|
| TROUBLESHOOTING | |||
If your Pole Saw does not operate correctly check the following: | ||||||
Problem | Possible Cause | Possible Solution | ||||
• | Toolwill not | • | Battery not | • | Check battery installation. | |
| start. | • | installed properly. | • | Check battery charging | |
|
| Battery not | ||||
|
| • | charged. |
| requirements. | |
|
| Pull back on lock | ||||
|
| • | actuated. | • | button/actuate trigger. | |
|
| Pole connections | Refer to instruction manual | |||
|
|
| not properly |
| for pole connections. | |
|
|
| tightened. | • | Insert battery into charger |
|
• | Unit will not | • | Battery not |
| ||
| charge. |
| inserted into |
| until green LED appears. | |
|
| charger. |
| Charge up to 8 hours if | ||
|
|
|
|
| battery totally drained. | |
• | Bar / chain | • | Chain too tight. | • | Refer to section on |
|
| overheated. | • | Lubrication | • | adjusting chain tension. | |
|
| Refer to sections for chain | ||||
|
|
| needed. |
| oiling application. | |
• | Chain is | • | Chain tension set | • Refer to section for chain |
| |
| loose. |
| incorrectly. |
| tensioning. |
|
14