SLIDE RACK POSITIONS
The slide rack can be used in 2 positions (E). It can be slid into the upper or lower slots found on the inside walls of the oven.
HELPFUL HINTS ABOUT YOUR OVEN
•When the oven is turned on, the blue light will come on and remain illuminated until the oven is turned off manually or auto- matically when the timer has been used.
•When selecting baking time for a particular product or recipe, include preheat time.
E
• This oven has a 30 minute timer. If baking something that will take longer than 30 minutes, we suggest you use the STAY ON feature (F).
• Metal,
• Be sure the top of the container or food being baked or broiled
F![]() is at least 1½ inches away from the upper heating elements.
is at least 1½ inches away from the upper heating elements.
•Turn all controls to OFF before inserting or removing plug from electrical outlet.
•Do not put any container directly on the lower heating element.
•To obtain the best performance from this toaster oven:
•Do not overfill the oven.
•To avoid heat loss, do not open the door too frequently.
•When using foil to cover a food, tuck the edges of the foil against the sides of the baking dish or pan.
OVERVIEW OF THE FUNCTIONS
Note: This oven gets hot. When in use, always use oven mitts or potholders when touching any outer or inner surface of the oven.
For best results, preheat oven for 8 to 10 minutes at desired baking temperature before baking food.
BAKING
1.Insert the slide rack into the lower rack position of the oven, engaging articulated hooks as directed.
2.Turn temperature selector to desired temperature from 150° F to 450° F.
3.Turn cooking function selector to BAKE.
4.Turn time selector to 10 and then turn back or forward to desired baking time, including preheat time. (Select STAY ON to bake longer than 30 minutes or to control cooking time yourself. Be sure to use a kitchen timer.)
Note: You must set the timer or select STAY ON for the oven to function.
5.The blue indicator light comes on and will remain lit during the entire baking time.
6.The heating elements will cycle on and off to maintain even heat distribution.
7.Once oven has preheated, open oven door and insert food. Close oven door.
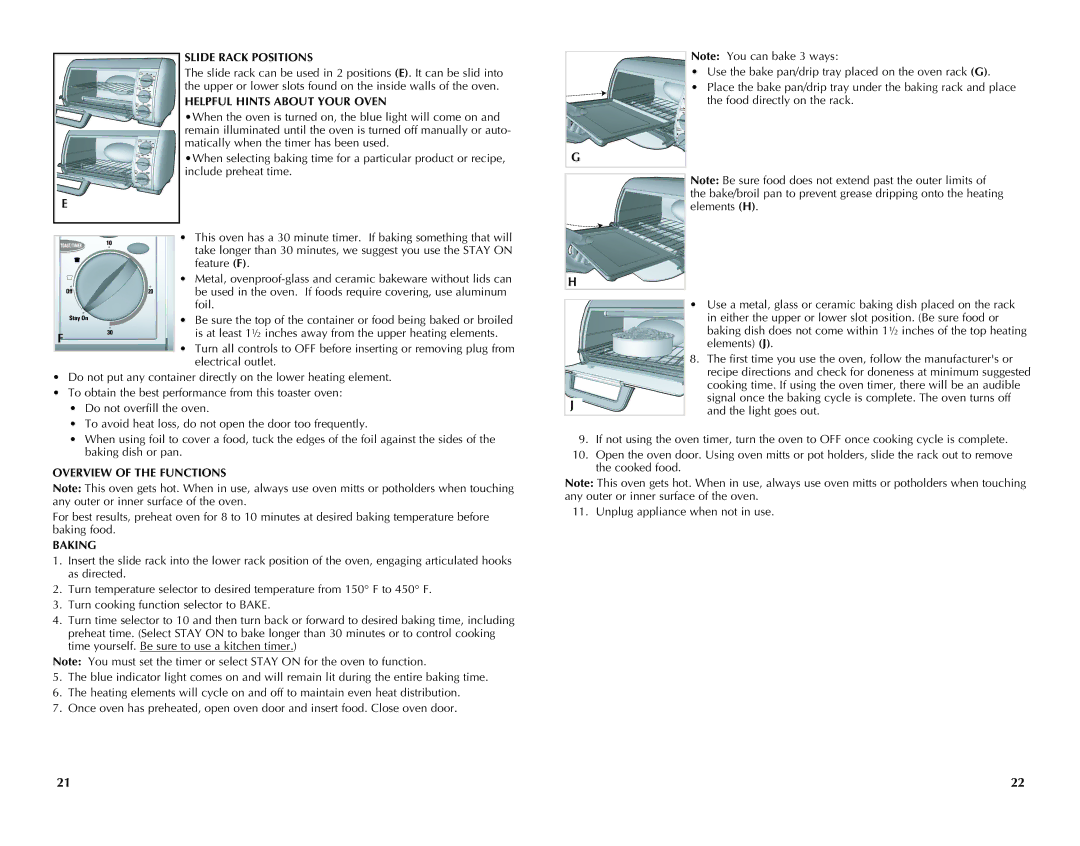
Note: You can bake 3 ways:
• Use the bake pan/drip tray placed on the oven rack (G).
![]() • Place the bake pan/drip tray under the baking rack and place the food directly on the rack.
• Place the bake pan/drip tray under the baking rack and place the food directly on the rack.
G
Note: Be sure food does not extend past the outer limits of the bake/broil pan to prevent grease dripping onto the heating elements (H).
H
|
|
| • | Use a metal, glass or ceramic baking dish placed on the rack |
|
|
| ||
|
|
|
| in either the upper or lower slot position. (Be sure food or |
|
|
|
| baking dish does not come within 1½ inches of the top heating |
|
|
|
| elements) (J). |
|
|
| 8. | The first time you use the oven, follow the manufacturer's or |
|
|
|
| recipe directions and check for doneness at minimum suggested |
|
|
|
| cooking time. If using the oven timer, there will be an audible |
|
|
|
| signal once the baking cycle is complete. The oven turns off |
| J |
|
| |
|
|
| and the light goes out. | |
|
|
|
|
9.If not using the oven timer, turn the oven to off once cooking cycle is complete.
10.Open the oven door. Using oven mitts or pot holders, slide the rack out to remove the cooked food.
Note: This oven gets hot. When in use, always use oven mitts or potholders when touching any outer or inner surface of the oven.
11. Unplug appliance when not in use.
21 | 22 |