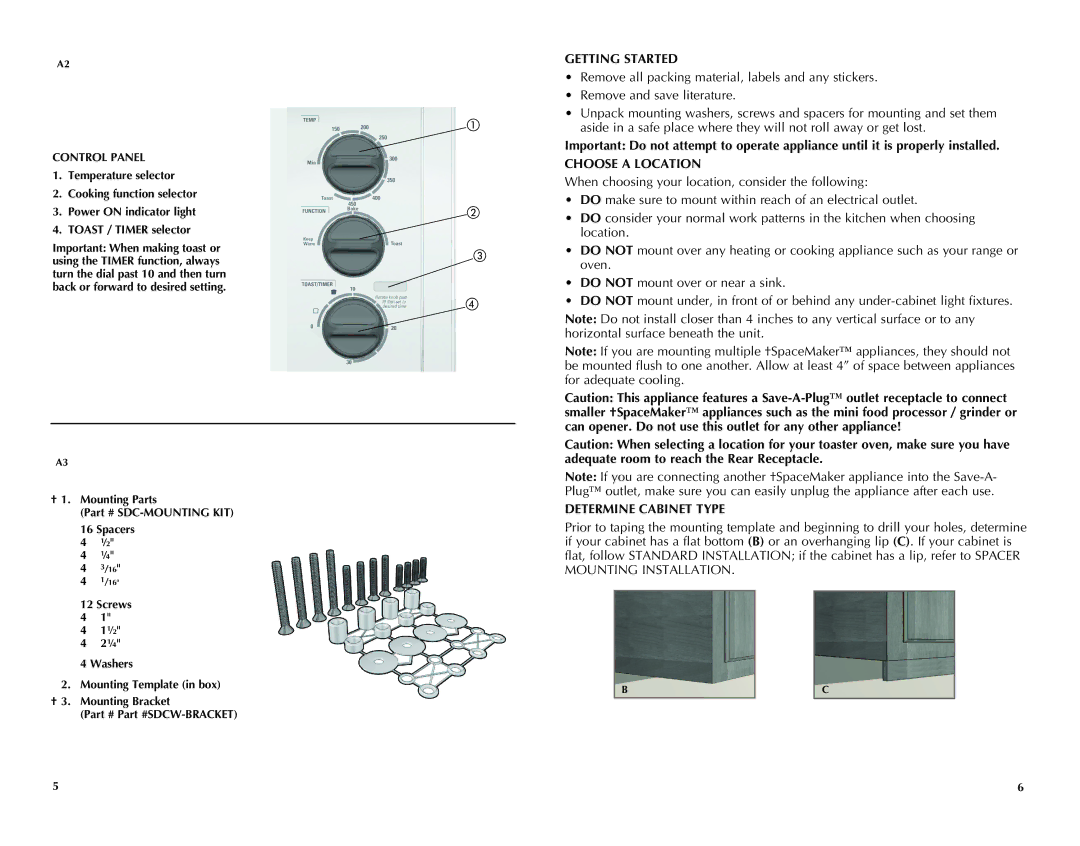
A2
CONTROL PANEL
1.Temperature selector
2.Cooking function selector
3.Power ON indicator light
4.TOAST / TIMER selector
Important: When making toast or using the TIMER function, always turn the dial past 10 and then turn back or forward to desired setting.
A3
† 1. Mounting Parts
(Part #
16Spacers 4 ½"
4 ¼"
4 3/16"
4 1/16"
12Screws 4 1"
4 1½"
4 2¼"
4 Washers
2. Mounting Template (in box)
†3. Mounting Bracket
(Part # Part
GETTING STARTED
•Remove all packing material, labels and any stickers.
•Remove and save literature.
•Unpack mounting washers, screws and spacers for mounting and set them
aside in a safe place where they will not roll away or get lost.
Important: Do not attempt to operate appliance until it is properly installed.
CHOOSE A LOCATION
When choosing your location, consider the following:
•DO make sure to mount within reach of an electrical outlet.
• DO consider your normal work patterns in the kitchen when choosing location.
• DO NOT mount over any heating or cooking appliance such as your range or oven.
•DO NOT mount over or near a sink.
• DO NOT mount under, in front of or behind any
Note: If you are mounting multiple †SpaceMaker™ appliances, they should not be mounted flush to one another. Allow at least 4” of space between appliances for adequate cooling.
Caution: This appliance features a
Caution: When selecting a location for your toaster oven, make sure you have adequate room to reach the Rear Receptacle.
Note: If you are connecting another †SpaceMaker appliance into the
DETERMINE CABINET TYPE
Prior to taping the mounting template and beginning to drill your holes, determine if your cabinet has a flat bottom (B) or an overhanging lip (C). If your cabinet is flat, follow STANDARD INSTALLATION; if the cabinet has a lip, refer to SPACER MOUNTING INSTALLATION.
B |
| C |
|
|
|
5 | 6 |