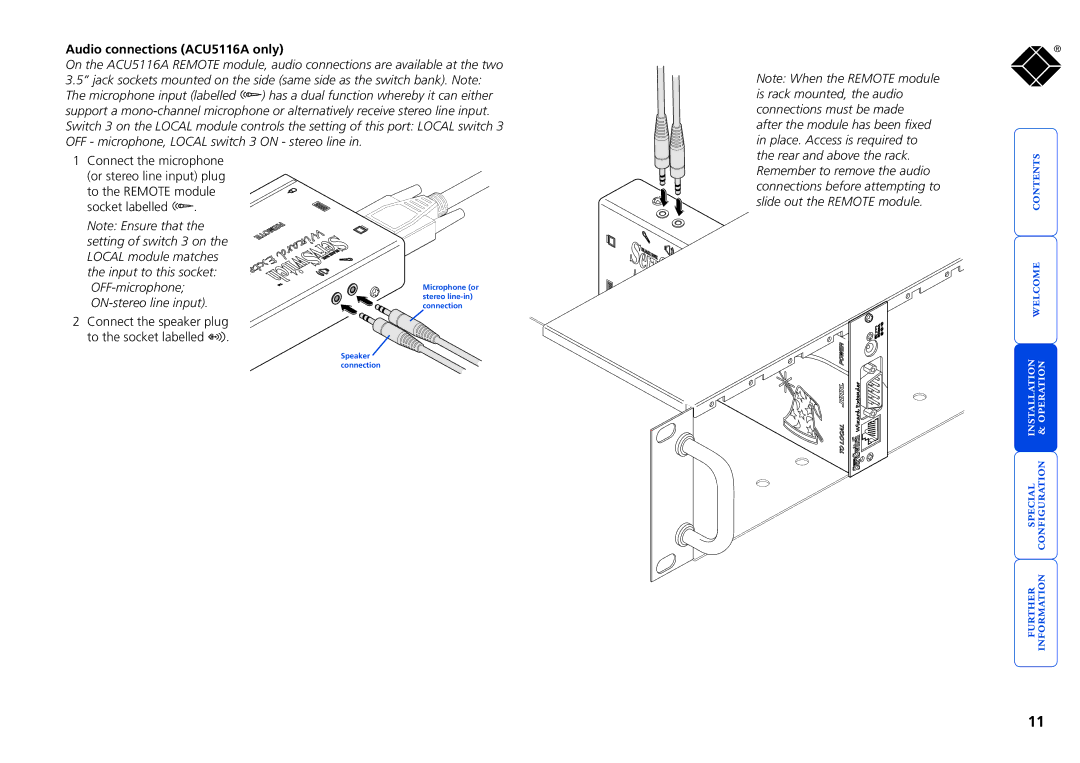
Audio connections (ACU5116A only)
On the ACU5116A REMOTE module, audio connections are available at the two 3.5” jack sockets mounted on the side (same side as the switch bank). Note:
The microphone input (labelled ![]() ) has a dual function whereby it can either support a
) has a dual function whereby it can either support a
Note: When the REMOTE module is rack mounted, the audio connections must be made after the module has been fixed in place. Access is required to
®
1Connect the microphone (or stereo line input) plug to the REMOTE module
socket labelled ![]() .
.
Note: Ensure that the setting of switch 3 on the LOCAL module matches the input to this socket:
2 Connect the speaker plug
to the socket labelled | . |
| Speaker |
| connection |
Microphone (or stereo
the rear and above the rack. Remember to remove the audio connections before attempting to slide out the REMOTE module.
11