TROUBLE-SHOOTING GUIDE

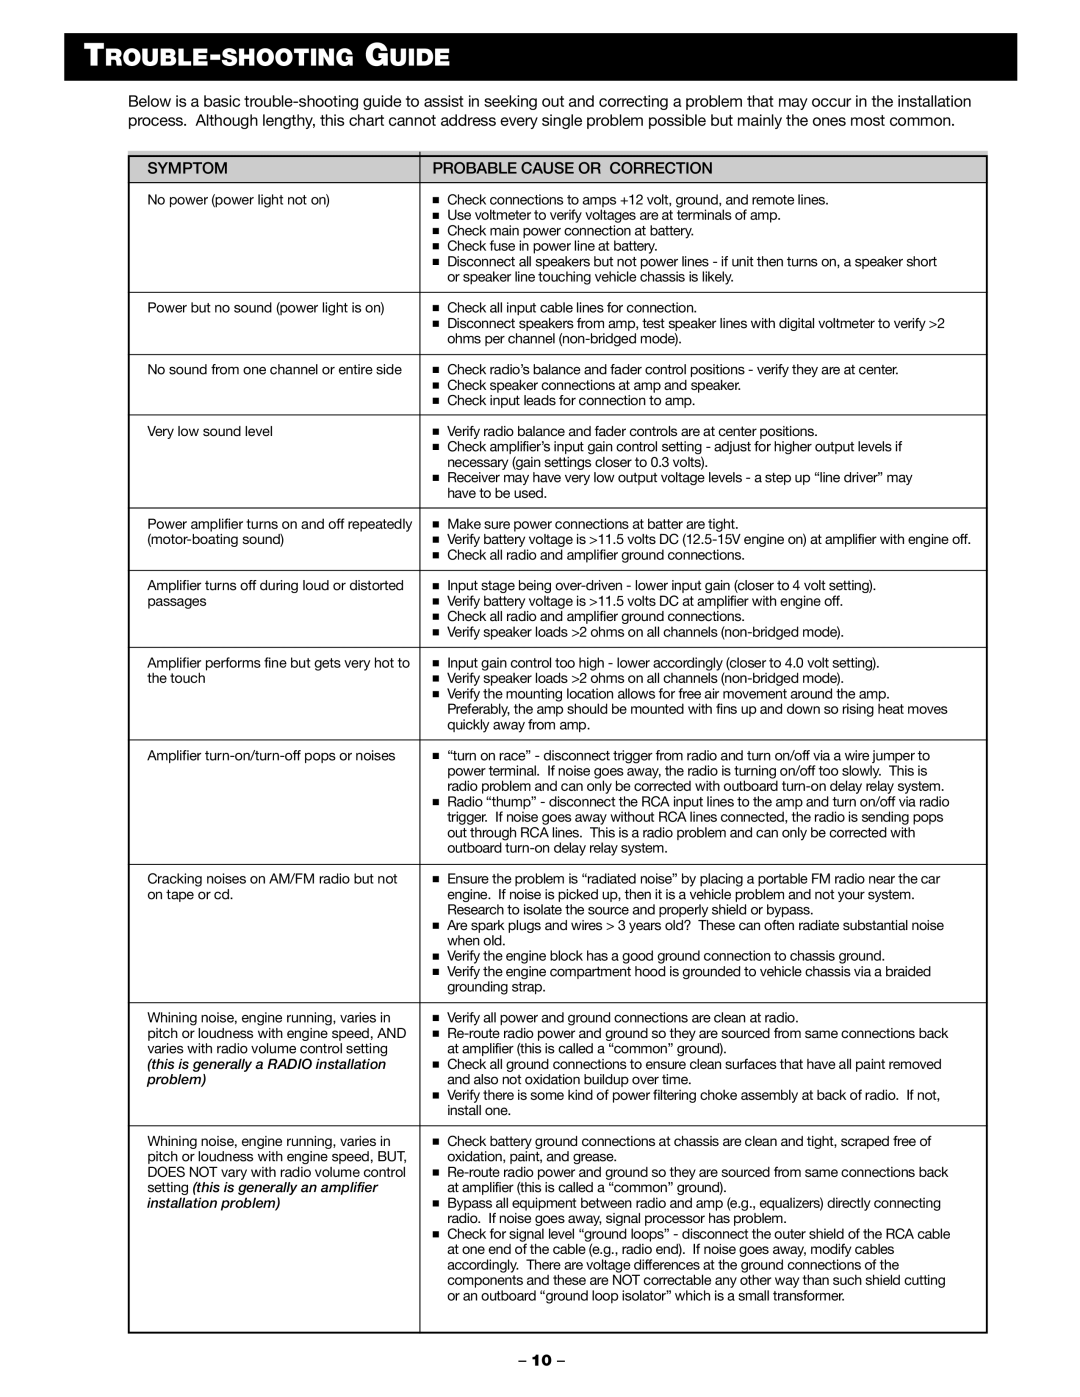
Below is a basic trouble-shooting guide to assist in seeking out and correcting a problem that may occur in the installation process. Although lengthy, this chart cannot address every single problem possible but mainly the ones most common.

SYMPTOM

PROBABLE CAUSE OR CORRECTION

No power (power light not on)

Check connections to amps +12 volt, ground, and remote lines.


Use voltmeter to verify voltages are at terminals of amp.


Check main power connection at battery.


Check fuse in power line at battery.


Disconnect all speakers but not power lines - if unit then turns on, a speaker short


or speaker line touching vehicle chassis is likely.


Power but no sound (power light is on)

Check all input cable lines for connection.


Disconnect speakers from amp, test speaker lines with digital voltmeter to verify >2


ohms per channel (non-bridged mode).


No sound from one channel or entire side

Check radio’s balance and fader control positions - verify they are at center.


Check speaker connections at amp and speaker.


Check input leads for connection to amp.


Very low sound level

Verify radio balance and fader controls are at center positions.


Check amplifier’s input gain control setting - adjust for higher output levels if


necessary (gain settings closer to 0.3 volts).


Receiver may have very low output voltage levels - a step up “line driver” may


have to be used.


Power amplifier turns on and off repeatedly

Make sure power connections at batter are tight.

(motor-boating sound)

Verify battery voltage is >11.5 volts DC (12.5-15V engine on) at amplifier with engine off.


Check all radio and amplifier ground connections.


Amplifier turns off during loud or distorted

Input stage being over-driven - lower input gain (closer to 4 volt setting).

passages

Verify battery voltage is >11.5 volts DC at amplifier with engine off.


Check all radio and amplifier ground connections.


Verify speaker loads >2 ohms on all channels (non-bridged mode).


Amplifier performs fine but gets very hot to

Input gain control too high - lower accordingly (closer to 4.0 volt setting).

the touch

Verify speaker loads >2 ohms on all channels (non-bridged mode).


Verify the mounting location allows for free air movement around the amp.


Preferably, the amp should be mounted with fins up and down so rising heat moves


quickly away from amp.


Amplifier turn-on/turn-off pops or noises

“turn on race” - disconnect trigger from radio and turn on/off via a wire jumper to


power terminal. If noise goes away, the radio is turning on/off too slowly. This is


radio problem and can only be corrected with outboard turn-on delay relay system.


Radio “thump” - disconnect the RCA input lines to the amp and turn on/off via radio


trigger. If noise goes away without RCA lines connected, the radio is sending pops


out through RCA lines. This is a radio problem and can only be corrected with


outboard turn-on delay relay system.


Cracking noises on AM/FM radio but not

Ensure the problem is “radiated noise” by placing a portable FM radio near the car

on tape or cd.


engine. If noise is picked up, then it is a vehicle problem and not your system.


Research to isolate the source and properly shield or bypass.


Are spark plugs and wires > 3 years old? These can often radiate substantial noise


when old.


Verify the engine block has a good ground connection to chassis ground.


Verify the engine compartment hood is grounded to vehicle chassis via a braided


grounding strap.


Whining noise, engine running, varies in

Verify all power and ground connections are clean at radio.

pitch or loudness with engine speed, AND

Re-route radio power and ground so they are sourced from same connections back

varies with radio volume control setting


at amplifier (this is called a “common” ground).

(this is generally a RADIO installation

Check all ground connections to ensure clean surfaces that have all paint removed

problem)


and also not oxidation buildup over time.


Verify there is some kind of power filtering choke assembly at back of radio. If not,


install one.


Whining noise, engine running, varies in

Check battery ground connections at chassis are clean and tight, scraped free of

pitch or loudness with engine speed, BUT,


oxidation, paint, and grease.

DOES NOT vary with radio volume control

Re-route radio power and ground so they are sourced from same connections back

setting (this is generally an amplifier


at amplifier (this is called a “common” ground).

installation problem)

Bypass all equipment between radio and amp (e.g., equalizers) directly connecting


radio. If noise goes away, signal processor has problem.


Check for signal level “ground loops” - disconnect the outer shield of the RCA cable


at one end of the cable (e.g., radio end). If noise goes away, modify cables


accordingly. There are voltage differences at the ground connections of the


components and these are NOT correctable any other way than such shield cutting


or an outboard “ground loop isolator” which is a small transformer.


10

Page 12
Image 12
Blaupunkt PCA 2100, PCA 250 manual TROUBLE-SHOOTING Guide, Symptom Probable Cause or Correction

PCA 2100, PCA 250 specifications

Blaupunkt is a brand synonymous with quality audio equipment, and two of its standout amplifiers are the PCA 250 and PCA 2100. These models have garnered attention for their impressive specifications and advanced technologies that cater to audio enthusiasts looking for top-notch sound performance.

The Blaupunkt PCA 250 is a compact amplifier that packs a punch with its powerful output, making it perfect for a variety of audio applications. With a peak power output of around 250 watts, it delivers rich, distortion-free sound that elevates the listening experience. One of the main features of the PCA 250 is its Class D amplification technology, which not only ensures efficiency but also minimizes heat generation. This allows the amplifier to work effectively without the requirement for extensive cooling systems, making it suitable for tight spaces.

Another notable characteristic of the PCA 250 is its built-in crossover features, which enable users to customize audio frequencies. This ensures that high frequencies remain crisp while low frequencies are deep and powerful, providing a balanced sound spectrum. Additionally, the PCA 250 supports multiple input options, allowing for versatile connectivity with various audio sources, including professional audio gear and home entertainment systems.

On the other hand, the PCA 2100 takes the capabilities of amplification even further. With a peak power output of 1000 watts, this model is engineered for higher performance demands. It employs advanced circuitry that optimizes signal processing, ensuring minimal noise and maximum clarity. Like the PCA 250, it also features Class D technology for efficient power consumption.

The PCA 2100 stands out for its robust construction, designed to handle demanding environments while delivering top-quality sound. It also features adjustable gain controls, allowing users to tailor the output to their specific needs. This flexibility makes the PCA 2100 suitable for both professional DJs and home audio enthusiasts.

Both models incorporate thermal protection and short circuit protection technologies, safeguarding against possible damage from overload or overheating. This ensures reliability and longevity in performance, giving users peace of mind while enjoying their audio.

In conclusion, the Blaupunkt PCA 250 and PCA 2100 offer a combination of powerful amplification, advanced features, and durable construction. These amplifiers cater to a range of audio needs, making them ideal choices for those seeking superior sound quality and reliability in their audio equipment. Whether for home use or professional settings, Blaupunkt’s PCA series continues to establish a solid reputation in the audio industry.