Operation 
Control Panel
| 1 |
2 |
|
3 |
|
4 | 5 |
6 |
|
7 |
|
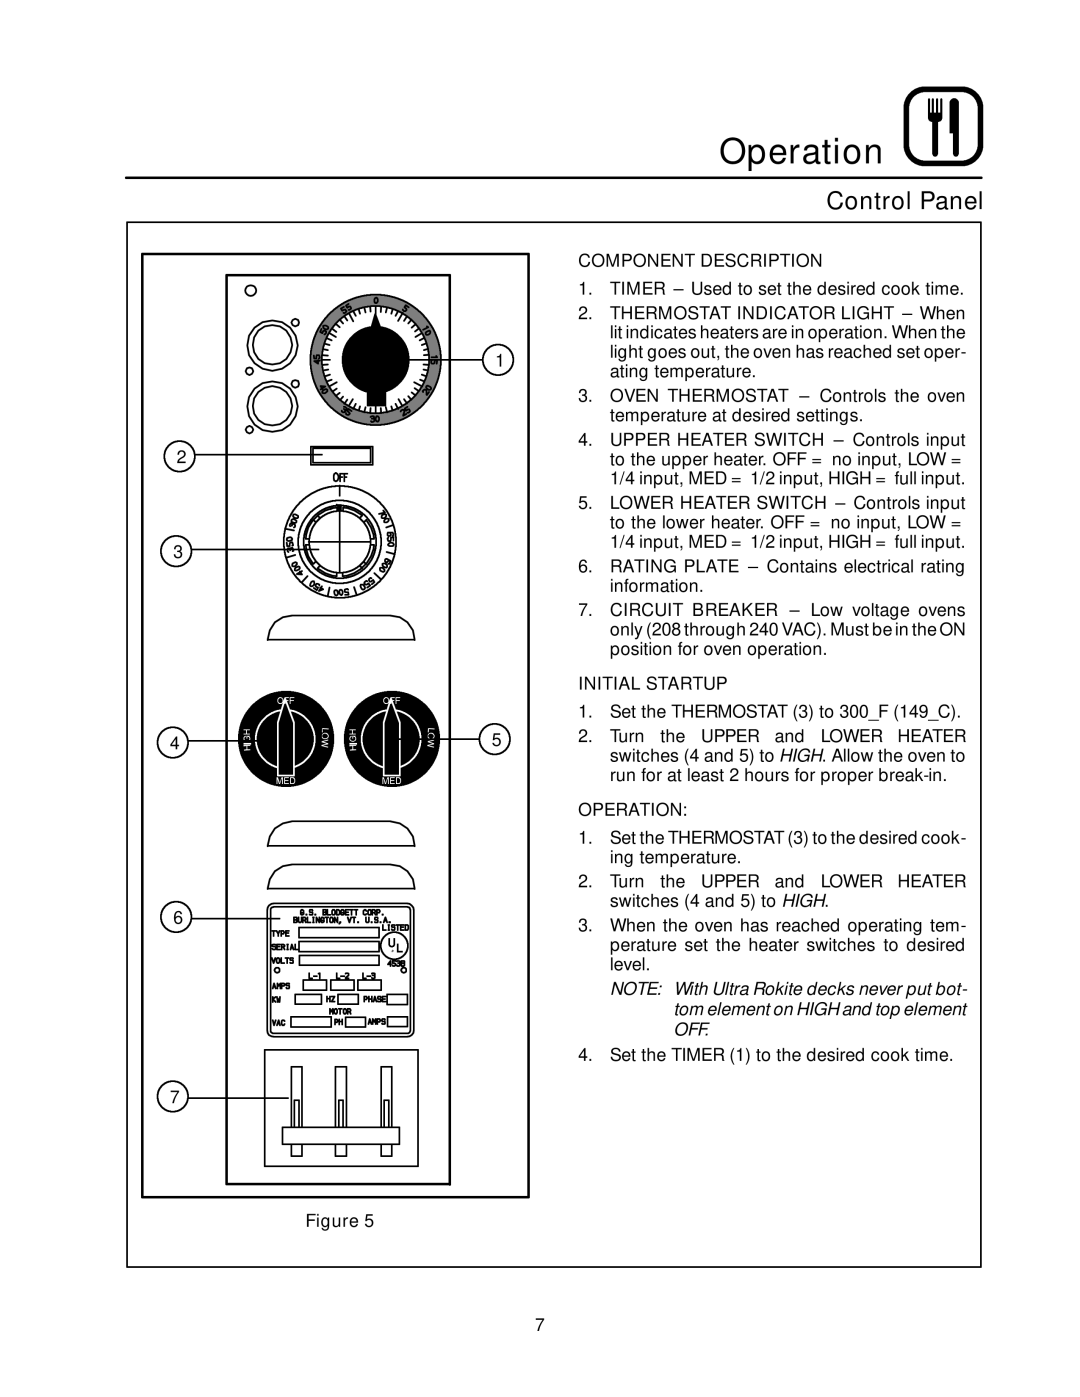
Figure 5
COMPONENT DESCRIPTION
1.TIMER
2.THERMOSTAT INDICATOR LIGHT
3.OVEN THERMOSTAT
4.UPPER HEATER SWITCH
5.LOWER HEATER SWITCH
6.RATING PLATE
7.CIRCUIT BREAKER
INITIAL STARTUP
1.Set the THERMOSTAT (3) to 300_F (149_C).
2.Turn the UPPER and LOWER HEATER switches (4 and 5) to HIGH. Allow the oven to run for at least 2 hours for proper
OPERATION:
1.Set the THERMOSTAT (3) to the desired cook- ing temperature.
2.Turn the UPPER and LOWER HEATER switches (4 and 5) to HIGH.
3.When the oven has reached operating tem- perature set the heater switches to desired level.
NOTE: With Ultra Rokite decks never put bot- tom element on HIGH and top element OFF.
4.Set the TIMER (1) to the desired cook time.
7
