3Installation Instructions
AWARNING - Risk of fire
•The clothes dryer (“appliance‘) installation must be performed by a qualified installer. •Install the appliance according to the manufacturer’s instructions and local codes. •Do not install a clothes dryer with flexible plastic venting materials. If flexible metal (foil type) duct is installed, it must be of a specific type identified by the ap pliance manufacturer as suitable for use with clothes dryers. Flexible venting materials are known to collapse, be easily crushed, and trap lint. These conditions will obstruct the clothes dryer’s airflow and increase the risk of fire.
•To reduce the risk of severe injury or death, follow all installation instructions.
SAVE THESE INSTRUCTIONS
Electrical connection
Connect the appliance to a grounded outlet protected by a fuse or circuit breaker of suitable capacity.
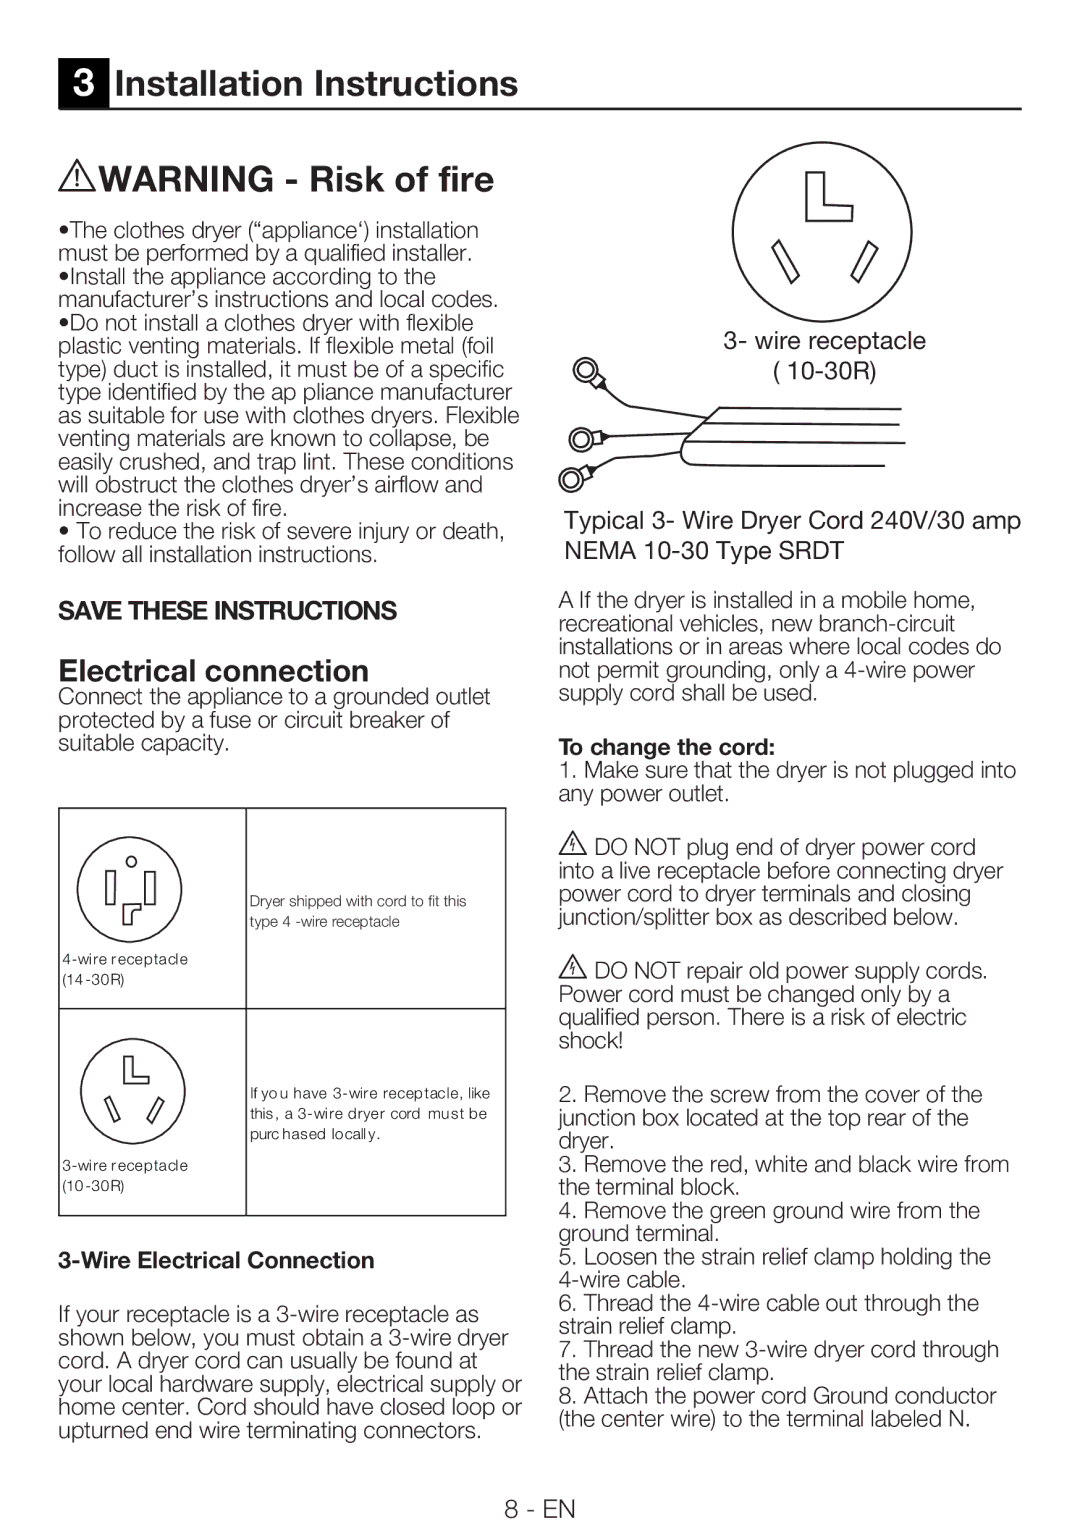
Dryer shipped with cord to fit this type 4
(14
If yo u have
(10
3-Wire Electrical Connection
If your receptacle is a
3- wire receptacle
(
Typical 3- Wire Dryer Cord 240V/30 amp NEMA
A If the dryer is installed in a mobile home, recreational vehicles, new
To change the cord:
1.Make sure that the dryer is not plugged into any power outlet.
B DO NOT plug end of dryer power cord into a live receptacle before connecting dryer power cord to dryer terminals and closing junction/splitter box as described below.
B DO NOT repair old power supply cords. Power cord must be changed only by a qualified person. There is a risk of electric shock!
2.Remove the screw from the cover of the junction box located at the top rear of the dryer.
3.Remove the red, white and black wire from the terminal block.
4.Remove the green ground wire from the ground terminal.
5.Loosen the strain relief clamp holding the
6.Thread the
7.Thread the new
8.Attach the power cord Ground conductor
(the center wire) to the terminal labeled N.
8 - EN