Since your treadmill is a heavy piece of equipment, we recommend that after taking off the top portion of the box, you slit the corners of the lower carton and fold down the sides. This will eliminate the need for you to pick up the treadmill over the sides of the box.
We also recommend that you use 2 people to assemble your treadmill, as some of the parts need to be held in place while the electrical connectors are pushed together.
Prior to starting the assembly process take all of the parts out of the box, remove all plastic bags, and lay them out of the floor to become familiar with the components. Make sure that you remove all parts packaged underneath the treadmill. You may need to slightly pick up the back of the treadmill to get better access to the parts on the bottom. You will notice that the treadmill is completely assembled except for the handlebars and the display.
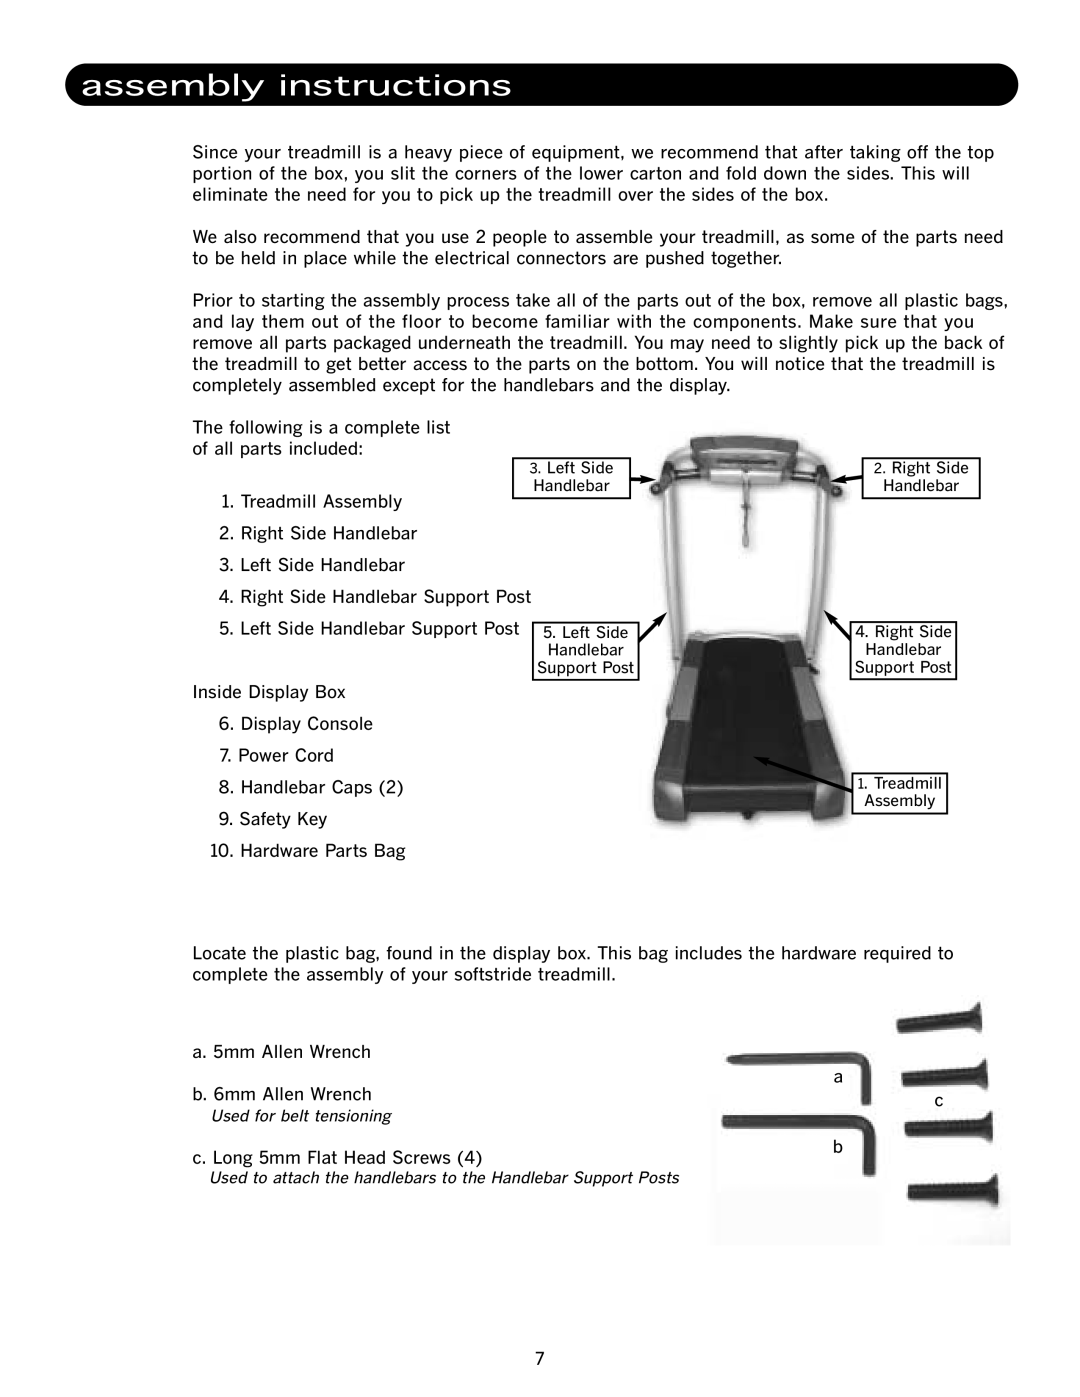
The following is a complete list of all parts included:
3. Left Side
Handlebar ![]()
1.Treadmill Assembly
2.Right Side Handlebar
3.Left Side Handlebar
4.Right Side Handlebar Support Post
5. Left Side Handlebar Support Post 5. Left Side
Handlebar
Support Post
Inside Display Box
6.Display Console
7. Power Cord
8.Handlebar Caps (2)
9.Safety Key
10.Hardware Parts Bag
2.Right Side Handlebar
4.Right Side Handlebar
Support Post
1. Treadmill
Assembly
Locate the plastic bag, found in the display box. This bag includes the hardware required to complete the assembly of your softstride treadmill.
a. 5mm Allen Wrench
b. 6mm Allen Wrench | a | |
| c | |
Used for belt tensioning |
| |
|
| |
|
|
|
c. Long 5mm Flat Head Screws (4) | b | |
|
| |
Used to attach the handlebars to the Handlebar Support Posts |
|
|
7