Installation instructions
3.4Mounting Heater
Warning: before starting installation:
B check that there are no loose parts inside the appliance
B ensure that gas pipe, gas valve, and burner have no damage and are properly fitted.
BRead chapter 2.2 to verify proper gas type and to check all parts are included in box.
Front cover should be removed in order to i inspect components visually (see
instructions below).
Remove cover and inspect.
BRemove the temperature control.
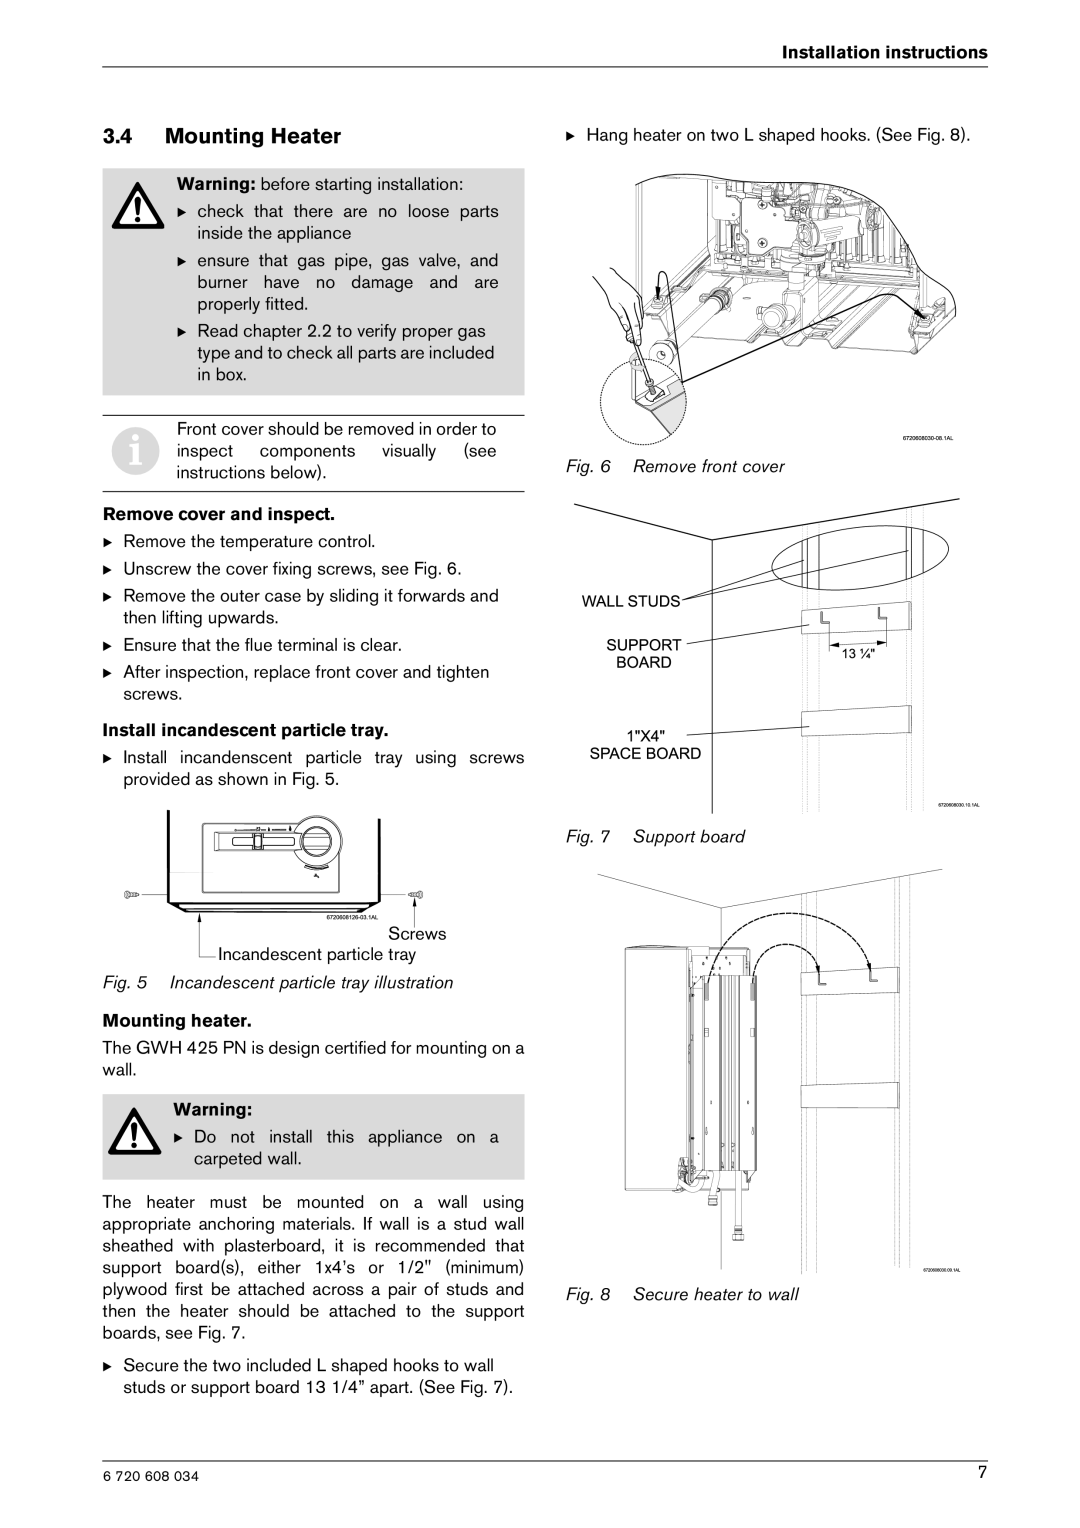
BUnscrew the cover fixing screws, see Fig. 6.
BRemove the outer case by sliding it forwards and then lifting upwards.
BEnsure that the flue terminal is clear.
BAfter inspection, replace front cover and tighten screws.
Install incandescent particle tray.
B Install incandenscent particle tray using screws provided as shown in Fig. 5.
BHang heater on two L shaped hooks. (See Fig. 8).
Fig. 6 Remove front cover
Fig. 7 Support board
Screws
Incandescent particle tray
Fig. 5 Incandescent particle tray illustration
Mounting heater.
The GWH 425 PN is design certified for mounting on a wall.
Warning:
B Do not install this appliance on a carpeted wall.
The heater must be mounted on a wall using |
|
appropriate anchoring materials. If wall is a stud wall |
|
sheathed with plasterboard, it is recommended that |
|
support board(s), either 1x4’s or 1/2" (minimum) |
|
plywood first be attached across a pair of studs and | Fig. 8 Secure heater to wall |
then the heater should be attached to the support |
|
boards, see Fig. 7. |
|
BSecure the two included L shaped hooks to wall studs or support board 13 1/4” apart. (See Fig. 7).
6 720 608 034 | 7 |