Maintenance*
If faults occur on the flue gas safety device, proceed as follows:
-Undo flue gas safety device fixing screw.
-Unplug igniter unit connector.
Replace damaged component with new one and refit using the reverse of the procedure set out the table above.
Function check*
Flue gas safety device function check:
-Disconnect flue pipe
-Replace with pipe (about 50 cm long) with sealed end
-Fit pipe vertically
-Start up appliance at rated output and set temperature control to maximum temperature.
Under those conditions, the appliance should shut down after two minutes. Remove temporary pipe and reconnect flue pipe.
* This work may only be carried out by an approved engineer.
4. Cross over in water lines
To confirm there is no
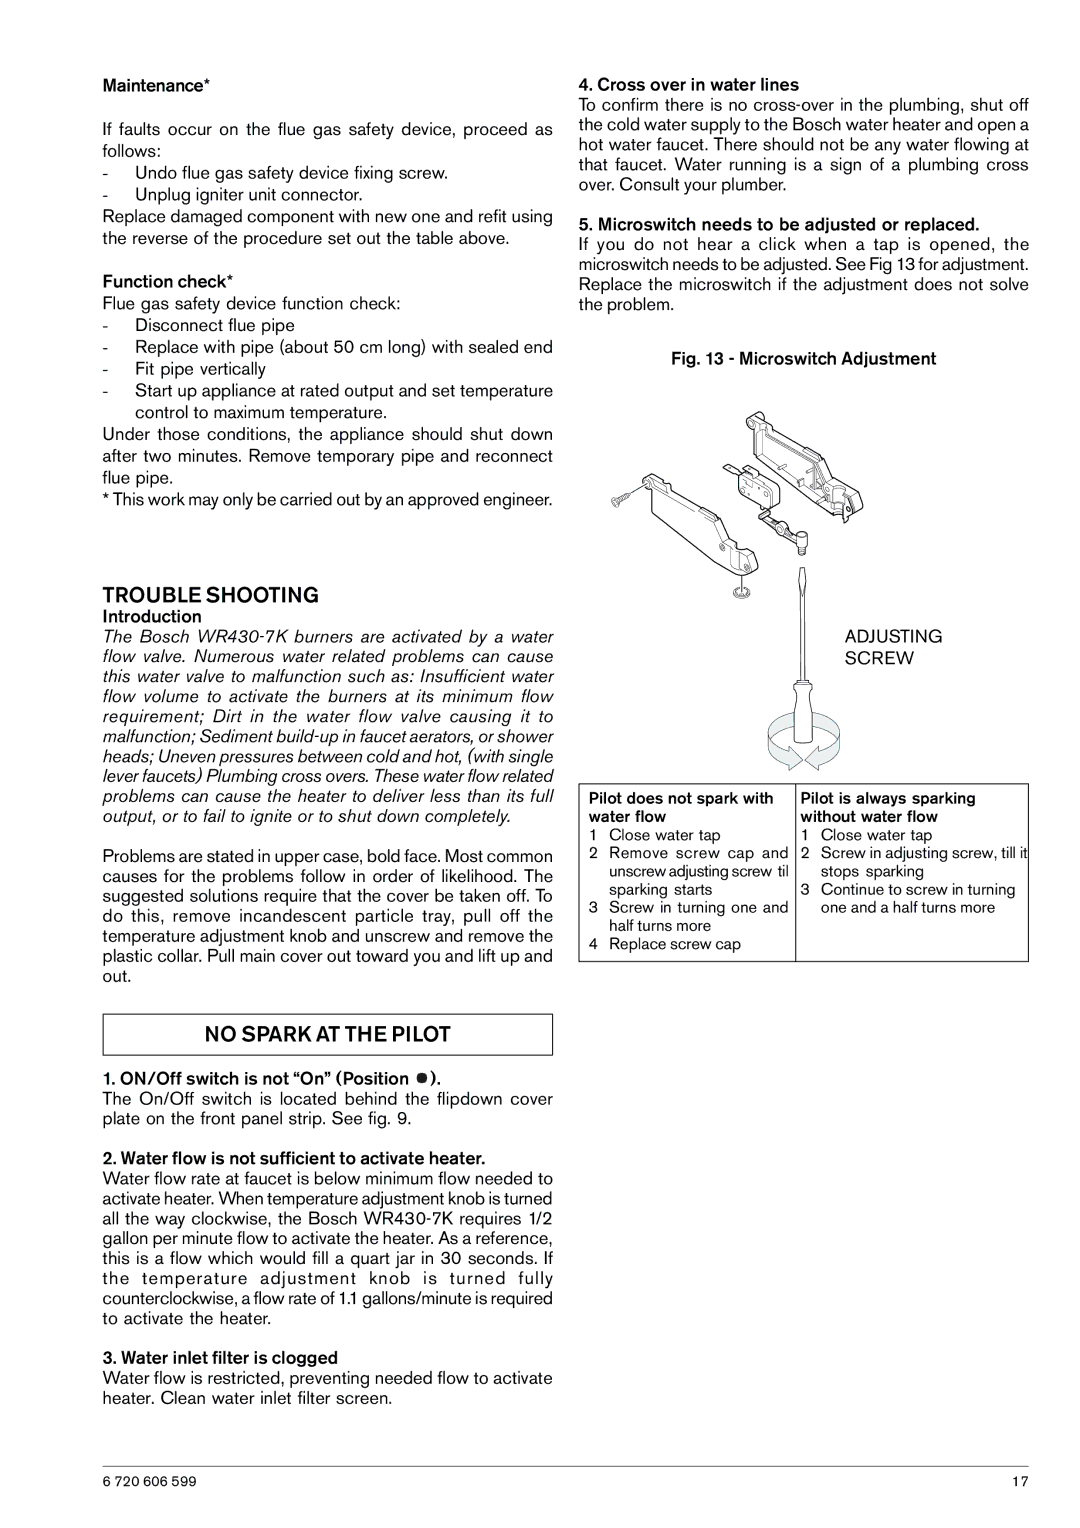
5. Microswitch needs to be adjusted or replaced.
If you do not hear a click when a tap is opened, the microswitch needs to be adjusted. See Fig 13 for adjustment. Replace the microswitch if the adjustment does not solve the problem.
Fig. 13 - Microswitch Adjustment
TROUBLE SHOOTING
Introduction
The Bosch
Problems are stated in upper case, bold face. Most common causes for the problems follow in order of likelihood. The suggested solutions require that the cover be taken off. To do this, remove incandescent particle tray, pull off the temperature adjustment knob and unscrew and remove the plastic collar. Pull main cover out toward you and lift up and out.
NO SPARK AT THE PILOT
1. ON/Off switch is not “On” (Position ![]() ).
).
The On/Off switch is located behind the flipdown cover plate on the front panel strip. See fig. 9.
2. Water flow is not sufficient to activate heater.
Water flow rate at faucet is below minimum flow needed to activate heater. When temperature adjustment knob is turned all the way clockwise, the Bosch
3. Water inlet filter is clogged
Water flow is restricted, preventing needed flow to activate heater. Clean water inlet filter screen.
ADJUSTING
SCREW
Pilot does not spark with | Pilot is always sparking | ||
water flow | without water flow | ||
1 | Close water tap | 1 | Close water tap |
2 | Remove screw cap and | 2 | Screw in adjusting screw, till it |
| unscrew adjusting screw til |
| stops sparking |
| sparking starts | 3 | Continue to screw in turning |
3 | Screw in turning one and |
| one and a half turns more |
| half turns more |
|
|
4 | Replace screw cap |
|
|
|
|
|
|
6 720 606 599 | 17 |