![]() BM 2610006360
BM 2610006360 ![]() 1:42 PM Page 9
1:42 PM Page 9
If necessary, wipe the blade clean. Only then should the saw teeth protector be removed.
Insert plug into power source and turn tool on briefly (See Operating Instructions Section). This will allow the saw blade pin to engage into the blade, which drives the blade back and forth. Turn tool off.
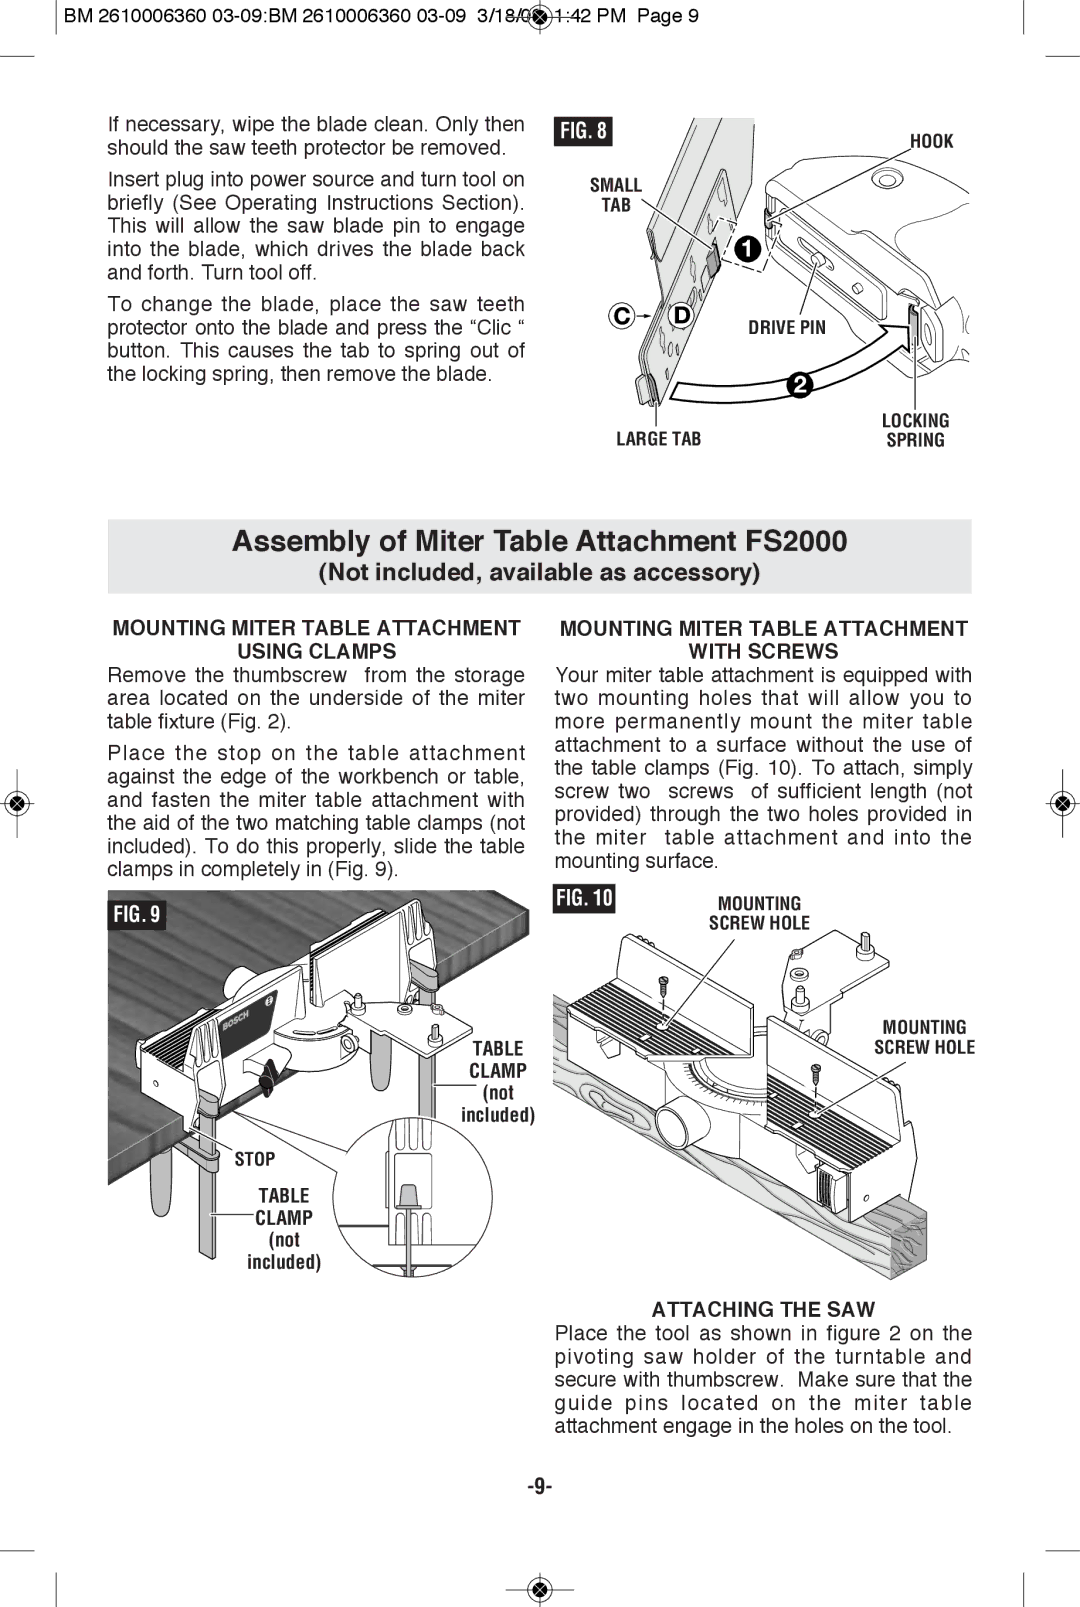
To change the blade, place the saw teeth protector onto the blade and press the “Clic “ button. This causes the tab to spring out of the locking spring, then remove the blade.
FIG. 8 | HOOK |
|
SMALL
TAB
| DRIVE PIN |
LARGE TAB | LOCKING |
SPRING |
Assembly of Miter Table Attachment FS2000
(Not included, available as accessory)
MOUNTING MITER TABLE ATTACHMENT
USING CLAMPS
Remove the thumbscrew from the storage area located on the underside of the miter table fixture (Fig. 2).
Place the stop on the table attachment against the edge of the workbench or table, and fasten the miter table attachment with the aid of the two matching table clamps (not included). To do this properly, slide the table clamps in completely in (Fig. 9).
FIG. 9
![]() TABLE CLAMP
TABLE CLAMP
![]() (not included)
(not included)
STOP
TABLE ![]() CLAMP
CLAMP
(not
included)
MOUNTING MITER TABLE ATTACHMENT
WITH SCREWS
Your miter table attachment is equipped with two mounting holes that will allow you to more permanently mount the miter table attachment to a surface without the use of the table clamps (Fig. 10). To attach, simply screw two screws of sufficient length (not provided) through the two holes provided in the miter table attachment and into the mounting surface.
FIG. 10 | MOUNTING |
| SCREW HOLE |
MOUNTING
SCREW HOLE
ATTACHING THE SAW
Place the tool as shown in figure 2 on the pivoting saw holder of the turntable and secure with thumbscrew. Make sure that the guide pins located on the miter table attachment engage in the holes on the tool.