![]() 2610009642 10/09 E:2610009642 10/09 E 10/20/09 3:18
2610009642 10/09 E:2610009642 10/09 E 10/20/09 3:18![]() PM Page 20
PM Page 20
Basic Saw Operations
Workpiece Support
Long workpieces have a tendency to tip over unless clamped down
and properly supported from underneath.
Clamps - The clamp easily secures a workpiece in either of two (2) clamp holes behind the fence (Figure 19 & 19a).
•Minimum of 1/2" of knurl must engage clamp post to be effective.
•Adjust screw if necessary to clear fence or for large differences in wood heights.
Workpiece Clamp (Model 5312 0nly) 1. Insert clamp post into clamp hole.
Conventional Clamps – and other hold down de- vices can be used to hold the workpiece firmly against the table and the fence.
long workpiece support
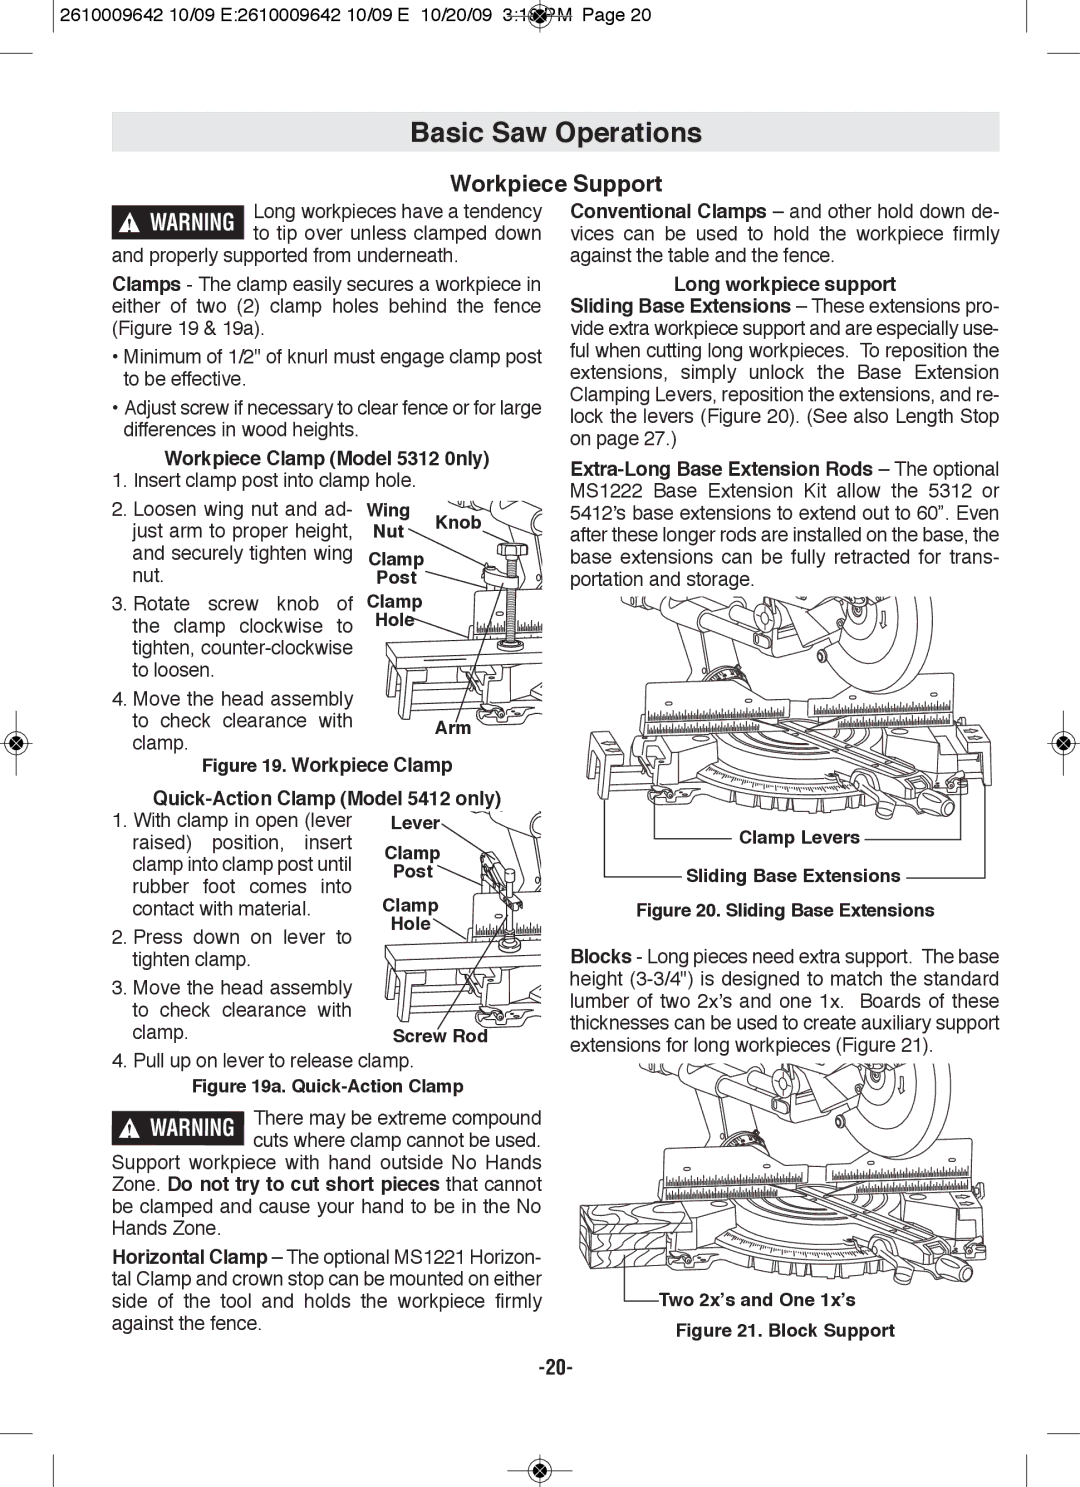
Sliding Base Extensions – These extensions pro- vide extra workpiece support and are especially use- ful when cutting long workpieces. To reposition the extensions, simply unlock the Base Extension Clamping Levers, reposition the extensions, and re- lock the levers (Figure 20). (See also Length Stop on page 27.)
2.Loosen wing nut and ad- just arm to proper height, and securely tighten wing nut.
3.Rotate screw knob of the clamp clockwise to tighten,
4.Move the head assembly to check clearance with clamp.
Wing
Nut Knob
Clamp
post 
Clamp
Hole
Arm
5412’s base extensions to extend out to 60”. Even after these longer rods are installed on the base, the base extensions can be fully retracted for trans- portation and storage.
figure 19. Workpiece Clamp
raised) position, insert clamp into clamp post until rubber foot comes into contact with material.
2. Press down on lever to tighten clamp.
3.Move the head assembly to check clearance with
clamp.
4.Pull up on lever to release clamp. figure 19a.
There may be extreme compound
!WARNING
cuts where clamp cannot be used. Support workpiece with hand outside No Hands Zone. Do not try to cut short pieces that cannot be clamped and cause your hand to be in the No Hands Zone.
Horizontal Clamp – The optional MS1221 Horizon- tal Clamp and crown stop can be mounted on either side of the tool and holds the workpiece firmly against the fence.
Clamp levers |
Sliding Base Extensions |
figure 20. Sliding Base Extensions
Blocks - Long pieces need extra support. The base height