BM 2610021461 06-12_BM 2610021461 06-12.qxp 6/26/12 1:38 PM Page 12
Operating Instructions
Bosch routers are designed for speed, accuracy and convenience in performing cabinet work, fluting, beading,
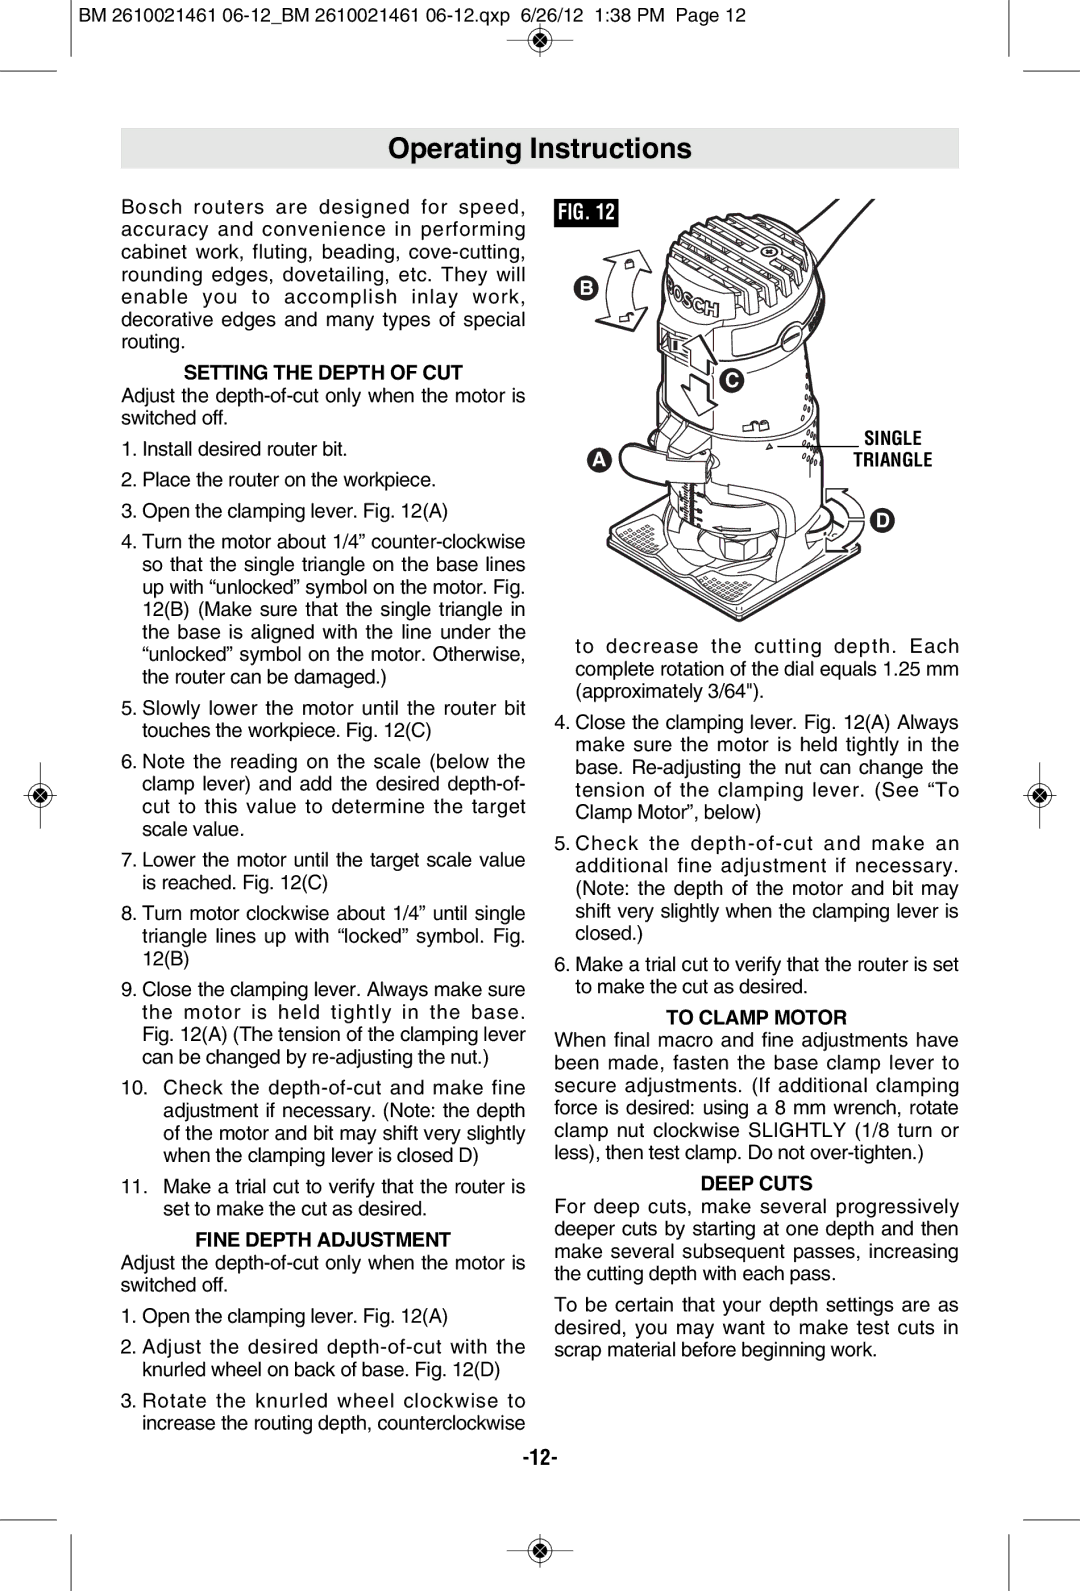
SETTING THE DEPTH OF CUT
Adjust the
1.Install desired router bit.
2.Place the router on the workpiece.
3.Open the clamping lever. Fig. 12(A)
4.Turn the motor about 1/4”
5.Slowly lower the motor until the router bit touches the workpiece. Fig. 12(C)
6.Note the reading on the scale (below the clamp lever) and add the desired
7.Lower the motor until the target scale value is reached. Fig. 12(C)
8.Turn motor clockwise about 1/4” until single triangle lines up with “locked” symbol. Fig. 12(B)
9.Close the clamping lever. Always make sure the motor is held tightly in the base. Fig. 12(A) (The tension of the clamping lever can be changed by
10.Check the
11.Make a trial cut to verify that the router is set to make the cut as desired.
FINE DEPTH ADJUSTMENT
Adjust the
1.Open the clamping lever. Fig. 12(A)
2.Adjust the desired
3.Rotate the knurled wheel clockwise to increase the routing depth, counterclockwise
FIG. 12
B
![]()
![]()
![]() C
C
| SINGLE |
A | TRIANGLE |
![]()
![]()
![]()
![]() D
D
to decrease the cutting depth. Each complete rotation of the dial equals 1.25 mm (approximately 3/64").
4.Close the clamping lever. Fig. 12(A) Always make sure the motor is held tightly in the base.
5.Check the
6.Make a trial cut to verify that the router is set to make the cut as desired.
TO CLAMP MOTOR
When final macro and fine adjustments have been made, fasten the base clamp lever to secure adjustments. (If additional clamping force is desired: using a 8 mm wrench, rotate clamp nut clockwise SLIGHTLY (1/8 turn or less), then test clamp. Do not
DEEP CUTS
For deep cuts, make several progressively deeper cuts by starting at one depth and then make several subsequent passes, increasing the cutting depth with each pass.
To be certain that your depth settings are as desired, you may want to make test cuts in scrap material before beginning work.