BEFORE OPERATION
OPERATING ON-SCREEN MENU
HOW TO OPERATE ON-SCREEN MENU
You can control and adjust this projector through the
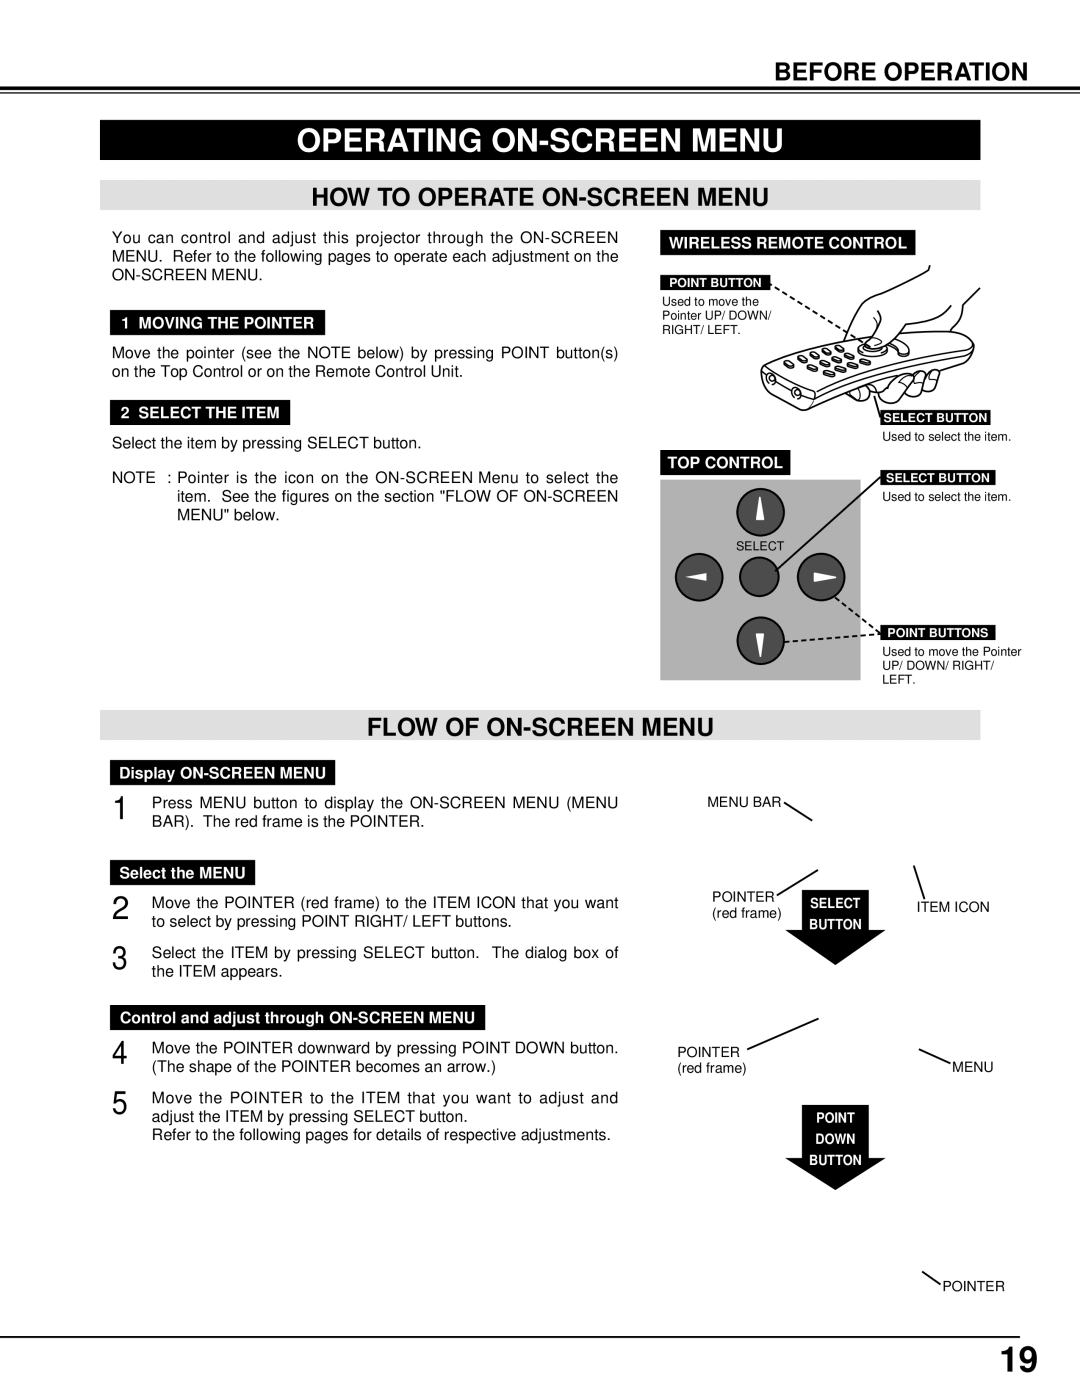
1 MOVING THE POINTER
Move the pointer (see the NOTE below) by pressing POINT button(s) on the Top Control or on the Remote Control Unit.
2 SELECT THE ITEM
Select the item by pressing SELECT button.
NOTE : Pointer is the icon on the
WIRELESS REMOTE CONTROL
POINT BUTTON
Used to move the
Pointer UP/ DOWN/
RIGHT/ LEFT.
![]() SELECT BUTTON
SELECT BUTTON
Used to select the item.
TOP CONTROL
SELECT BUTTON
Used to select the item.
SELECT
POINT BUTTONS
Used to move the Pointer
UP/ DOWN/ RIGHT/
LEFT.
FLOW OF ON-SCREEN MENU
Display
1 | Press MENU button to display the | ||
BAR). The red frame is the POINTER. | |||
|
| ||
Select the MENU |
|
| |
2 | Move the POINTER (red frame) to the ITEM ICON that you want | ||
to select by pressing POINT RIGHT/ LEFT buttons. | |||
3 | Select the ITEM by pressing SELECT button. The dialog box of | ||
the ITEM appears. | |||
| |||
Control and adjust through |
| ||
4 | Move the POINTER downward by pressing POINT DOWN button. | ||
(The shape of the POINTER becomes an arrow.) | |||
5 | Move the POINTER to the ITEM that you want to adjust and | ||
adjust the ITEM by pressing SELECT button. | |||
Refer to the following pages for details of respective adjustments.
MENU BAR |
|
| |
POINTER | SELECT | ITEM ICON | |
(red frame) | |||
BUTTON |
| ||
|
|
POINTER | MENU |
(red frame) |
POINT
DOWN
BUTTON
POINTER
19