Using your bread maker
Note: Depending on the cycle or recipe used, some steps may not apply or there may be additional steps. Refer to the respective recipes instructions in the recipes portion of this book, as well as the specific cycle instructions located at the end of these usage instructions.
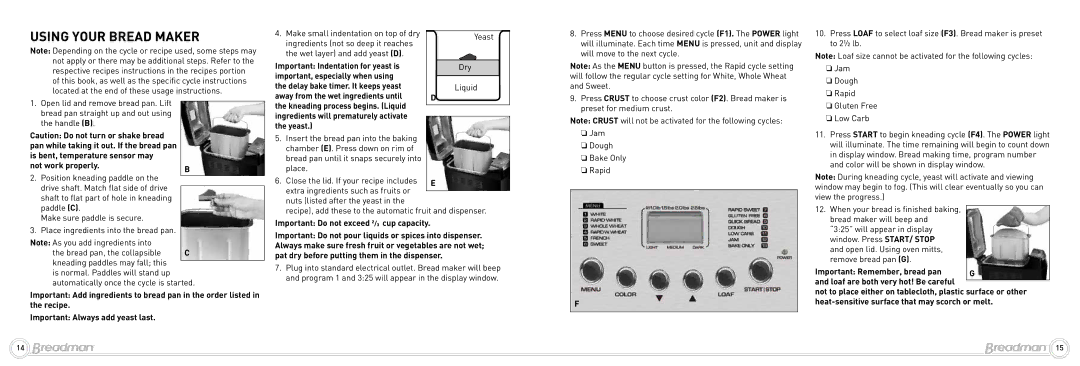
1. | Open lid and remove bread pan. Lift |
| |
| |||
| bread pan straight up and out using |
| |
| the handle (B). |
| |
Caution: Do not turn or shake bread |
| ||
pan while taking it out. If the bread pan |
| ||
is bent, temperature sensor may |
| ||
not work properly. | B | ||
2. | Position kneading paddle on the | ||
| |||
| |||
| drive shaft. Match flat side of drive |
| |
|
| ||
| shaft to flat part of hole in kneading |
| |
| paddle (C). |
| |
| Make sure paddle is secure. |
| |
3. | Place ingredients into the bread pan. |
| |
Note: As you add ingredients into
the bread pan, the collapsible C kneading paddles may fall; this
is normal. Paddles will stand up automatically once the cycle is started.
Important: Add ingredients to bread pan in the order listed in the recipe.
Important: Always add yeast last.
4. Make small indentation on top of dry |
| |
Yeast | ||
ingredients (not so deep it reaches | ||
| ||
the wet layer) and add yeast (D). |
| |
Important: Indentation for yeast is | Dry | |
important, especially when using |
| |
the delay bake timer. It keeps yeast | Liquid | |
away from the wet ingredients until | D | |
the kneading process begins. (Liquid |
| |
| ||
ingredients will prematurely activate |
| |
| ||
the yeast.) |
|
5.Insert the bread pan into the baking chamber (E). Press down on rim of bread pan until it snaps securely into place.
6. Close the lid. If your recipe includes | E |
extra ingredients such as fruits or |
|
| |
nuts (listed after the yeast in the |
|
recipe), add these to the automatic fruit and dispenser.
Important: Do not exceed 2/3 cup capacity.
Important: Do not pour liquids or spices into dispenser. Always make sure fresh fruit or vegetables are not wet; pat dry before putting them in the dispenser.
7.Plug into standard electrical outlet. Bread maker will beep and program 1 and 3:25 will appear in the display window.
8.Press MENU to choose desired cycle (F1). The POWER light will illuminate. Each time MENU is pressed, unit and display will move to the next cycle.
Note: As the MENU button is pressed, the Rapid cycle setting will follow the regular cycle setting for White, Whole Wheat and Sweet.
9.Press CRUST to choose crust color (F2). Bread maker is preset for medium crust.
Note: CRUST will not be activated for the following cycles:
❏Jam
❏Dough
❏Bake Only
❏Rapid
F
10.Press LOAF to select loaf size (F3). Bread maker is preset to 2½ lb.
Note: Loaf size cannot be activated for the following cycles:
❏Jam
❏Dough
❏Rapid
❏Gluten Free
❏Low Carb
11.Press START to begin kneading cycle (F4). The Power light will illuminate. The time remaining will begin to count down in display window. Bread making time, program number and color will be shown in display window.
Note: During kneading cycle, yeast will activate and viewing window may begin to fog. (This will clear eventually so you can view the progress.)
12.When your bread is finished baking, bread maker will beep and “3:25” will appear in display window. Press START/ STOP
and open lid. Using oven mitts, remove bread pan (G).
Important: Remember, bread pan | G |
and loaf are both very hot! Be careful |
|
|
not to place either on tablecloth, plastic surface or other
14
15