
Portable Generator specifications
Briggs & Stratton portable generators have become a trusted choice for both homeowners and professionals who need reliable power on the go. Known for their robust design and innovative features, these generators are engineered to deliver exceptional performance in various applications, from outdoor events to emergency backup during power outages.One of the key features of Briggs & Stratton portable generators is their powerful engine options. Equipped with reliable four-stroke engines, these generators provide ample power to run essential appliances, tools, and equipment. Models like the Briggs & Stratton P4500 are especially praised for their inverter technology, which produces clean power suitable for sensitive electronics. This means users can confidently power laptops, TVs, and other sensitive devices without the risk of damage due to power surges.
Technology plays a pivotal role in enhancing the usability of Briggs & Stratton generators. The equipped PowerSmart Series technology allows for smart engine management, optimizing fuel efficiency while delivering consistent power output. This not only saves fuel but also extends the runtime, making them perfect companions for long camping trips or power outages.
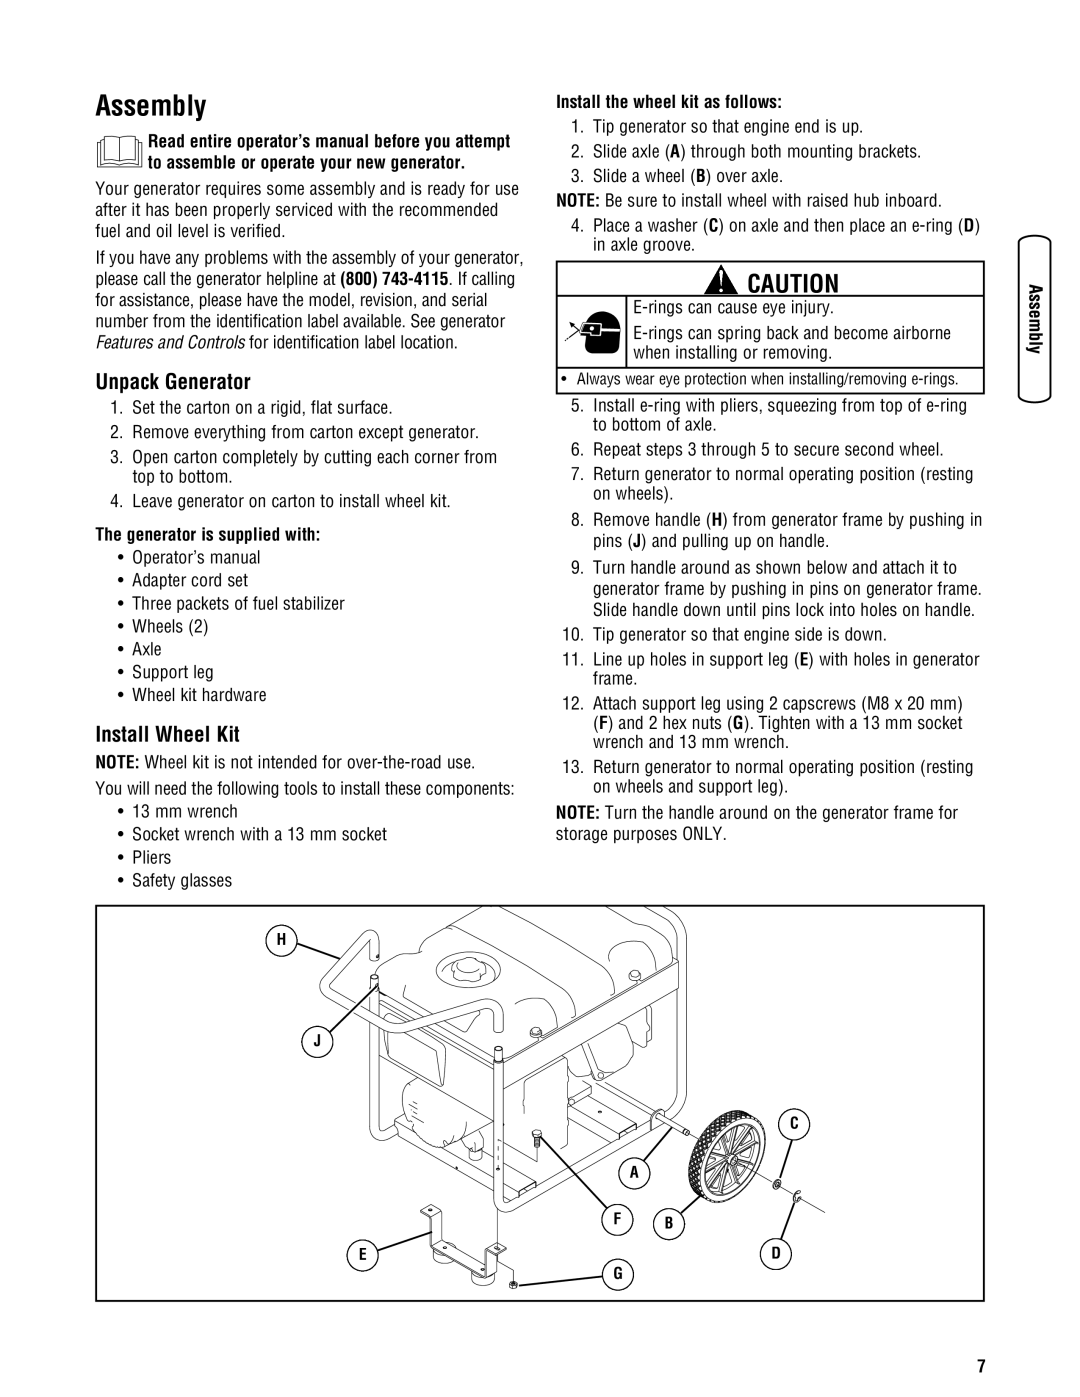
Portability is another hallmark of Briggs & Stratton generators. Many units come with built-in handles and transport wheels, making it easy to move them from one location to another. Their lightweight yet durable construction ensures that even larger models can be handled by one or two people, providing convenience without sacrificing strength.
In terms of safety features, Briggs & Stratton portable generators are designed with user protection in mind. Many models include low-oil shutdown systems that automatically halt operation when oil levels drop dangerously low, preventing engine damage. Additionally, their built-in circuit breakers help avoid overloads, ensuring that the generator operates safely and efficiently.
Other noteworthy characteristics include easy-start engines, easy-access control panels, and multiple outlet options, which enhance their versatility for various types of users. With features such as USB outlets, users can charge personal electronics alongside their other power needs.
In summary, Briggs & Stratton portable generators stand out due to their power, efficiency, portability, and safety features. These generators are an essential investment for anyone seeking reliable power solutions, whether for recreational use, construction work, or emergency preparedness. With a legacy of quality and innovation, Briggs & Stratton continues to set a benchmark in the portable generator market.