
RM503604, RM503004 specifications
The Broan RM503004 is a well-engineered range hood that combines style and functionality, making it an ideal choice for modern kitchens. This powerful unit is designed to provide effective ventilation while elevating the aesthetic of your cooking space.One of the main features of the Broan RM503004 is its sleek design. With a stainless steel finish, it offers a contemporary look that complements various kitchen styles, from traditional to modern. Its under-cabinet mount fits seamlessly into your kitchen cabinetry, making it a discreet yet functional addition.
In terms of performance, the RM503004 boasts a 250 CFM blower. This powerful fan is effective in removing smoke, steam, and odors from your kitchen, ensuring a fresh cooking environment. The two-speed settings provide flexibility in ventilation power, allowing users to adjust airflow according to their cooking needs. Whether frying, sautéing, or simmering, the range hood has the capability to tackle various cooking scenarios effectively.
The RM503004 comes equipped with easy-to-clean aluminum mesh filters that capture grease and other particulates, preventing them from entering the kitchen air. These filters are dishwasher-safe, making maintenance a breeze and ensuring that your range hood remains efficient over time.
Another notable technology embedded in the Broan RM503004 is the integrated lighting system. It features bright, energy-efficient LED lights that illuminate your cooking surface. This not only enhances visibility while cooking but also adds a warm ambiance to the kitchen space.
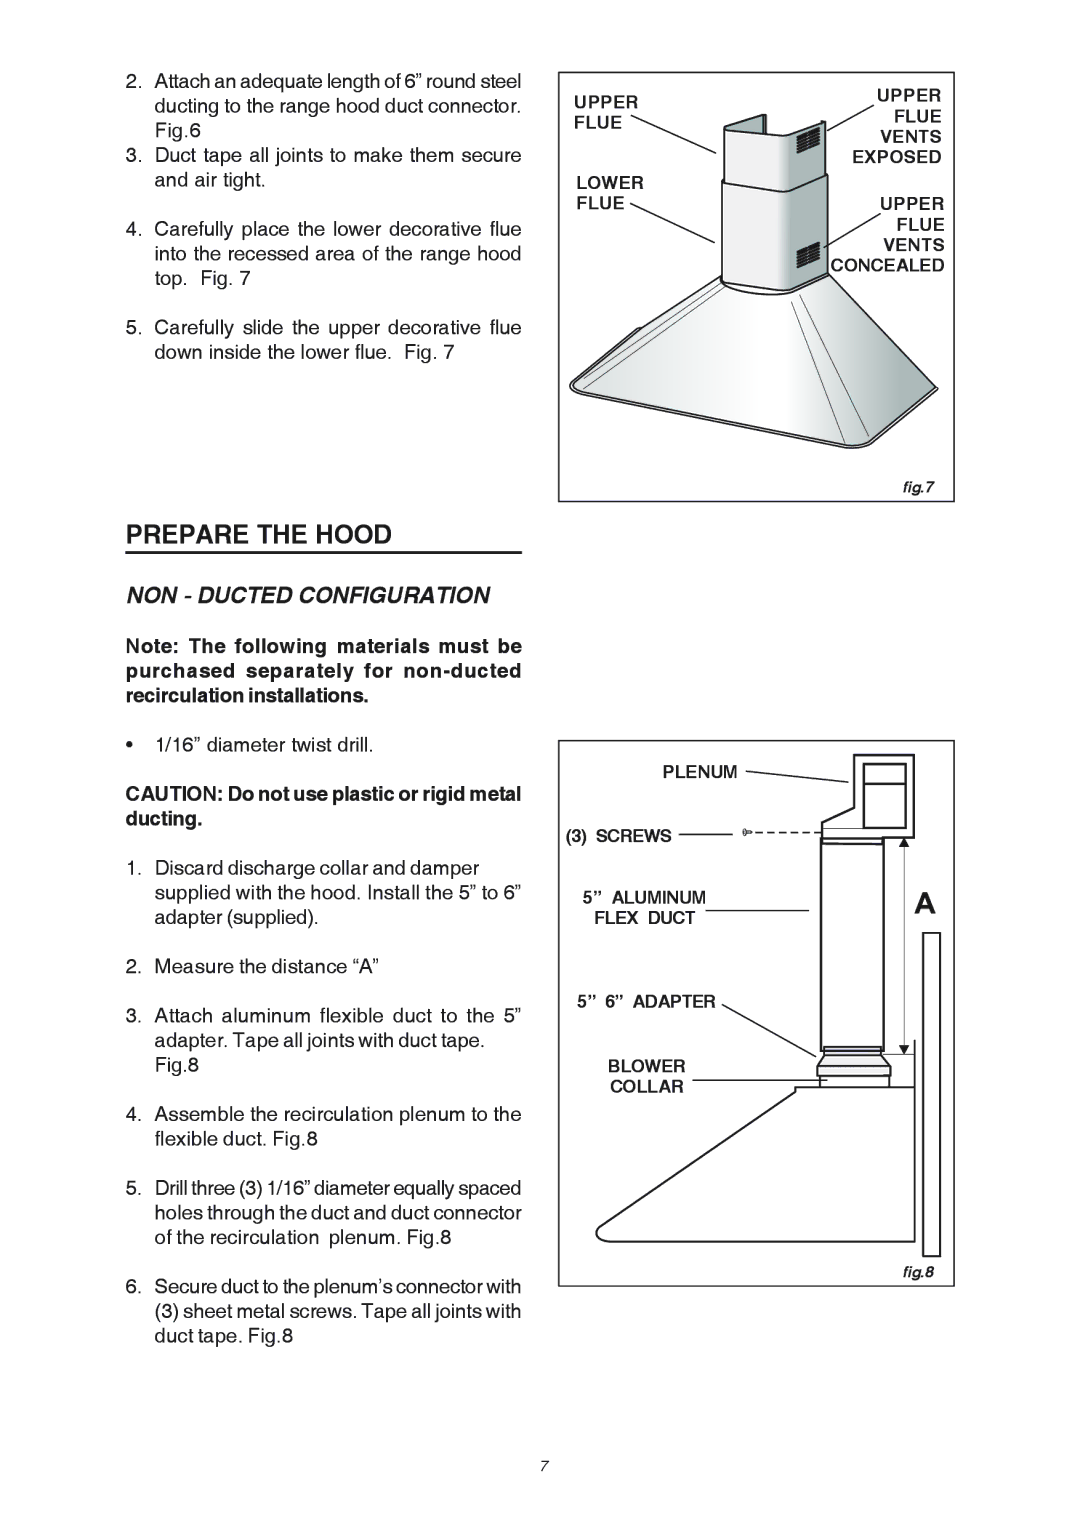
Installation is straightforward, as the range hood comes with a comprehensive installation guide that assists homeowners and professionals alike. It's designed for ducted or ductless operation, depending on your kitchen setup, which adds to its versatility.
In summary, the Broan RM503004 is a stylish, efficient, and user-friendly range hood. Its blend of performance features, including a powerful blower, energy-efficient lighting, and easy maintenance, makes it a standout choice for anyone looking to enhance their kitchen environment. Whether you are a home chef or a casual cook, this range hood provides the ventilation needed to keep your kitchen fresh and inviting.