Macintosh Setup
Print Server Configuration
It is recommended that you connect the print server directly to your Apple computer using a cross over Ethernet Cable or connect the Apple computer and the print server to a hub or switch, to perform the initial configuration. The print server will attempt to obtain an IP address from a DHCP server if one is available, otherwise the print server will default to an IP address of 192.168.11.222. If a DHCP server is available you will have to check the server’s logs to determine which IP address the print server received.
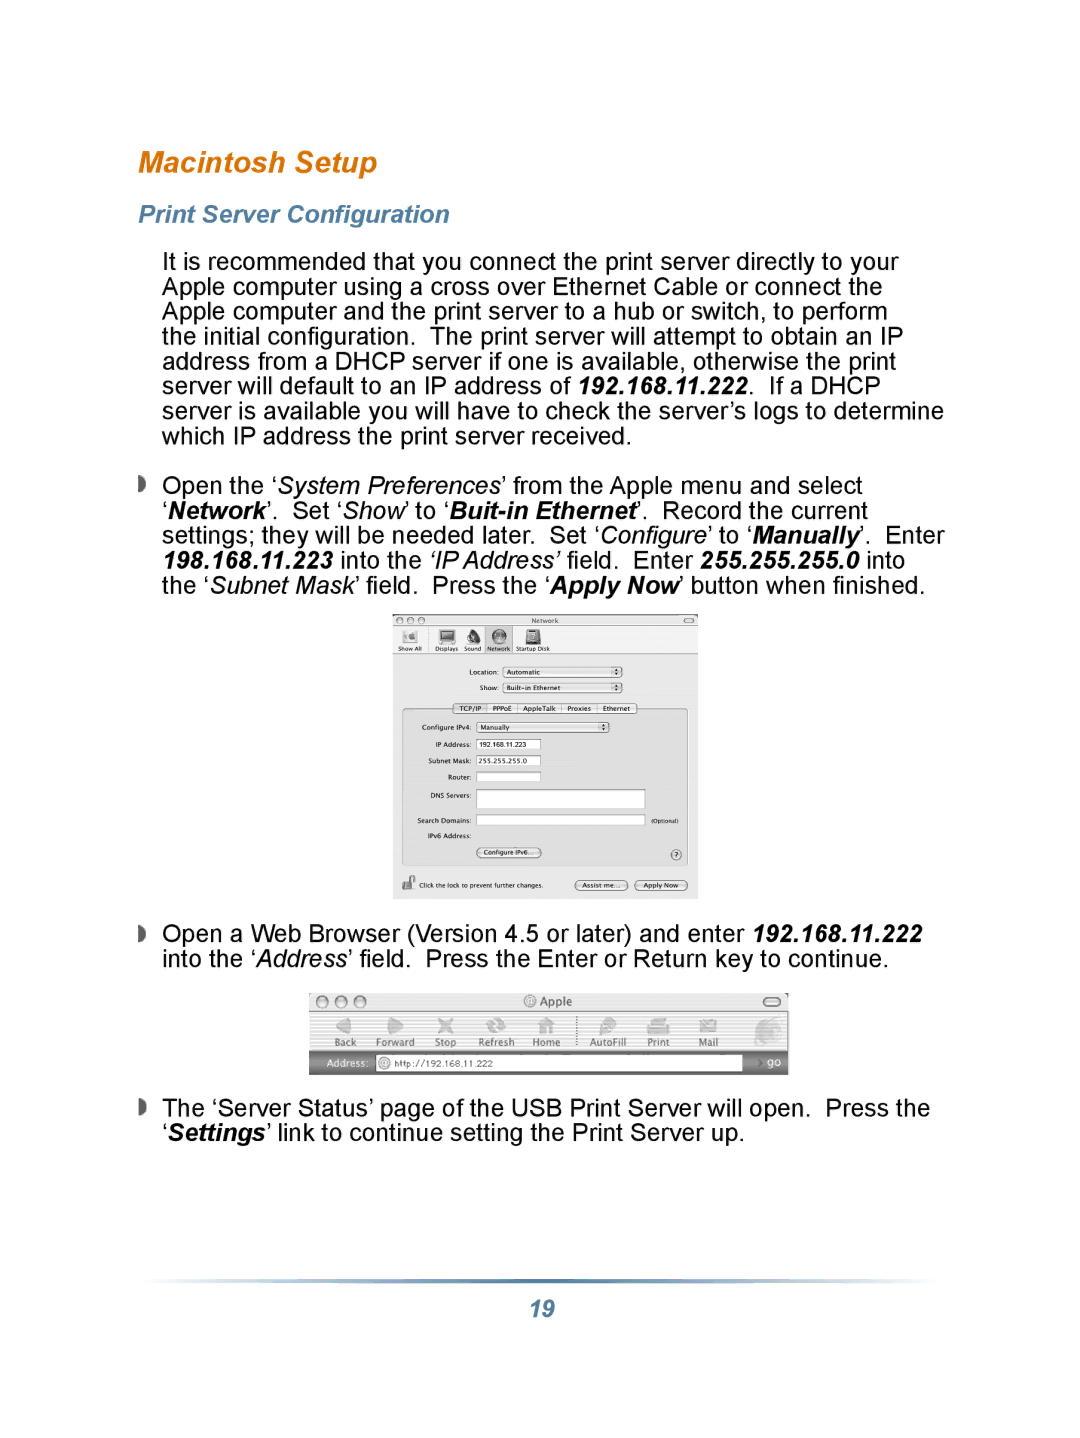
Open the ‘System Preferences’ from the Apple menu and select ‘Network’. Set ‘Show’ to
Open a Web Browser (Version 4.5 or later) and enter 192.168.11.222 into the ‘Address’ field. Press the Enter or Return key to continue.
The ‘Server Status’ page of the USB Print Server will open. Press the ‘Settings’ link to continue setting the Print Server up.
19