PLUMBING REQUIREMENTS - ALL EXCEPT OHW
This dispenser must be connected to a cold water system with operating pressure between 20 and 90 psi (138 and 620 kPa)from a ½˝ or larger supply line. A
NOTE -
As directed in the International Plumbing Code of the International Code Council and the Food Code Manual of the Food and Drug Administration (FDA), this equipment must be installed with adequate backflow prevention to comply with federal, state and local codes. For models installed outside the U.S.A., you must comply with the applicable Plumbing /Sanitation Code for your area.
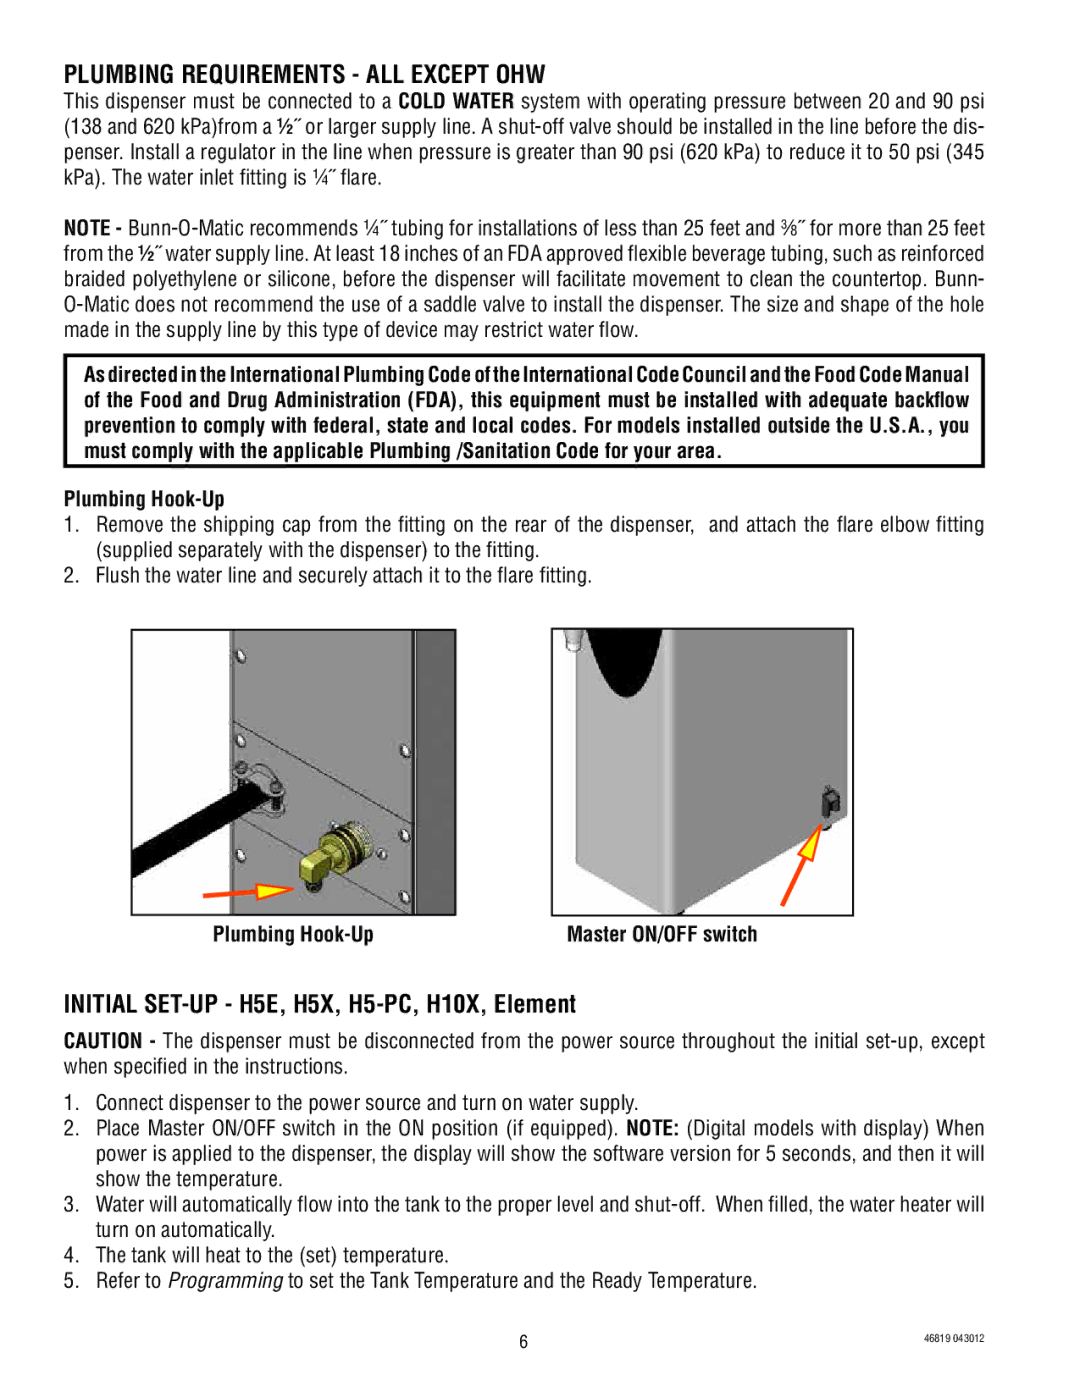
Plumbing Hook-Up
1.Remove the shipping cap from the fitting on the rear of the dispenser, and attach the flare elbow fitting (supplied separately with the dispenser) to the fitting.
2.Flush the water line and securely attach it to the flare fitting.
Plumbing | Master ON/OFF switch |
INITIAL SET-UP - H5E, H5X, H5-PC, H10X, Element
CAUTION - The dispenser must be disconnected from the power source throughout the initial
1.Connect dispenser to the power source and turn on water supply.
2.Place Master ON/OFF switch in the ON position (if equipped). NOTE: (Digital models with display) When power is applied to the dispenser, the display will show the software version for 5 seconds, and then it will show the temperature.
3.Water will automatically flow into the tank to the proper level and
4.The tank will heat to the (set) temperature.
5.Refer to Programming to set the Tank Temperature and the Ready Temperature.
6 | 46819 043012 |
|