PROGRAMMING - H5-E, H5-PC, H5X, H10X
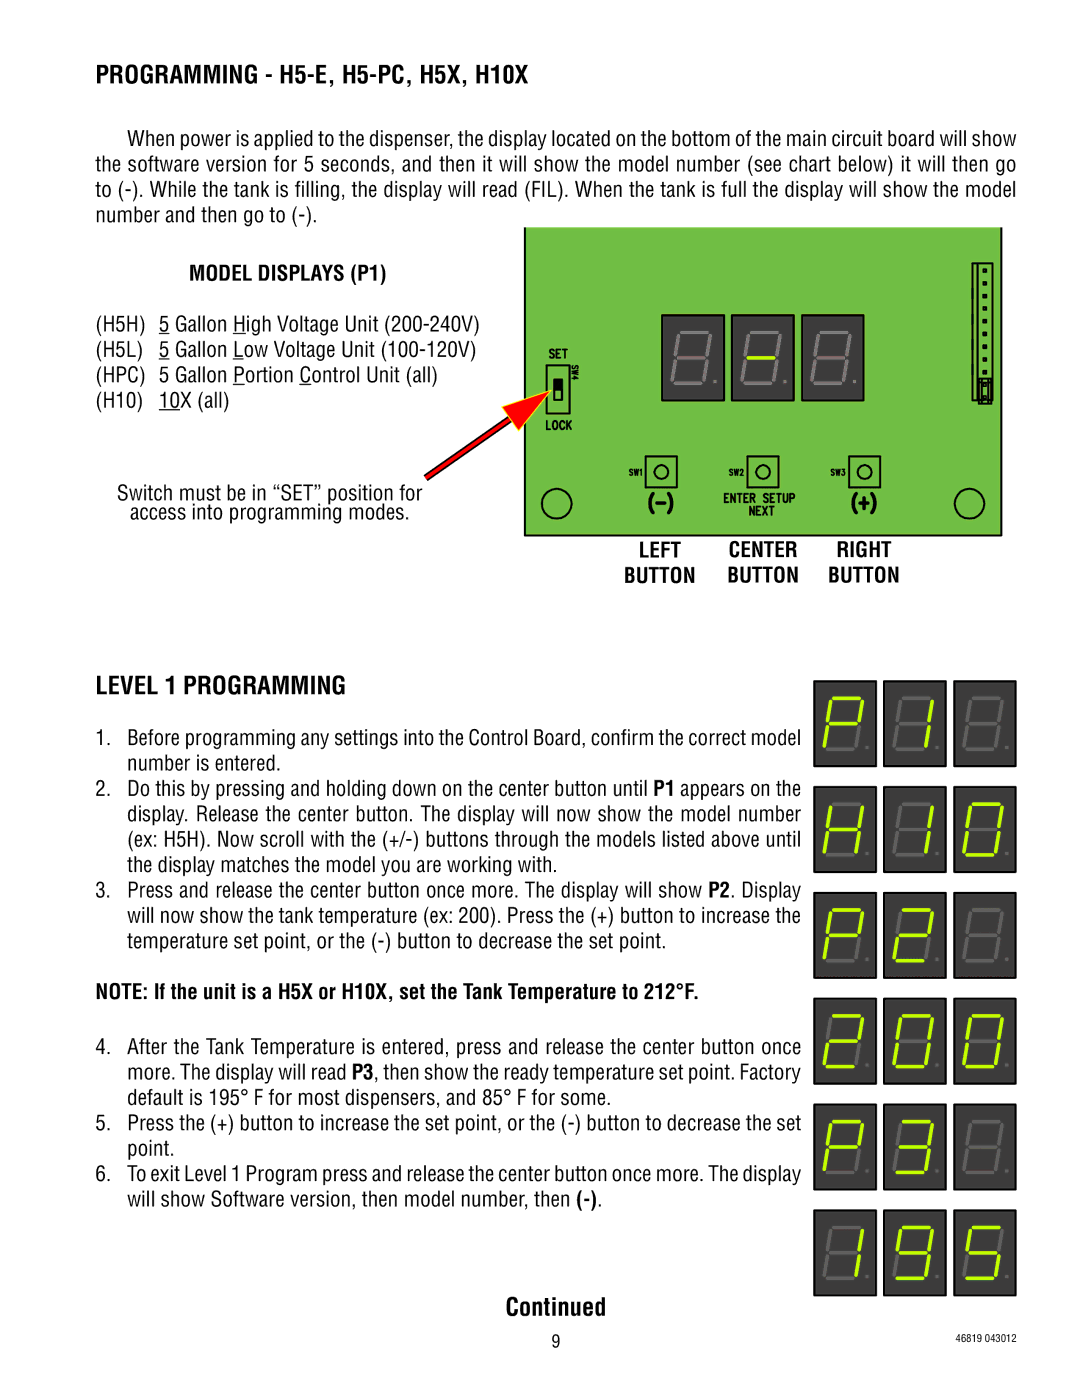
When power is applied to the dispenser, the display located on the bottom of the main circuit board will show the software version for 5 seconds, and then it will show the model number (see chart below) it will then go to
MODEL DISPLAYS (P1)
(H5H) 5 Gallon High Voltage Unit
(H10) 10X (all)
Switch must be in “SET” position for access into programming modes.
LEFT CENTER RIGHT
BUTTON BUTTON BUTTON
LEVEL 1 PROGRAMMING
1. Before programming any settings into the Control Board, confirm the correct model number is entered.
2. Do this by pressing and holding down on the center button until P1 appears on the display. Release the center button. The display will now show the model number (ex: H5H). Now scroll with the
3. Press and release the center button once more. The display will show P2. Display will now show the tank temperature (ex: 200). Press the (+) button to increase the temperature set point, or the
NOTE: If the unit is a H5X or H10X, set the Tank Temperature to 212°F.
4. After the Tank Temperature is entered, press and release the center button once more. The display will read P3, then show the ready temperature set point. Factory default is 195° F for most dispensers, and 85° F for some.
5. Press the (+) button to increase the set point, or the
6. To exit Level 1 Program press and release the center button once more. The display will show Software version, then model number, then
Continued
9 | 46819 043012 |
|
