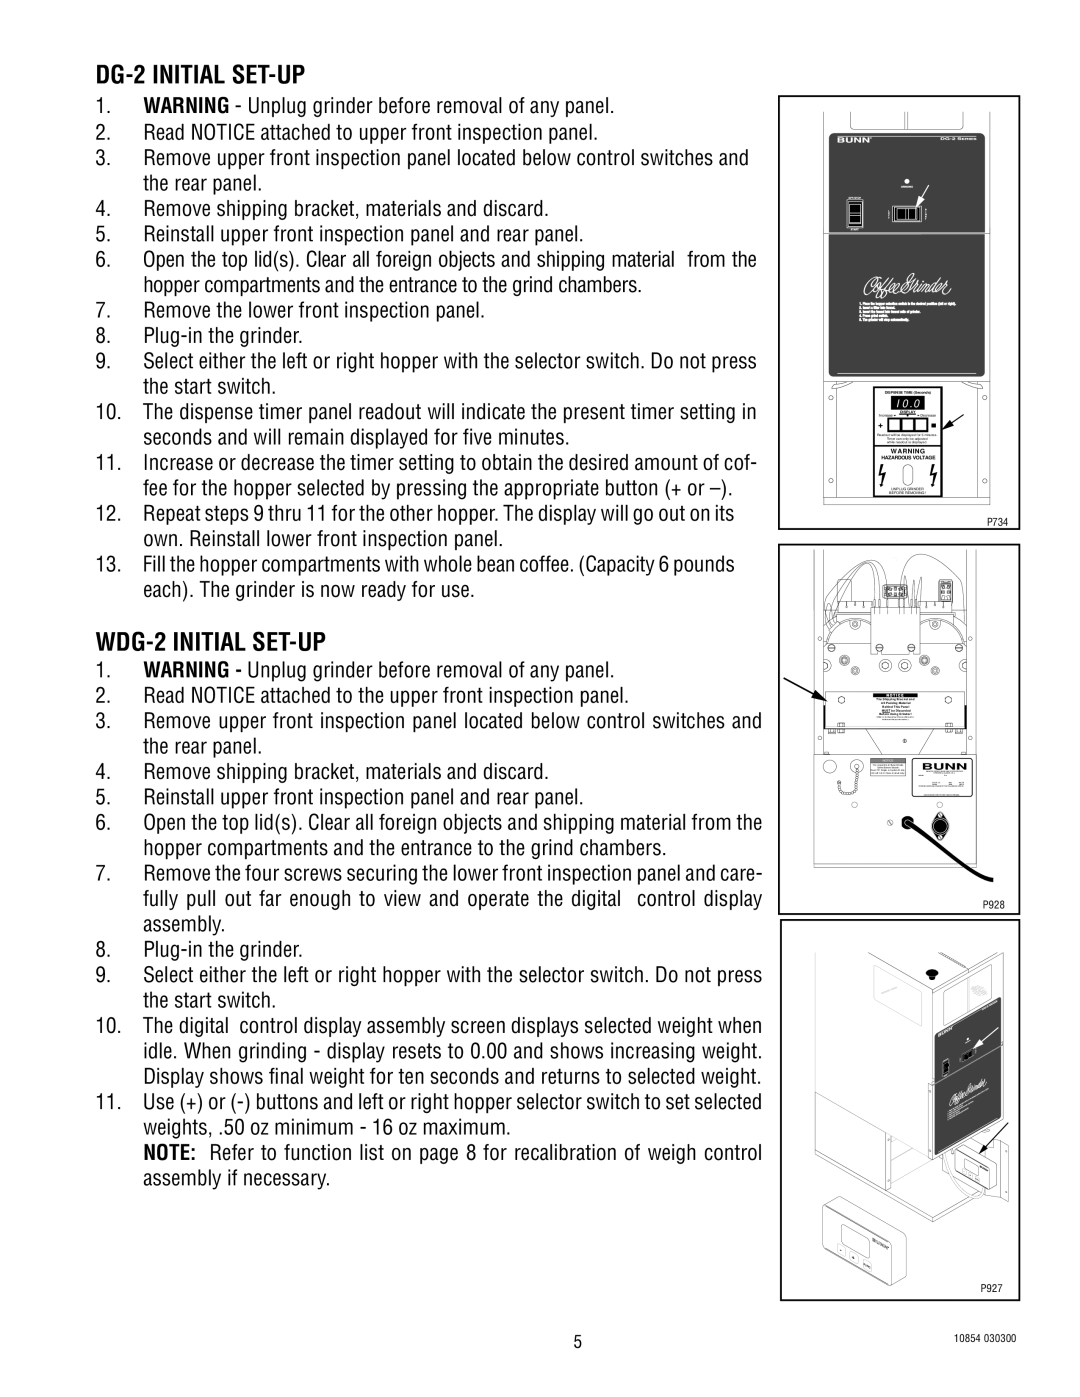
DG-2 INITIAL SET-UP
1.WARNING - Unplug grinder before removal of any panel.
2.Read NOTICE attached to upper front inspection panel.
3.Remove upper front inspection panel located below control switches and the rear panel.
4.Remove shipping bracket, materials and discard.
5.Reinstall upper front inspection panel and rear panel.
6.Open the top lid(s). Clear all foreign objects and shipping material from the hopper compartments and the entrance to the grind chambers.
7.Remove the lower front inspection panel.
8.
9.Select either the left or right hopper with the selector switch. Do not press the start switch.
10.The dispense timer panel readout will indicate the present timer setting in seconds and will remain displayed for five minutes.
11.Increase or decrease the timer setting to obtain the desired amount of cof- fee for the hopper selected by pressing the appropriate button (+ or
12.Repeat steps 9 thru 11 for the other hopper. The display will go out on its own. Reinstall lower front inspection panel.
13.Fill the hopper compartments with whole bean coffee. (Capacity 6 pounds each). The grinder is now ready for use.
WDG-2 INITIAL SET-UP
1.WARNING - Unplug grinder before removal of any panel.
2.Read NOTICE attached to the upper front inspection panel.
3.Remove upper front inspection panel located below control switches and the rear panel.
4.Remove shipping bracket, materials and discard.
5.Reinstall upper front inspection panel and rear panel.
6.Open the top lid(s). Clear all foreign objects and shipping material from the hopper compartments and the entrance to the grind chambers.
7.Remove the four screws securing the lower front inspection panel and care- fully pull out far enough to view and operate the digital control display assembly.
8.
9.Select either the left or right hopper with the selector switch. Do not press the start switch.
10.The digital control display assembly screen displays selected weight when idle. When grinding - display resets to 0.00 and shows increasing weight. Display shows final weight for ten seconds and returns to selected weight.
11.Use (+) or
NOTE: Refer to function list on page 8 for recalibration of weigh control assembly if necessary.
5
DISPENSE TIME (Seconds)
I 0.0
| DISPLAY |
Increase | Decrease |
+ |
|
Readout will be displayed for 5 minutes.
Timer can only be adjusted while readout is displayed.
WARNING
HAZARDOUS VOLTAGE
UNPLUG GRINDER
BEFORE REMOVING!
| P734 |
N O T I C E |
|
The Shipping Bracket and |
|
All Packing Material |
|
Behind This Panel |
|
MUST be Discarded |
|
Before Using Grinder! |
|
NOTICE | BUNN |
For connection to | |
Coffee Brewer Models: | |
Dual, OT, Single, & System III only. | |
(24 volt N.E.C. Class 2 circuit only.) |
|
P928 |
- |
+ |
FUNC |
- |
+ |
FU |
NC |
P927 |
P927 |
10854 030300 |
