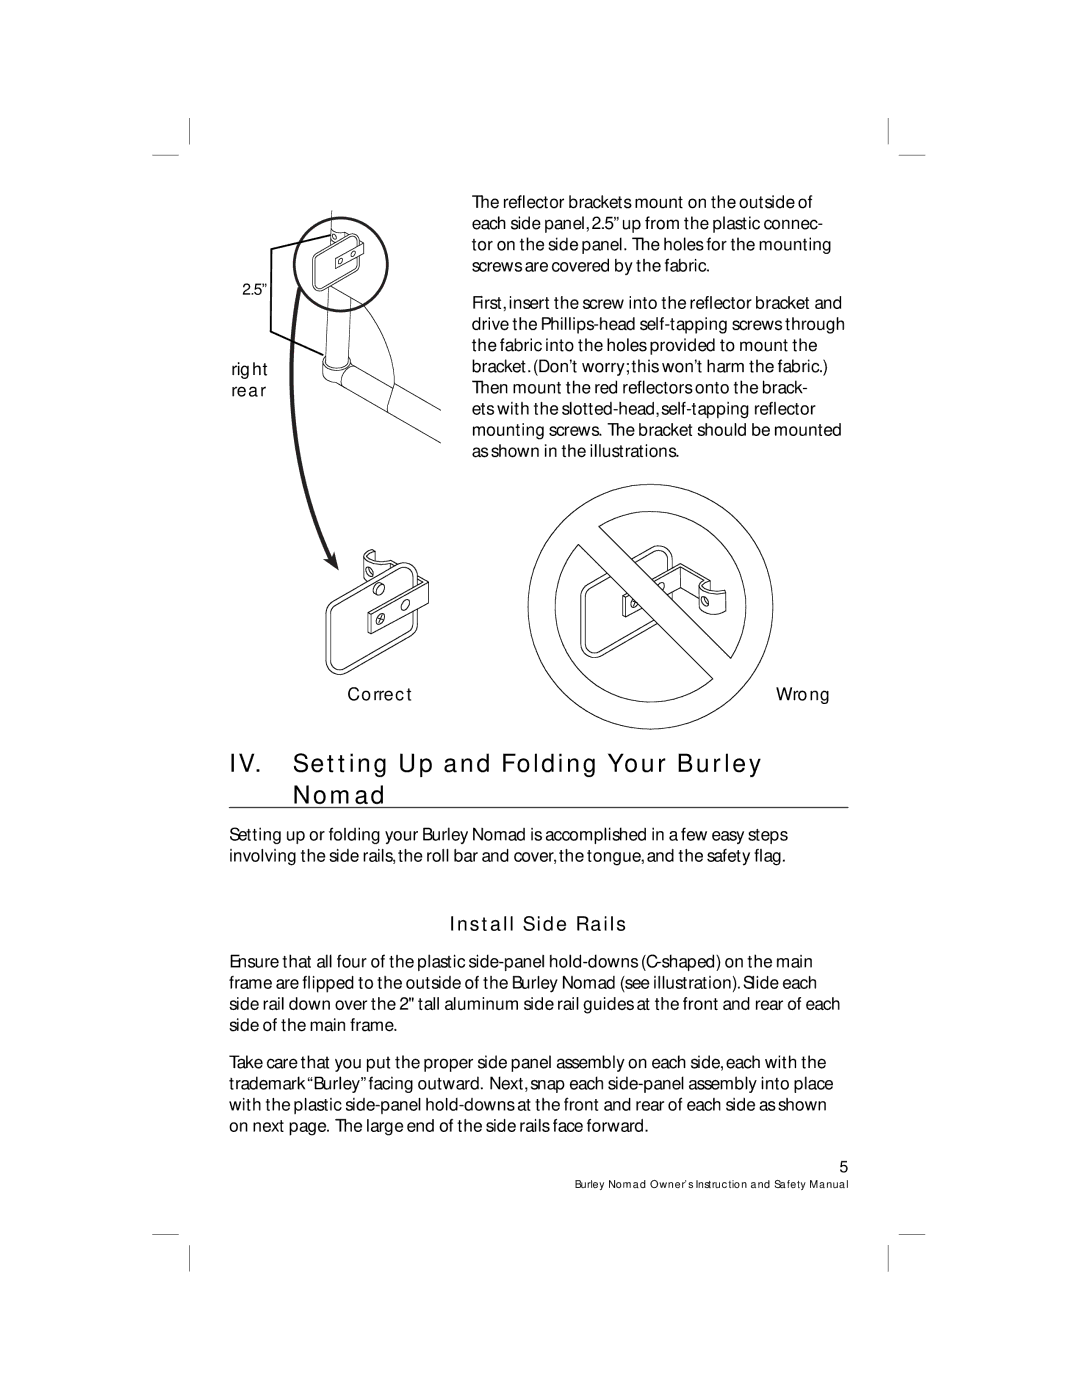
2.5”

right rear

The reflector brackets mount on the outside of each side panel, 2.5” up from the plastic connec- tor on the side panel. The holes for the mounting screws are covered by the fabric.

First, insert the screw into the reflector bracket and drive the Phillips-head self-tapping screws through the fabric into the holes provided to mount the bracket. (Don’t worry; this won’t harm the fabric.) Then mount the red reflectors onto the brack-

ets with the slotted-head, self-tapping reflector mounting screws. The bracket should be mounted as shown in the illustrations.

Correct

Wrong

IV. Setting Up and Folding Your Burley Nomad

Setting up or folding your Burley Nomad is accomplished in a few easy steps involving the side rails, the roll bar and cover, the tongue, and the safety flag.

Install Side Rails

Ensure that all four of the plastic side-panel hold-downs (C-shaped) on the main frame are flipped to the outside of the Burley Nomad (see illustration). Slide each side rail down over the 2" tall aluminum side rail guides at the front and rear of each side of the main frame.

Take care that you put the proper side panel assembly on each side, each with the trademark “Burley” facing outward. Next, snap each side-panel assembly into place with the plastic side-panel hold-downs at the front and rear of each side as shown on next page. The large end of the side rails face forward.

5

Burley Nomad Owner’s Instruction and Safety Manual

Page 5
Image 5
Burley HP 4489 warranty IV. Setting Up and Folding Your Burley Nomad, Install Side Rails