Install Tongue
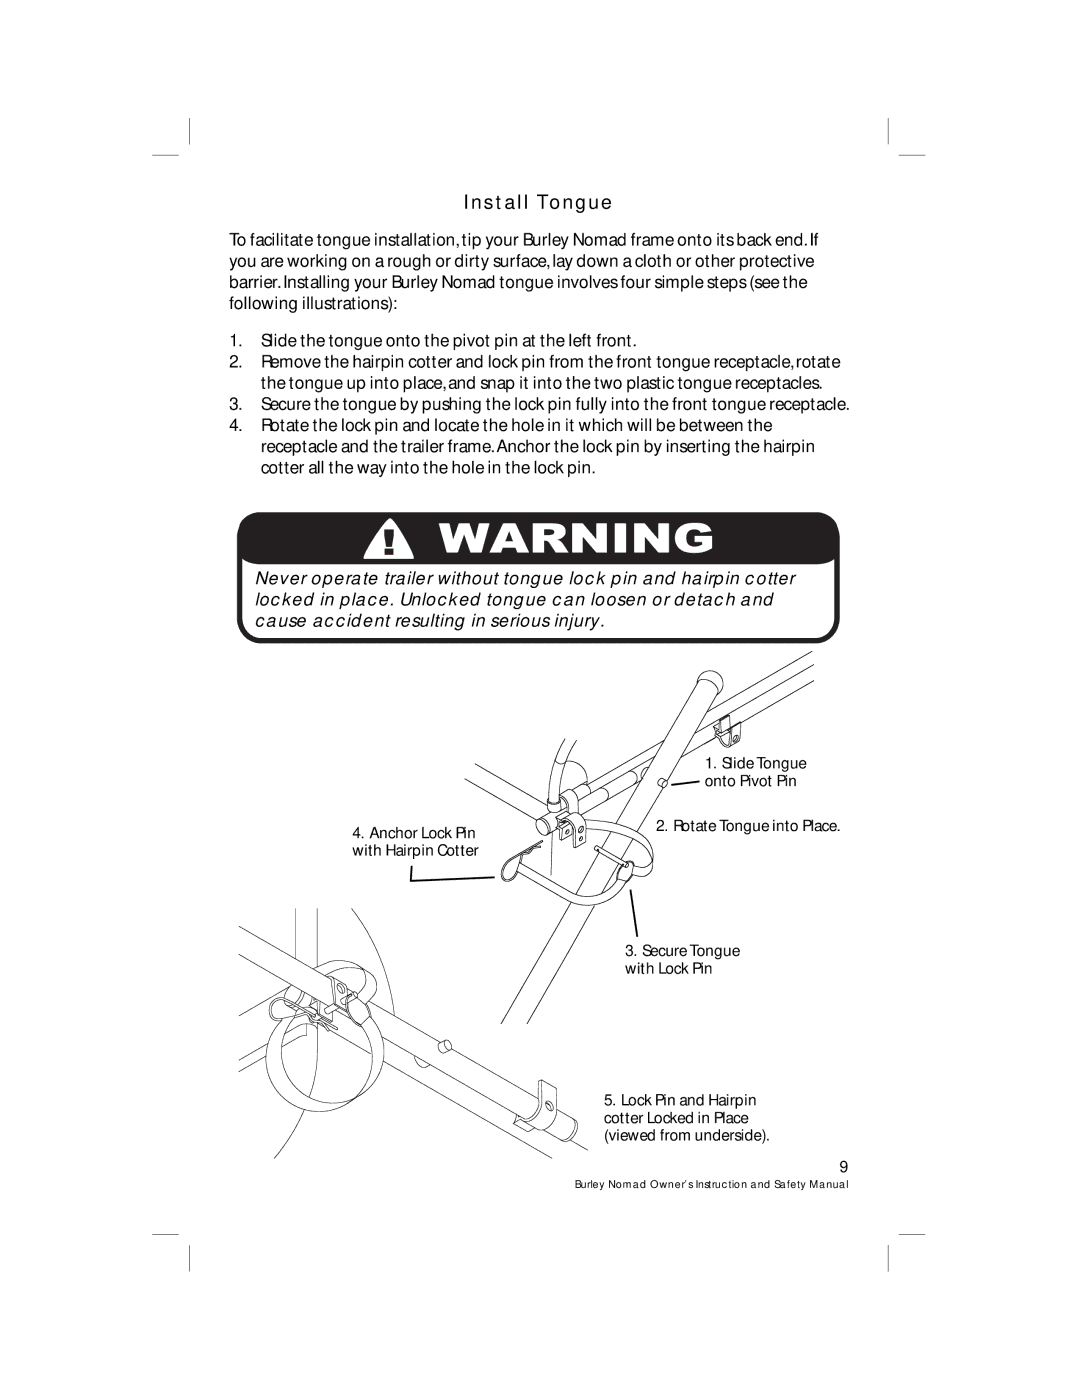
To facilitate tongue installation, tip your Burley Nomad frame onto its back end. If you are working on a rough or dirty surface, lay down a cloth or other protective barrier. Installing your Burley Nomad tongue involves four simple steps (see the following illustrations):
1.Slide the tongue onto the pivot pin at the left front.
2.Remove the hairpin cotter and lock pin from the front tongue receptacle, rotate the tongue up into place, and snap it into the two plastic tongue receptacles.
3.Secure the tongue by pushing the lock pin fully into the front tongue receptacle.
4.Rotate the lock pin and locate the hole in it which will be between the receptacle and the trailer frame. Anchor the lock pin by inserting the hairpin cotter all the way into the hole in the lock pin.
Never operate trailer without tongue lock pin and hairpin cotter locked in place. Unlocked tongue can loosen or detach and cause accident resulting in serious injury.
4.Anchor Lock Pin with Hairpin Cotter
1. Slide Tongue ![]()
![]()
![]()
![]() onto Pivot Pin
onto Pivot Pin
2. Rotate Tongue into Place.
3.Secure Tongue with Lock Pin
5. Lock Pin and Hairpin cotter Locked in Place (viewed from underside).
9
