Always check the handle attachment before using. Be sure that handle is properly installed with buttons protruding in the locked position. Failure to do this could lead to loosening of handle, loss of control, and serious injury.
V. Mount Wheel Pivot Assembly
Parts Included for the Pivot wheel Assembly Attachment:
(1) | 1/4 x 2” hex bolt | (1) Pivot Wheel Assembly |
(3) | 1/4” locking nuts | (3) 1/4 x 1” hex bolts |
(3) | 5/8” washers |
|
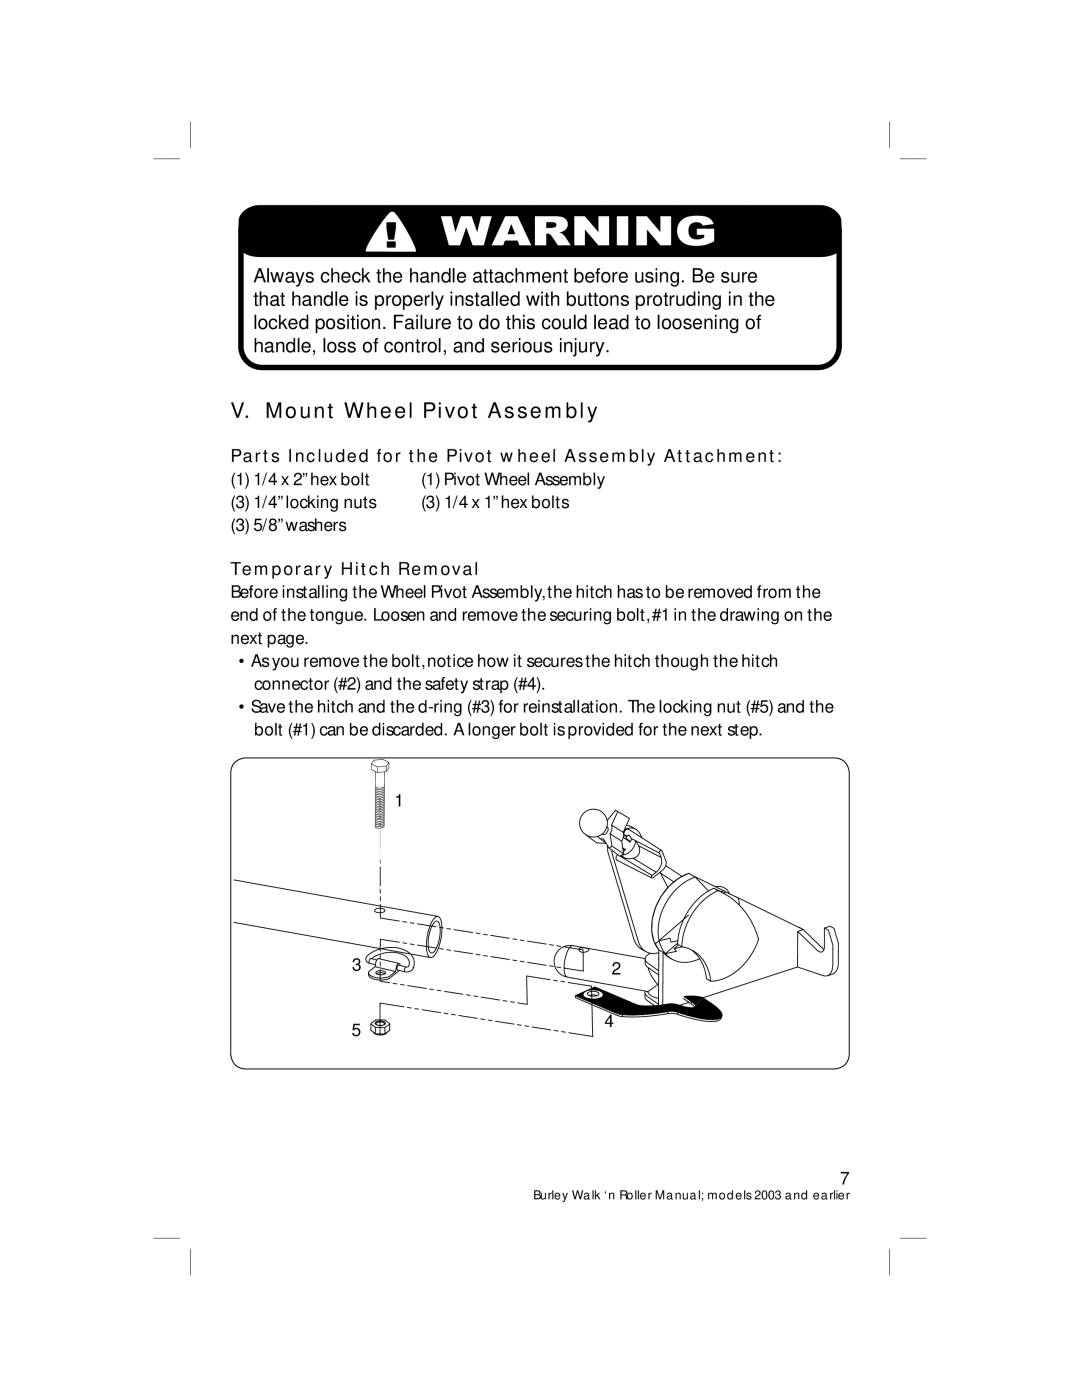
Temporary Hitch Removal
Before installing the Wheel Pivot Assembly, the hitch has to be removed from the end of the tongue. Loosen and remove the securing bolt, #1 in the drawing on the next page.
•As you remove the bolt, notice how it secures the hitch though the hitch connector (#2) and the safety strap (#4).
•Save the hitch and the
1
32
5 | 4 |
|
7