DVD player setup
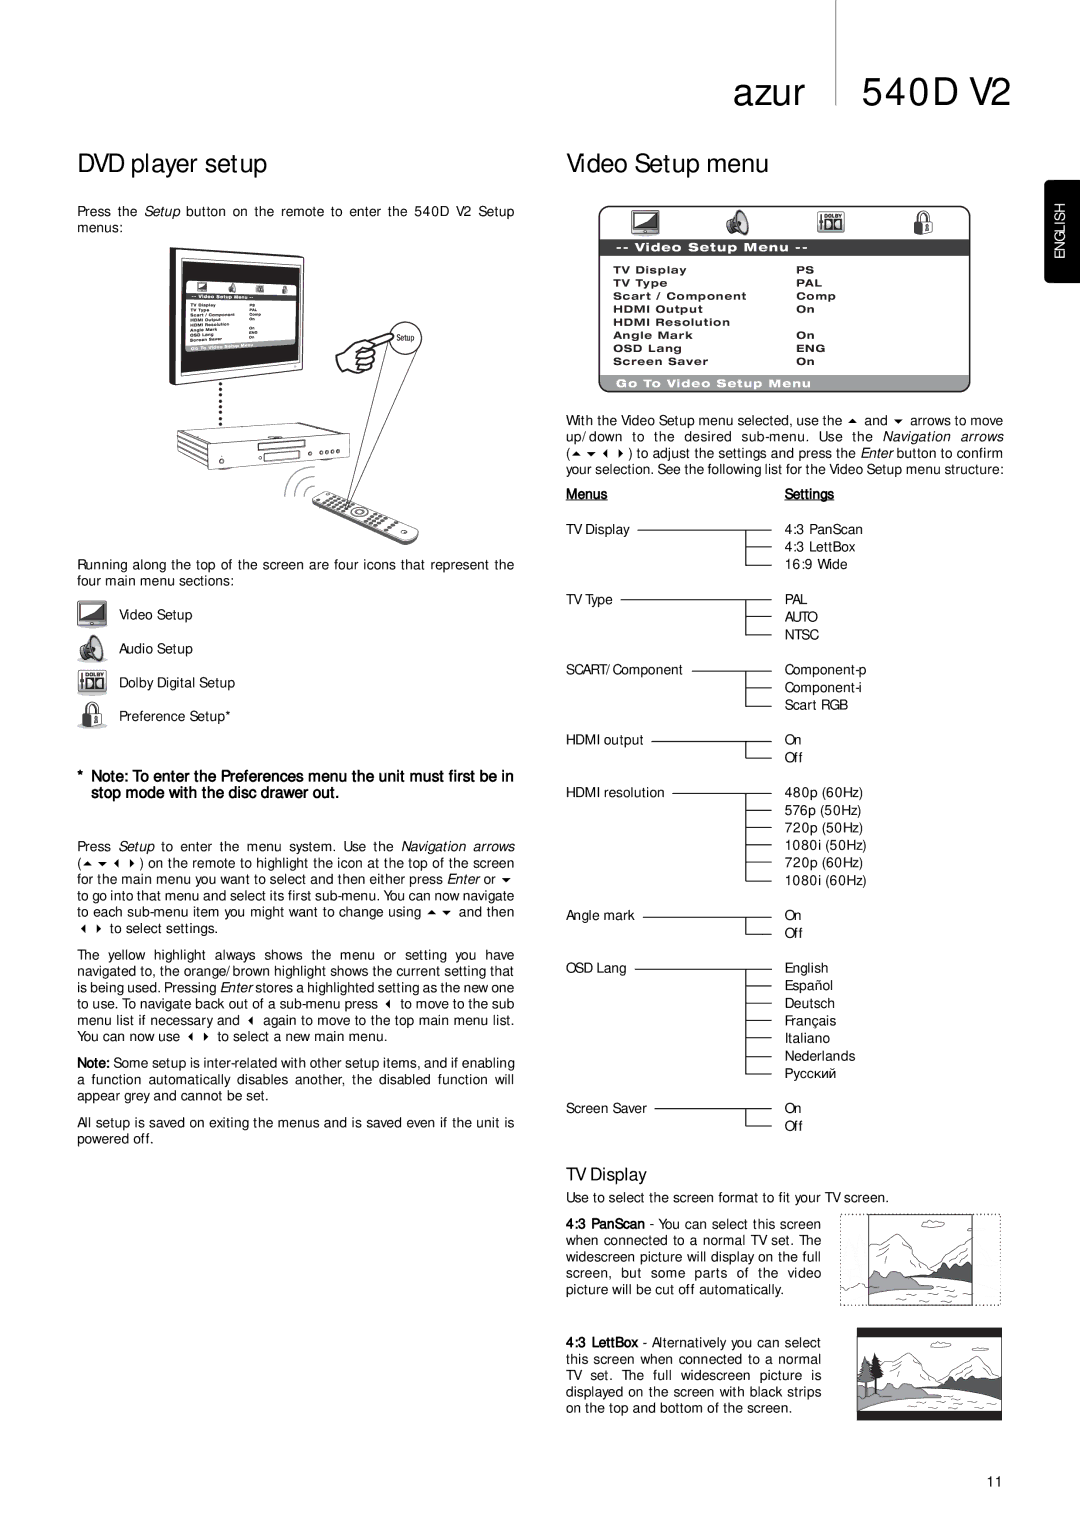
Press the Setup button on the remote to enter the 540D V2 Setup menus:
![]() Setup
Setup
Running along the top of the screen are four icons that represent the four main menu sections:
Video Setup
Audio Setup
Dolby Digital Setup
Preference Setup*
azur 540D V2
Video Setup menu
-- Video Setup Menu --
TV Display | PS |
TV Type | PAL |
Scart / Component | Comp |
HDMI Output | On |
HDMI Resolution |
|
Angle Mark | On |
OSD Lang | ENG |
Screen Saver | On |
Go To Video Setup Menu |
| |
With the Video Setup menu selected, use the | and arrows to move | |
up/down | to the desired | the Navigation arrows |
( | ) to adjust the settings and press the Enter button to confirm | |
your selection. See the following list for the Video Setup menu structure:
Menus | Settings | ||||
TV Display |
|
|
| 4:3 PanScan | |
|
|
| |||
|
|
|
|
| 4:3 LettBox |
|
|
|
|
| |
|
|
|
|
| 16:9 Wide |
|
|
|
|
| |
TV Type |
|
| PAL | ||
|
|
| |||
|
|
|
|
| AUTO |
|
|
|
|
| |
|
|
|
|
| NTSC |
|
|
|
|
| |
SCART/Component |
| ||||
|
| ||||
|
|
|
|
| |
|
|
|
|
| |
|
|
|
|
| Scart RGB |
|
|
|
|
| |
ENGLISH
*Note: To enter the Preferences menu the unit must first be in stop mode with the disc drawer out.
Press Setup to enter the menu system. Use the Navigation arrows
( ) on the remote to highlight the icon at the top of the screen for the main menu you want to select and then either press Enter or to go into that menu and select its first
HDMI output
HDMI resolution
On
Off
480p (60Hz)
576p (50Hz)
720p (50Hz)
1080i (50Hz)
720p (60Hz)
1080i (60Hz)
to each | and then |
to select settings. |
|
The yellow highlight always shows the menu or setting you have navigated to, the orange/brown highlight shows the current setting that is being used. Pressing Enter stores a highlighted setting as the new one to use. To navigate back out of a
You can now use | to select a new main menu. |
Note: Some setup is
All setup is saved on exiting the menus and is saved even if the unit is powered off.
Angle mark |
|
|
|
| On | |
|
|
|
|
|
| Off |
|
|
|
|
| ||
OSD Lang |
|
| English | |||
|
|
| ||||
|
|
|
|
|
| Español |
|
|
|
|
|
| |
|
|
|
|
|
| Deutsch |
|
|
|
|
|
| |
|
|
|
|
|
| Français |
|
|
|
|
|
| |
|
|
|
|
|
| Italiano |
|
|
|
|
|
| |
|
|
|
|
|
| Nederlands |
|
|
|
|
|
| |
|
|
|
|
|
| Русский |
|
|
|
|
| ||
Screen Saver |
|
|
| On | ||
|
| |||||
|
|
|
|
|
| Off |
|
|
|
|
| ||
TV Display
Use to select the screen format to fit your TV screen.
4:3 PanScan - You can select this screen when connected to a normal TV set. The widescreen picture will display on the full screen, but some parts of the video picture will be cut off automatically.
4:3 LettBox - Alternatively you can select this screen when connected to a normal TV set. The full widescreen picture is displayed on the screen with black strips on the top and bottom of the screen.
11
