SPEAKER MOUNTING
Method 2 – Use this method to mount the speaker vertically when you have less that 21" clearance above the top of the speaker bracket. Always use method #1 when mounting the speaker horizontally, and whenever at least 21" clearance is available.
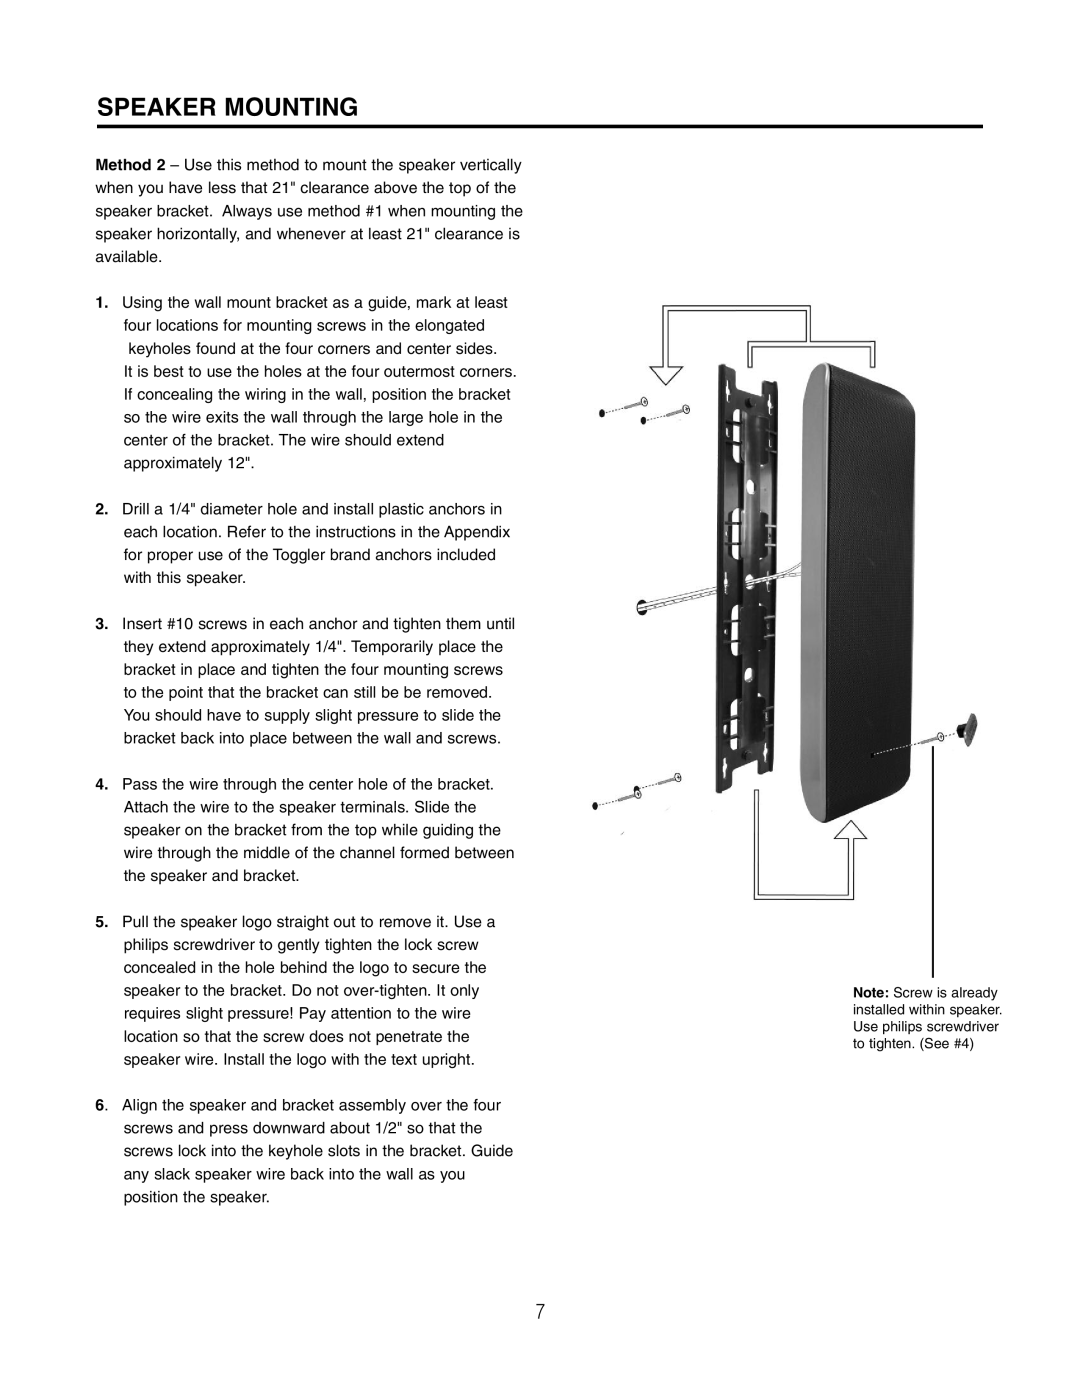
1.Using the wall mount bracket as a guide, mark at least four locations for mounting screws in the elongated keyholes found at the four corners and center sides.
It is best to use the holes at the four outermost corners. If concealing the wiring in the wall, position the bracket so the wire exits the wall through the large hole in the center of the bracket. The wire should extend approximately 12".
2.Drill a 1/4" diameter hole and install plastic anchors in each location. Refer to the instructions in the Appendix for proper use of the Toggler brand anchors included with this speaker.
3.Insert #10 screws in each anchor and tighten them until they extend approximately 1/4". Temporarily place the bracket in place and tighten the four mounting screws to the point that the bracket can still be be removed. You should have to supply slight pressure to slide the bracket back into place between the wall and screws.
4.Pass the wire through the center hole of the bracket. Attach the wire to the speaker terminals. Slide the speaker on the bracket from the top while guiding the wire through the middle of the channel formed between the speaker and bracket.
5.Pull the speaker logo straight out to remove it. Use a philips screwdriver to gently tighten the lock screw concealed in the hole behind the logo to secure the speaker to the bracket. Do not
6.
Note: Screw is already installed within speaker. Use philips screwdriver to tighten. (See #4)
7
