Attach the earlobe sensor before operating the unit.
3Changing the setting
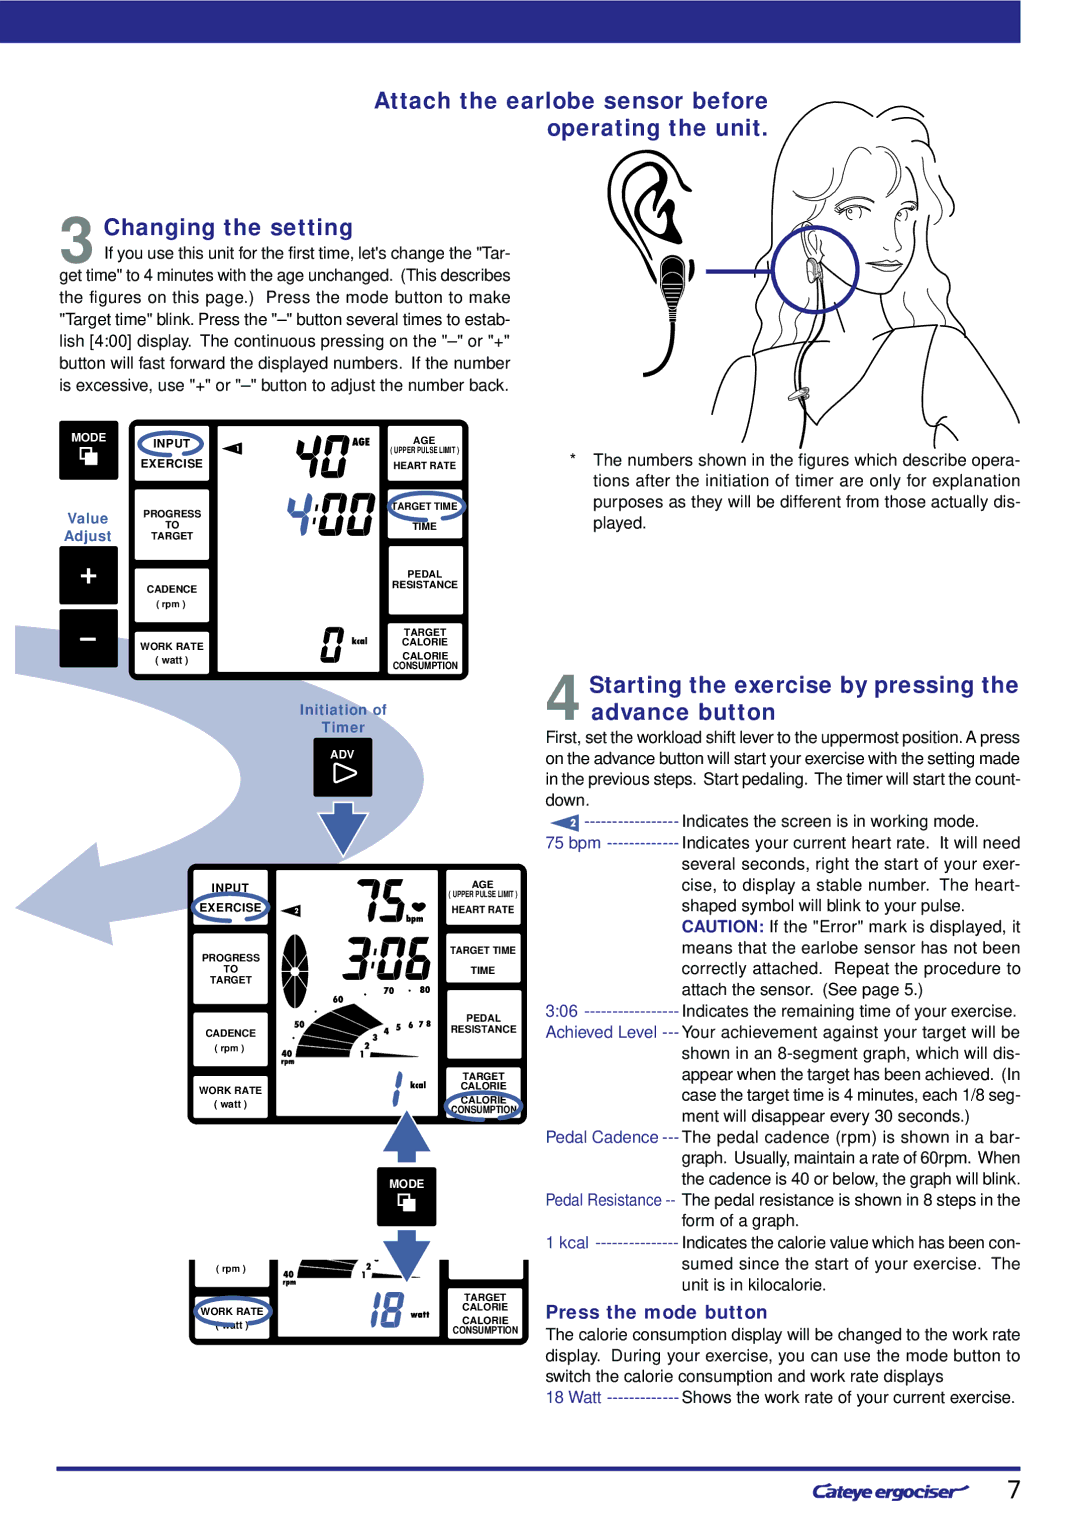
If you use this unit for the first time, let's change the "Tar- get time" to 4 minutes with the age unchanged. (This describes the figures on this page.) Press the mode button to make "Target time" blink. Press the
MODE INPUT
EXERCISE
Value PROGRESS TO
Adjust TARGET
CADENCE
( rpm )
WORK RATE
( watt )
AGE
( UPPER PULSE LIMIT )
HEART RATE
TARGET TIME
TIME
PEDAL
RESISTANCE
TARGET
CALORIE
CALORIE
CONSUMPTION
*The numbers shown in the figures which describe opera- tions after the initiation of timer are only for explanation purposes as they will be different from those actually dis- played.
Initiation of
Timer
ADV
INPUT
EXERCISE
PROGRESS
TO
TARGET
CADENCE
( rpm )
WORK RATE
( watt )
AGE
( UPPER PULSE LIMIT )
HEART RATE
TARGET TIME
TIME
PEDAL
RESISTANCE
TARGET
CALORIE
CALORIE
CONSUMPTION
4Starting the exercise by pressing the advance button
First, set the workload shift lever to the uppermost position. A press on the advance button will start your exercise with the setting made in the previous steps. Start pedaling. The timer will start the count- down.
![]() -----------------
-----------------
75 bpm
several seconds, right the start of your exer- cise, to display a stable number. The heart- shaped symbol will blink to your pulse.
CAUTION: If the "Error" mark is displayed, it means that the earlobe sensor has not been correctly attached. Repeat the procedure to attach the sensor. (See page 5.)
3:06
Achieved Level
| MODE | |
( rpm ) |
| |
| TARGET | |
WORK RATE | CALORIE | |
CALORIE | ||
( watt ) | ||
CONSUMPTION | ||
|
Pedal Cadence
Pedal Resistance
1 kcal
sumed since the start of your exercise. The unit is in kilocalorie.
Press the mode button
The calorie consumption display will be changed to the work rate display. During your exercise, you can use the mode button to switch the calorie consumption and work rate displays
18 Watt
7
