REAR-FACING INSTALLATION
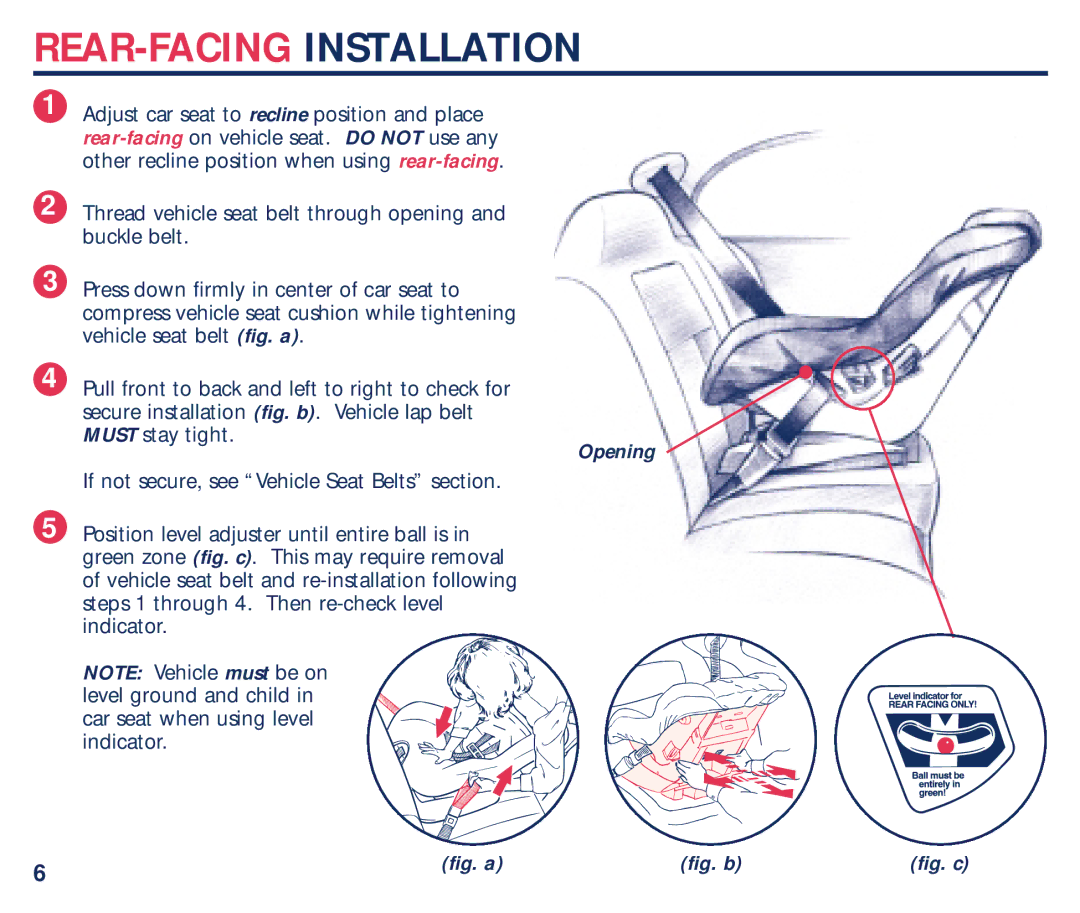
1Adjust car seat to recline position and place
2Thread vehicle seat belt through opening and buckle belt.
3Press down firmly in center of car seat to compress vehicle seat cushion while tightening vehicle seat belt (fig. a).
4Pull front to back and left to right to check for secure installation (fig. b). Vehicle lap belt MUST stay tight.
Opening
If not secure, see “Vehicle Seat Belts” section.
5Position level adjuster until entire ball is in green zone (fig. c). This may require removal of vehicle seat belt and
NOTE: Vehicle must be on level ground and child in car seat when using level indicator.
6 | (fig. a) | (fig. b) | (fig. c) |
|
|
|