
8200 1/2 HP specifications
The Chamberlain 8200 is a robust and efficient garage door opener that combines power, reliability, and advanced technology to provide homeowners with a seamless experience. With its 1/2 HP motor, this opener is designed to handle sectional doors weighing up to 500 pounds, making it suitable for a variety of garage doors.One of the standout features of the Chamberlain 8200 is its strong motor, which ensures smooth and quiet operation. This is particularly important for homeowners who have living spaces adjacent to the garage, as the reduced noise levels contribute to a more comfortable environment. The motor is also designed for durability and long-lasting performance, ensuring that it will consistently meet the needs of the user over time.
The Chamberlain 8200 comes equipped with the innovative MyQ technology, which enables users to control their garage door opener remotely via a smartphone app. This feature not only provides convenience but also enhances security, allowing homeowners to monitor and manage their garage door from anywhere. Whether you’re on vacation or simply at work, the ability to check the status of your garage door gives peace of mind.
Safety is another priority with the Chamberlain 8200, which includes features such as the patented Security+ 2.0 technology. This system ensures that your garage door opener transmits a new code every time the remote control is used, significantly reducing the risk of unauthorized access. Additionally, the opener is equipped with safety sensors that detect any obstructions in the door's path, preventing accidents or injuries.
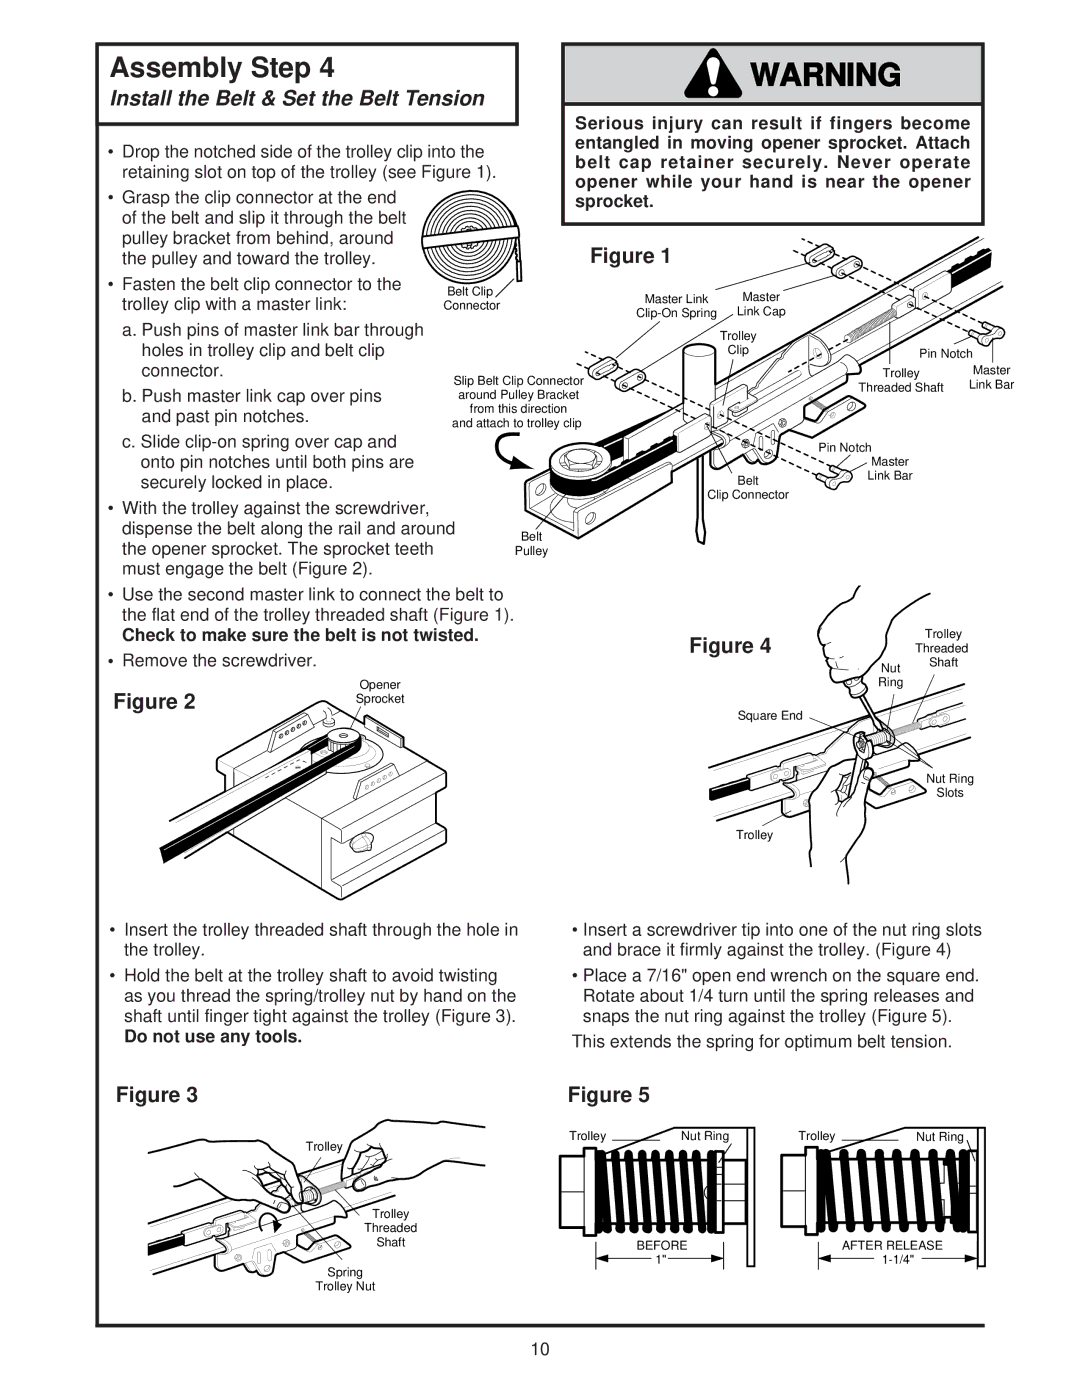
Installation of the Chamberlain 8200 is straightforward, thanks to its detailed instructions and user-friendly design. The unit is compatible with a variety of garage door types and can easily integrate with existing door systems.
Overall, the Chamberlain 8200 1/2 HP garage door opener stands out as a powerful, technologically advanced solution for homeowners seeking convenience and security. Its blend of performance, innovative features, and user-friendly design makes it a top choice for modern garage door automation. Whether you are looking to upgrade your current system or installing a new opener, the Chamberlain 8200 promises reliability and peace of mind.