Before Beginning Assembly
•Remove all contents from box. Lay cardboard on the ground when unpacking, assemble grill parts on the cardboard to avoid scratching surfaces.
•Carefully read and follow all assembly instructions, paying particular attention to parts orientation.
•Easily find fasteners by referring to each item (shown actual size) at the start of each step.
•Minimum tools...for assembly of your grill include screwdrivers (Phillips), adjustable wrench and pliers. A 3/8” nut driver would be ideal.
•You may fill your LP gas tank prior to assembly. The tank must also have the safety cap installed onto the tank when not in use, See Use & Care section.
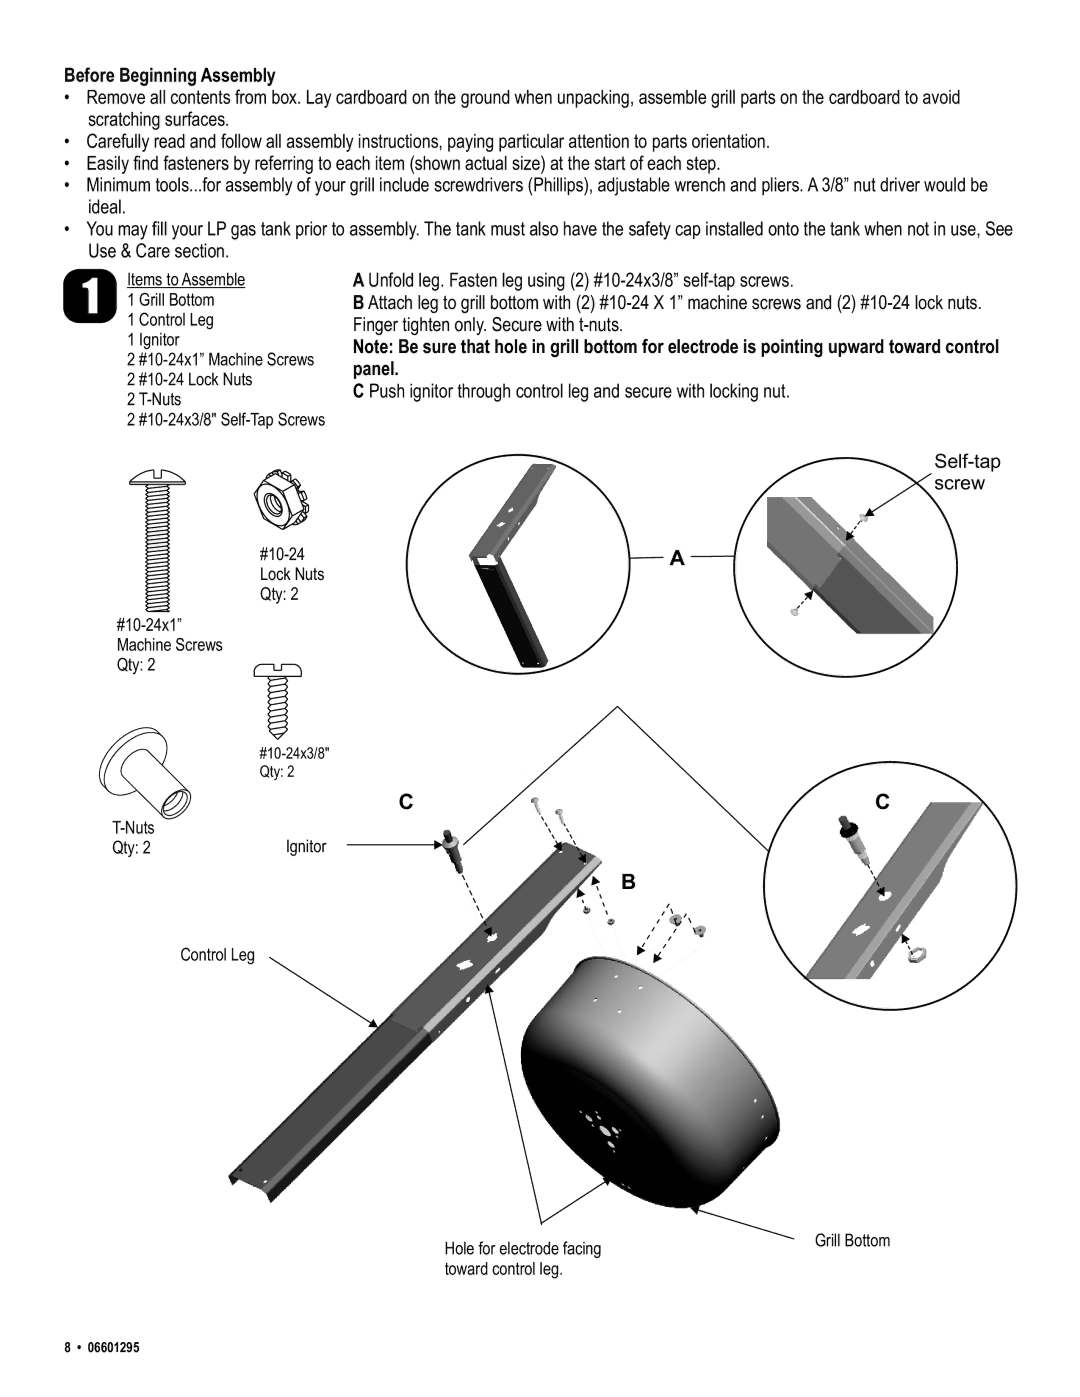
Items to Assemble
1 1 Grill Bottom
1 Control Leg
1Ignitor
2
2
2
2
A Unfold leg. Fasten leg using (2)
B Attach leg to grill bottom with (2)
Note: Be sure that hole in grill bottom for electrode is pointing upward toward control
panel.
C Push ignitor through control leg and secure with locking nut.
A | |
Lock Nuts |
|
Qty: 2 |
|
C | C | |
Ignitor |
| |
Qty: 2 |
|
B
Control Leg
Hole for electrode facing toward control leg.
Grill Bottom
8 • 06601295