the stove and that the chimney is in good condition. If not, a chimney liner must be installed or a suitable class 2 gas flue used. An
The stove must be installed in accordance with current gas and building regulations applicable.
Connect and seal the stove flue collar to the chimney with a length of pipe fitting for a depth of at least 20mm (3/4"). A minimum of 610 mm (2ft) of vertical pipe should be established before the flue direction is changed, unless the stove is to be used with a fanned (powered) flue.
The flue must have a minimum height of 3 metres (10ft), however to ensure optimum performance we recommend
3.6metres (12ft) or higher. The flue must be free of obstruction and any dampers must be fixed in a permanently open position. Ensure the chimney is not closed and that it has been swept prior to the stove being installed.
Make sure that rain, birds or any foreign body cannot get into the chimney to cause damage or a blockage. This problem can normally be overcome by fitting an approved Gas Cowl. It is essential to the effective running of your stove that the chimney draws properly to allow the products of combustion to escape.
Gas Connection.
The gas supply must be properly sized to provide the correct gas rate at running pressure when measured at the inlet valve. The final connection to the stove must be made with a suitable 8mm dia gas pipe.
It is essential that a gas isolation tap is provided upstream of the stove, in a position that is easily accessible.
Gas Pressure.
Make sure that there is adequate gas pressure and volume to the stove. The relevant pressures are on the data plate.
Ensure that the gas pressure to the stove is maintained when it is operating at the same time as other appliances in the building.
The gas pressure can be obtained by unscrewing the pressure test nipple and applying a suitable pressure gauge i.e. a manometer.
Pressures to be as stated on the data plate.
Before any coals are placed in position make sure that the burner is operating correctly. The flame should be fairly even across the burner top.
Ventilation
Under normal circumstances no additional room ventilation is needed.
Coals Layout
The approved layout of the coals is shown in Figs. 3, 4, 5 and 6. Adjustments may be made on this basis to give a beautiful looking fire. Spare coals are provided in the pack.
Pre Lighting Checks
1.All building work and flue sealing is complete.
2.The front fire bar is refitted in position.
3.All the coals are correctly placed.
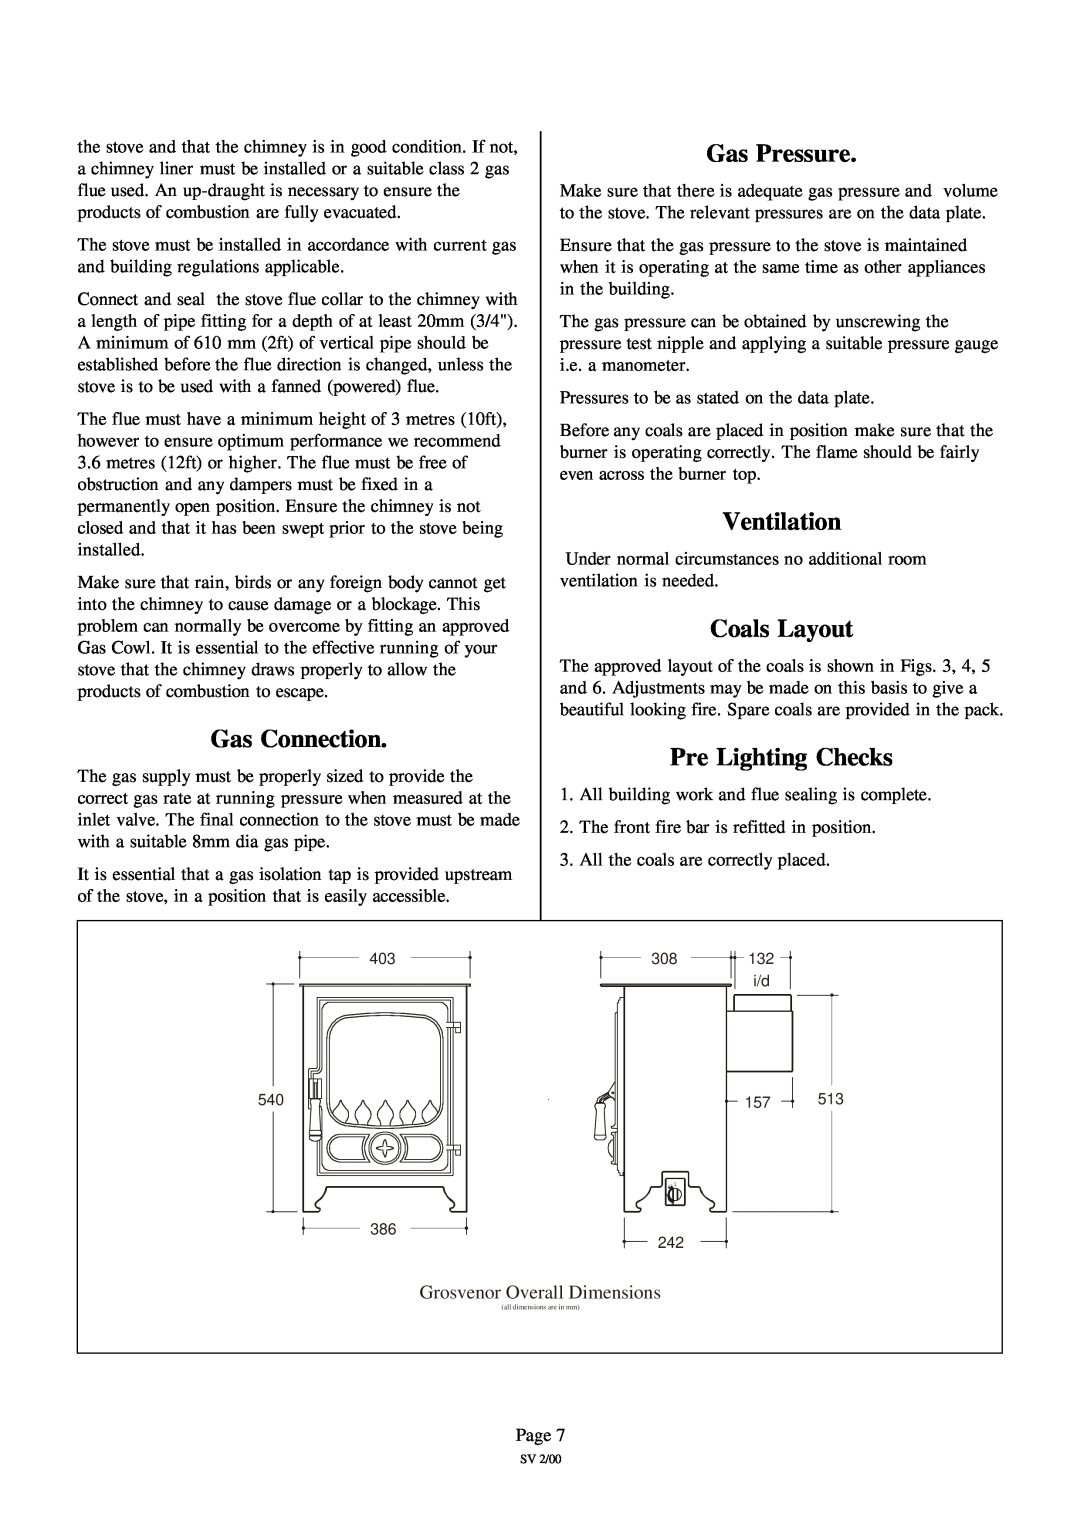
403 | 308 | 132 |
|
|
| i/d |
|
540 |
| 157 | 513 |
386 | 242 |
|
|
|
|
| |
| Grosvenor Overall Dimensions |
|
|
| (all dimensions are in mm) |
|
|
Page 7
SV 2/00
