ASSEMBLY INSTRUCTIONS
NOTE: For additional information regarding the parts listed in the following pages, refer to the Assembly Diagram on page 19.
1.![]()
![]() WARNING! Always make sure the Power Switch of the Tile Saw is in its “OFF” position and the unit is unplugged from its electrical outlet prior to assembling the unit, adding any accessories, or making any adjustments to the unit.
WARNING! Always make sure the Power Switch of the Tile Saw is in its “OFF” position and the unit is unplugged from its electrical outlet prior to assembling the unit, adding any accessories, or making any adjustments to the unit.
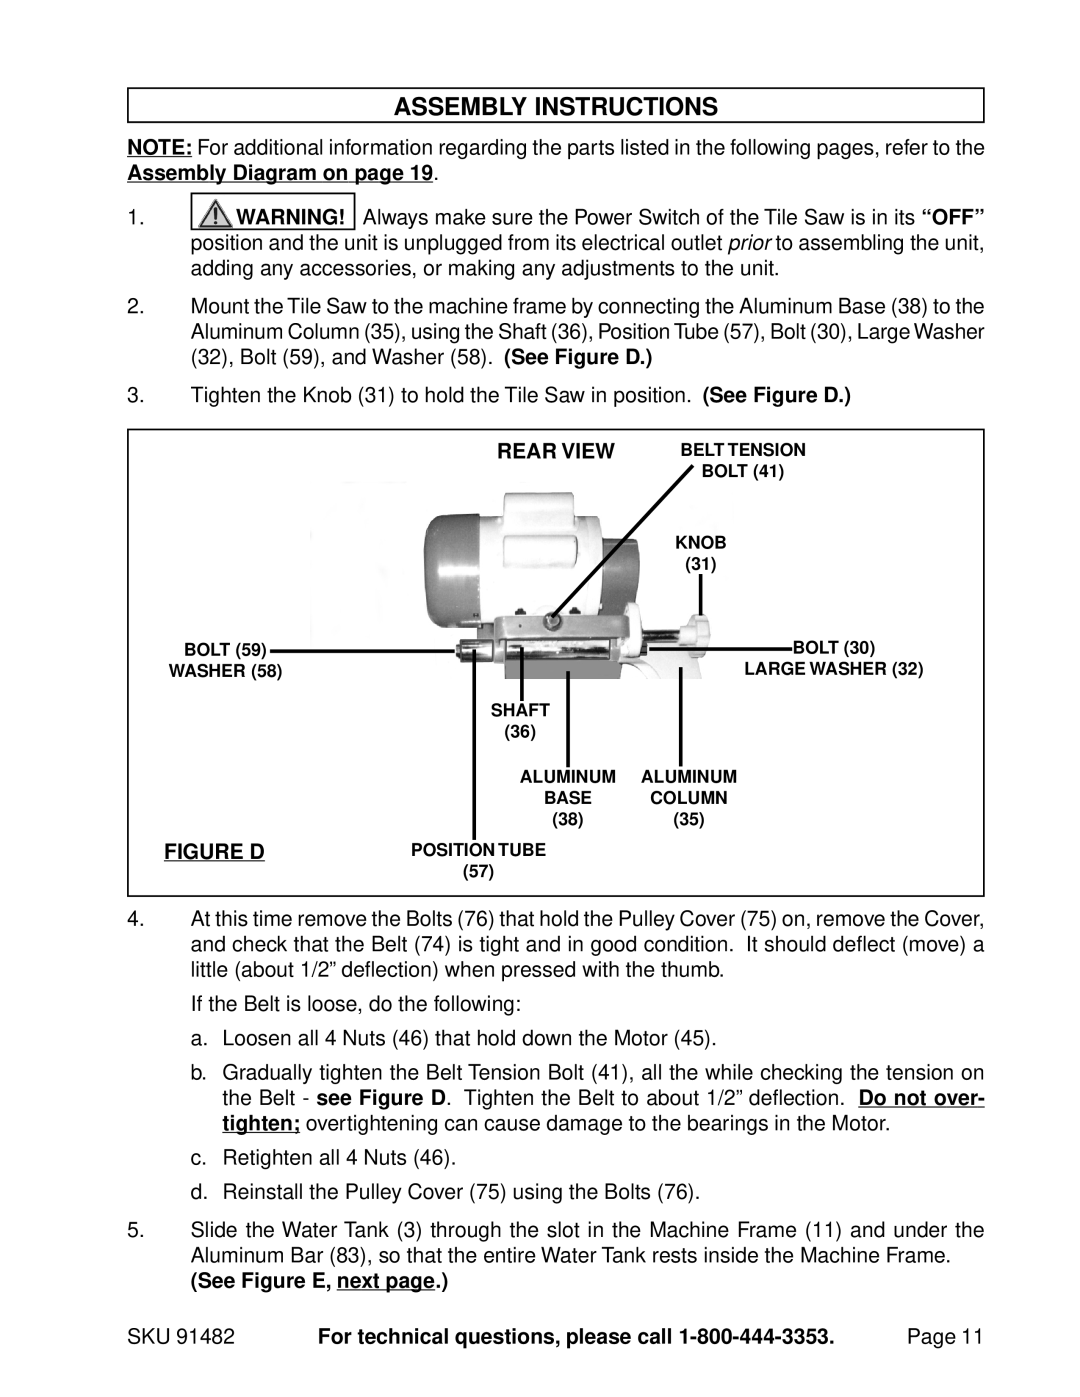
2.Mount the Tile Saw to the machine frame by connecting the Aluminum Base (38) to the Aluminum Column (35), using the Shaft (36), Position Tube (57), Bolt (30), Large Washer (32), Bolt (59), and Washer (58). (See Figure D.)
3.Tighten the Knob (31) to hold the Tile Saw in position. (See Figure D.)
REAR VIEW | BELT TENSION |
| BOLT (41) |
KNOB
(31)
BOLT (59) |
|
|
|
|
|
|
|
|
| BOLT (30) |
WASHER (58) |
|
|
|
|
|
|
| LARGE WASHER (32) | ||
|
|
|
|
|
|
| ||||
|
|
|
|
|
|
|
|
|
|
|
|
|
|
| SHAFT |
|
|
|
|
| |
|
|
|
| (36) |
|
|
|
|
| |
|
|
|
|
|
|
|
|
|
|
|
|
| ALUMINUM | ||||||||
|
|
|
| ALUMINUM | ||||||
|
|
|
|
| BASE |
| COLUMN | |||
|
|
|
| (38) | (35) |
| ||||
FIGURE D |
|
|
|
|
|
|
| |||
POSITION | TUBE |
|
|
|
| |||||
|
| (57) |
|
|
|
|
|
| ||
4.At this time remove the Bolts (76) that hold the Pulley Cover (75) on, remove the Cover, and check that the Belt (74) is tight and in good condition. It should deflect (move) a little (about 1/2” deflection) when pressed with the thumb.
If the Belt is loose, do the following:
a.Loosen all 4 Nuts (46) that hold down the Motor (45).
b.Gradually tighten the Belt Tension Bolt (41), all the while checking the tension on the Belt - see Figure D. Tighten the Belt to about 1/2” deflection. Do not over- tighten; overtightening can cause damage to the bearings in the Motor.
c.Retighten all 4 Nuts (46).
d.Reinstall the Pulley Cover (75) using the Bolts (76).
5.Slide the Water Tank (3) through the slot in the Machine Frame (11) and under the Aluminum Bar (83), so that the entire Water Tank rests inside the Machine Frame.
(See Figure E, next page.)
SKU 91482 | For technical questions, please call | Page 11 |