Installation Instructions |
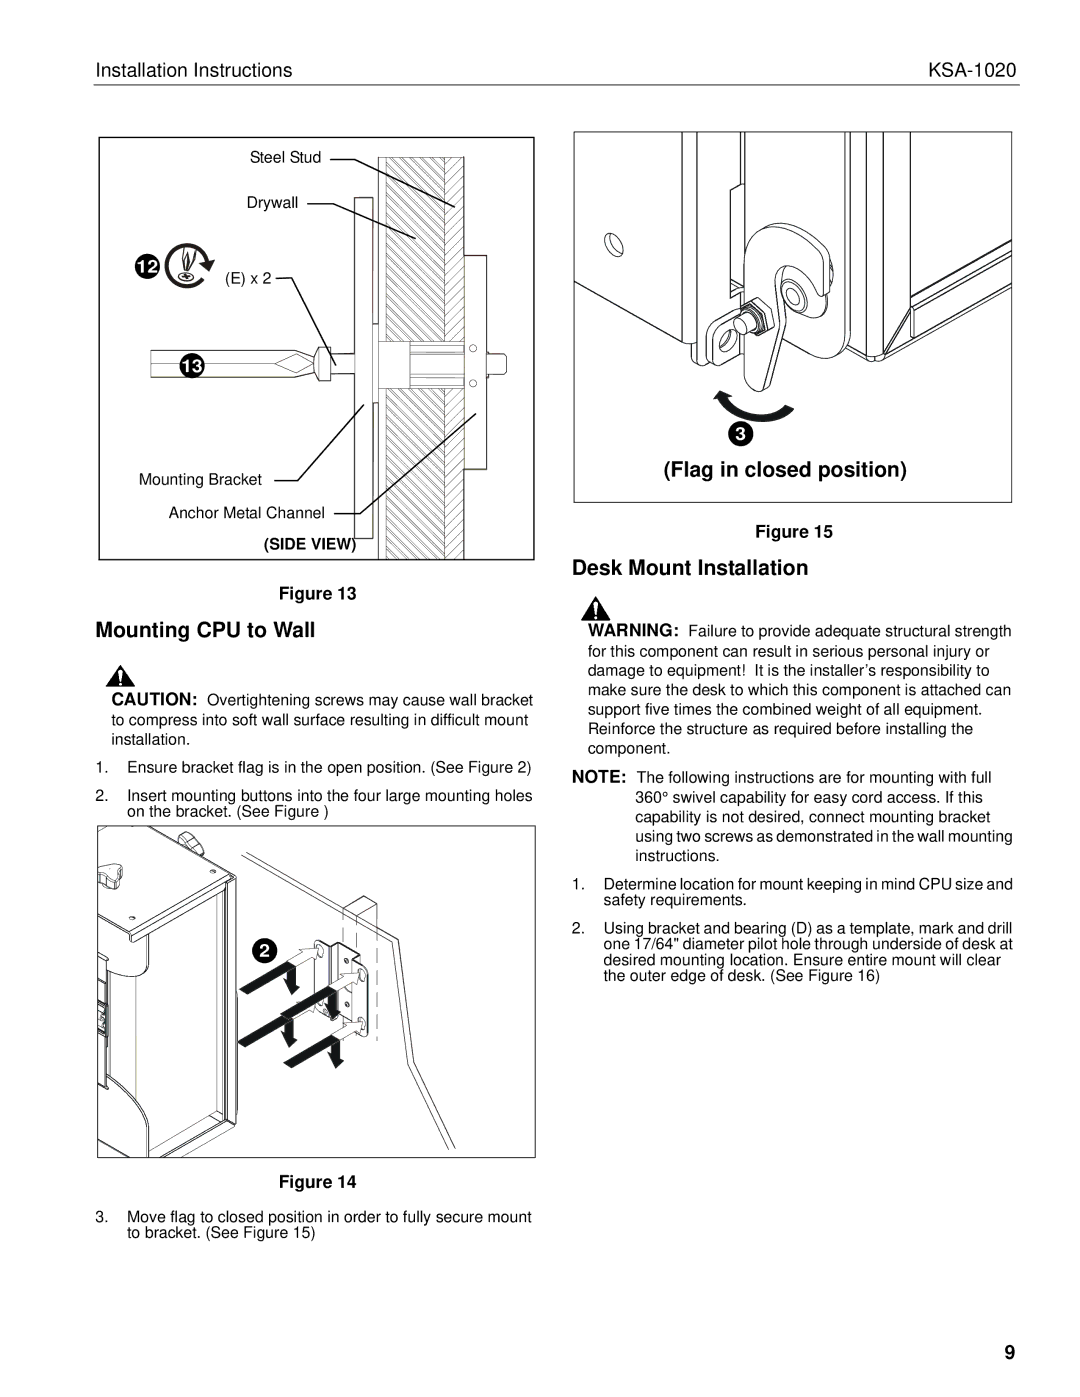
| Steel Stud |
| Drywall |
12 | (E) x 2 |
| |
| 13 |
Mounting Bracket | |
| Anchor Metal Channel |
| (SIDE VIEW) |
Figure 13
Mounting CPU to Wall
CAUTION: Overtightening screws may cause wall bracket to compress into soft wall surface resulting in difficult mount installation.
1.Ensure bracket flag is in the open position. (See Figure 2)
2.Insert mounting buttons into the four large mounting holes on the bracket. (See Figure )
2 |
Figure 14
3.Move flag to closed position in order to fully secure mount to bracket. (See Figure 15)
3
(Flag in closed position)
Figure 15
Desk Mount Installation
WARNING: Failure to provide adequate structural strength for this component can result in serious personal injury or damage to equipment! It is the installer’s responsibility to make sure the desk to which this component is attached can support five times the combined weight of all equipment. Reinforce the structure as required before installing the component.
NOTE: The following instructions are for mounting with full 360° swivel capability for easy cord access. If this capability is not desired, connect mounting bracket using two screws as demonstrated in the wall mounting instructions.
1.Determine location for mount keeping in mind CPU size and safety requirements.
2.Using bracket and bearing (D) as a template, mark and drill one 17/64" diameter pilot hole through underside of desk at desired mounting location. Ensure entire mount will clear the outer edge of desk. (See Figure 16)
9