Model: | Installation Instructions |
Truss |
10 |
Clamp with Hardware |
(4 places) |
Figure 5: Install Truss Plate to Truss
Install Face Plate to Truss Plate
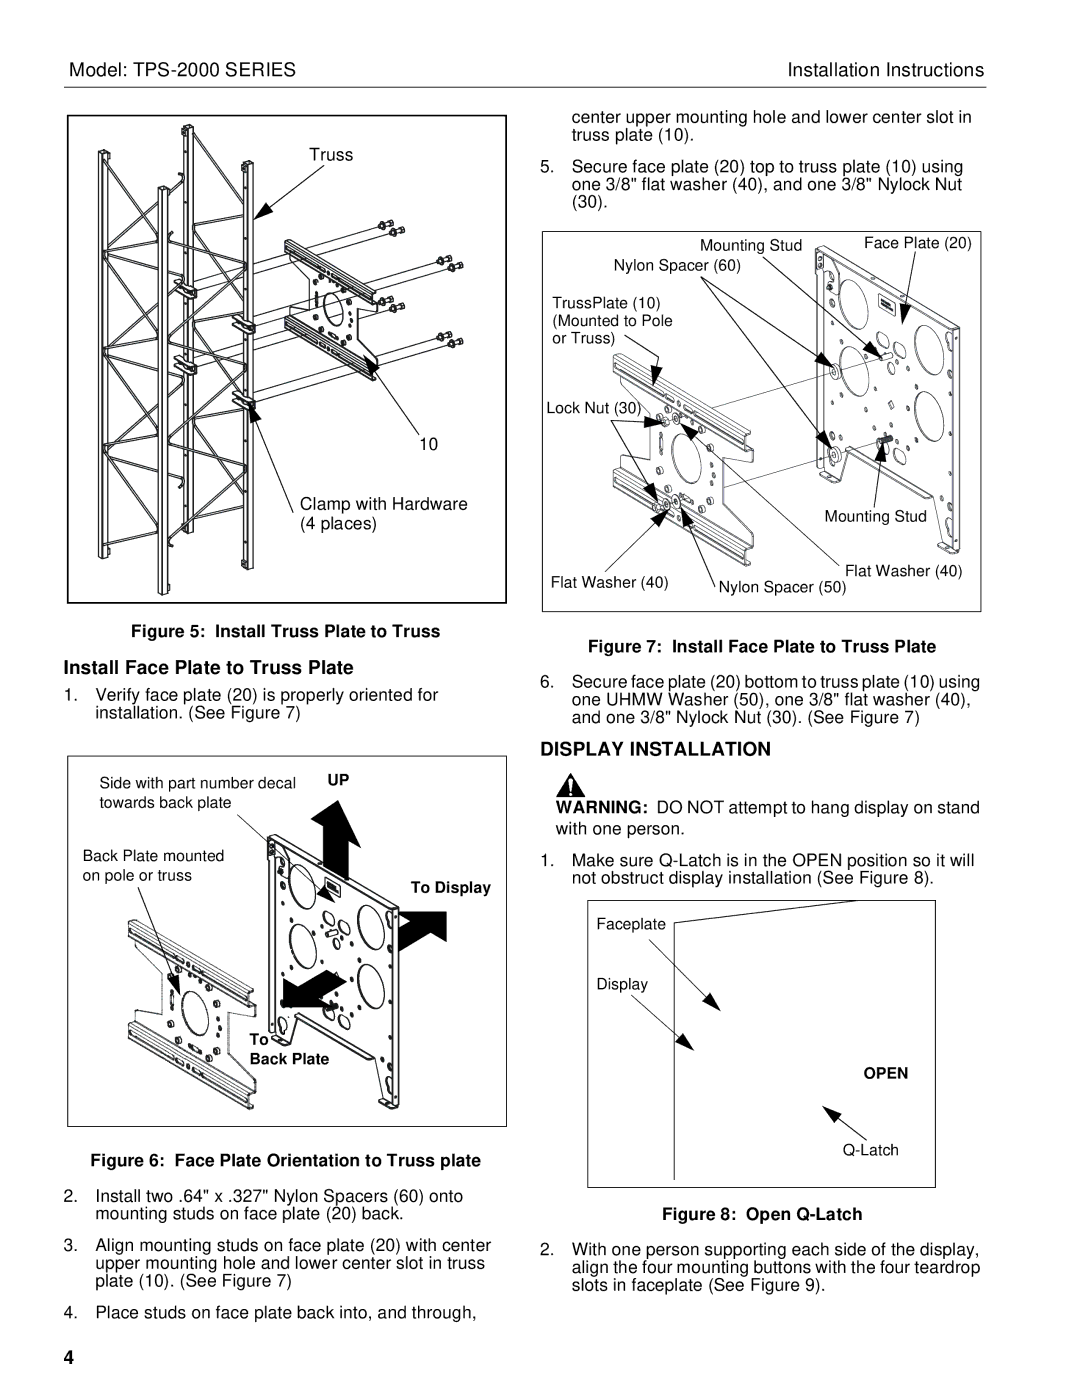
1.Verify face plate (20) is properly oriented for installation. (See Figure 7)
Side with part number decal | UP |
towards back plate |
|
Back Plate mounted on pole or truss
To Display
To ![]()
Back Plate
Figure 6: Face Plate Orientation to Truss plate
2.Install two .64" x .327" Nylon Spacers (60) onto mounting studs on face plate (20) back.
3.Align mounting studs on face plate (20) with center upper mounting hole and lower center slot in truss plate (10). (See Figure 7)
4.Place studs on face plate back into, and through,
center upper mounting hole and lower center slot in truss plate (10).
5.Secure face plate (20) top to truss plate (10) using one 3/8" flat washer (40), and one 3/8" Nylock Nut (30).
Mounting Stud | Face Plate (20) |
Nylon Spacer (60) |
|
TrussPlate (10) |
|
(Mounted to Pole |
|
or Truss) |
|
Lock Nut (30) |
|
| Mounting Stud |
Flat Washer (40) | Flat Washer (40) |
Nylon Spacer (50) |
Figure 7: Install Face Plate to Truss Plate
6.Secure face plate (20) bottom to truss plate (10) using one UHMW Washer (50), one 3/8" flat washer (40), and one 3/8" Nylock Nut (30). (See Figure 7)
DISPLAY INSTALLATION
WARNING: DO NOT attempt to hang display on stand with one person.
1.Make sure
Faceplate
Display
OPEN
Figure 8: Open Q-Latch
2.With one person supporting each side of the display, align the four mounting buttons with the four teardrop slots in faceplate (See Figure 9).
4
