e.Confirm that the router has power by checking that the PWR LED on the front panel is on.
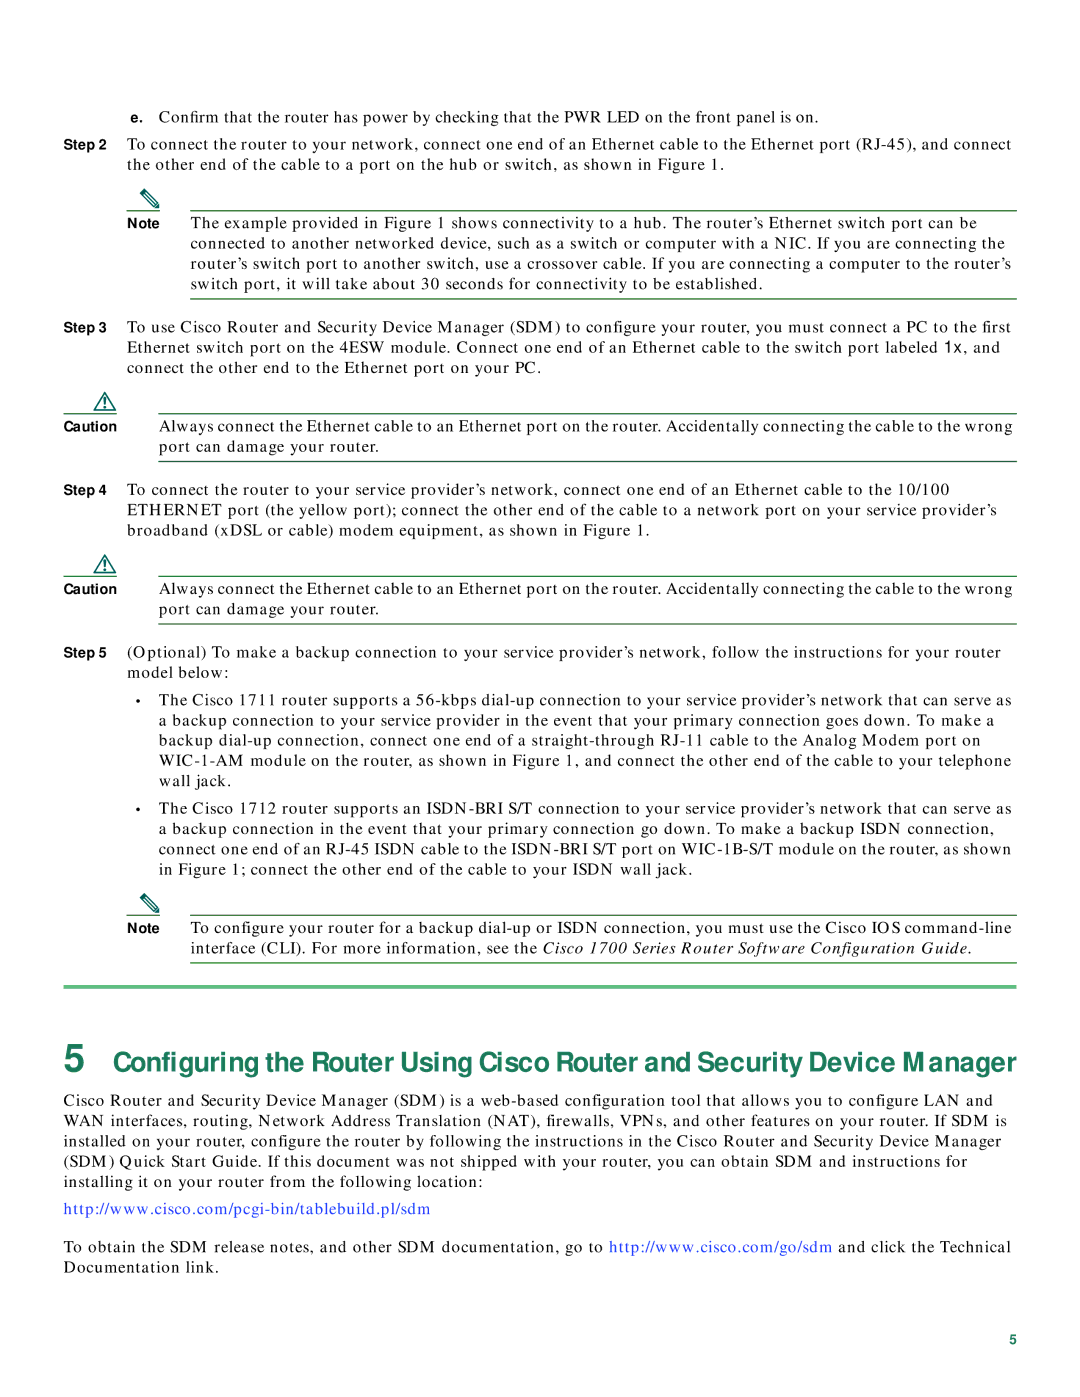
Step 2 To connect the router to your network, connect one end of an Ethernet cable to the Ethernet port
Note The example provided in Figure 1 shows connectivity to a hub. The router’s Ethernet switch port can be connected to another networked device, such as a switch or computer with a NIC. If you are connecting the router’s switch port to another switch, use a crossover cable. If you are connecting a computer to the router’s switch port, it will take about 30 seconds for connectivity to be established.
Step 3 To use Cisco Router and Security Device Manager (SDM) to configure your router, you must connect a PC to the first Ethernet switch port on the 4ESW module. Connect one end of an Ethernet cable to the switch port labeled 1x, and connect the other end to the Ethernet port on your PC.
Caution Always connect the Ethernet cable to an Ethernet port on the router. Accidentally connecting the cable to the wrong port can damage your router.
Step 4 To connect the router to your service provider’s network, connect one end of an Ethernet cable to the 10/100 ETHERNET port (the yellow port); connect the other end of the cable to a network port on your service provider’s broadband (xDSL or cable) modem equipment, as shown in Figure 1.
Caution Always connect the Ethernet cable to an Ethernet port on the router. Accidentally connecting the cable to the wrong port can damage your router.
Step 5 (Optional) To make a backup connection to your service provider’s network, follow the instructions for your router model below:
•The Cisco 1711 router supports a
•The Cisco 1712 router supports an
Note To configure your router for a backup
5Configuring the Router Using Cisco Router and Security Device Manager
Cisco Router and Security Device Manager (SDM) is a
To obtain the SDM release notes, and other SDM documentation, go to http://www.cisco.com/go/sdm and click the Technical Documentation link.
5