Required Tools and Equipment
Required Tools and Equipment
You need the following tools and equipment to install the
•Number 2 Phillips screwdriver
•Screws for rack mounting
Attaching the Center-Mount Brackets to the Chassis
You can use the center mount brackets to install the Cisco 3640 chassis with either the front panel or the rear panel facing forward. The bracket orientation and attachment holes used are different for
Complete the applicable procedure below, depending on the required chassis orientation in the rack.
Front-Panel Forward Installation
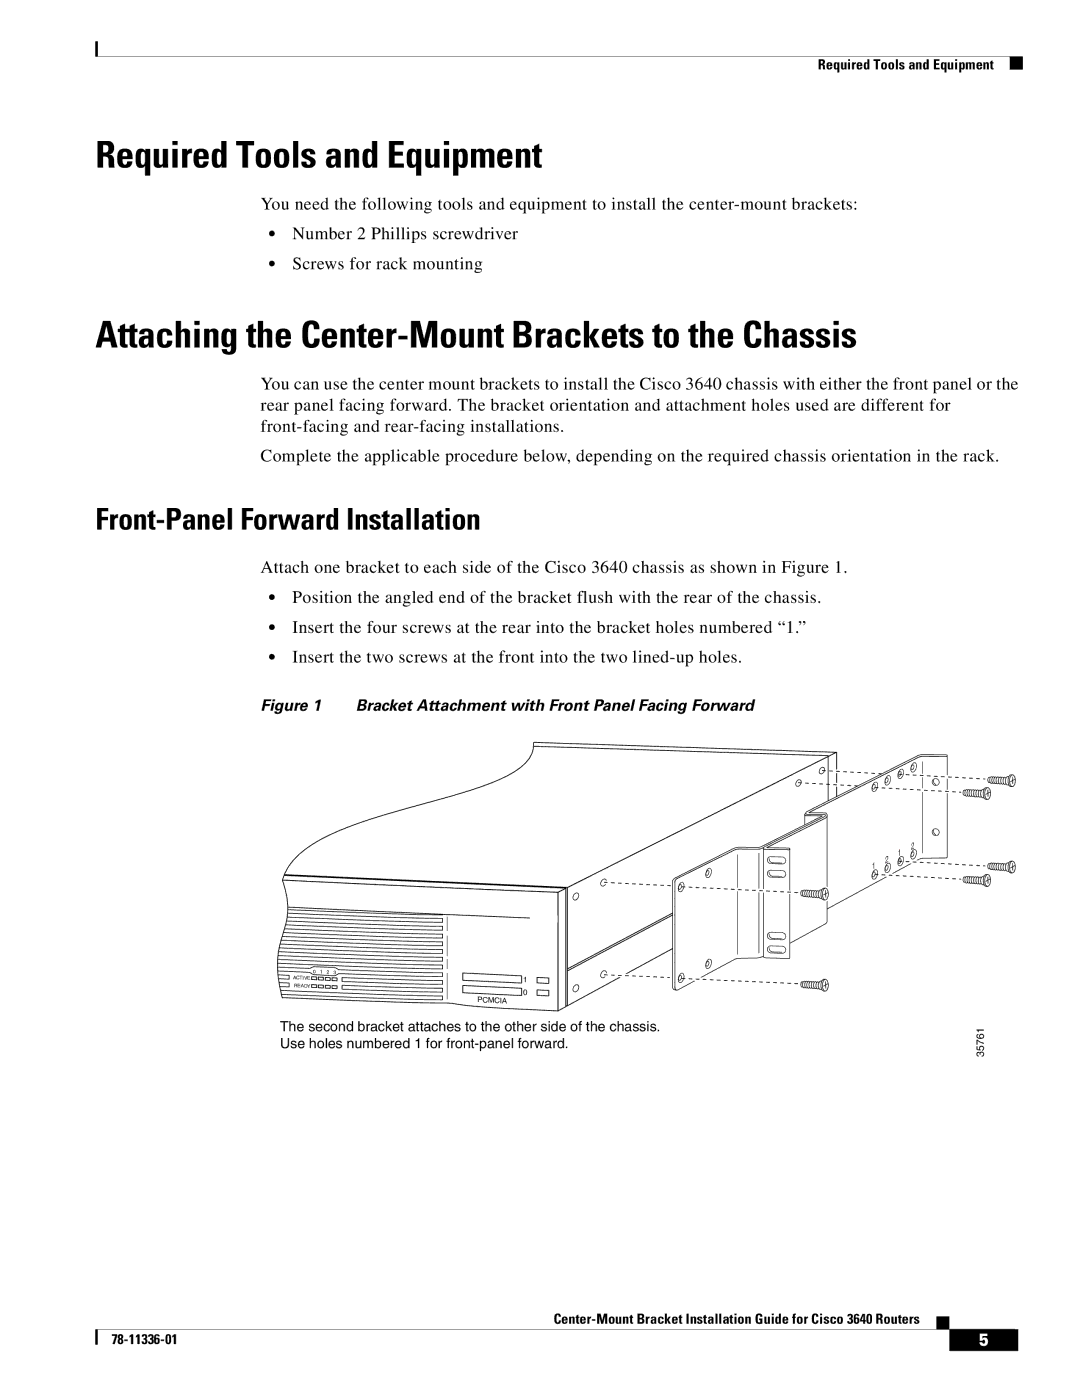
Attach one bracket to each side of the Cisco 3640 chassis as shown in Figure 1.
•Position the angled end of the bracket flush with the rear of the chassis.
•Insert the four screws at the rear into the bracket holes numbered “1.”
•Insert the two screws at the front into the two
Figure 1 Bracket Attachment with Front Panel Facing Forward
0 | 1 | 2 | 3 |
ACTIVE |
|
| 1 |
READY |
|
| |
|
| 0 | |
|
|
| |
|
|
| PCMCIA |
The second bracket attaches to the other side of the chassis. Use holes numbered 1 for
2 |
1 |
2 1 ![]()
35761
|
| 5 |
|
|
|