Chapter 4 Camera Management
Viewing Live Video
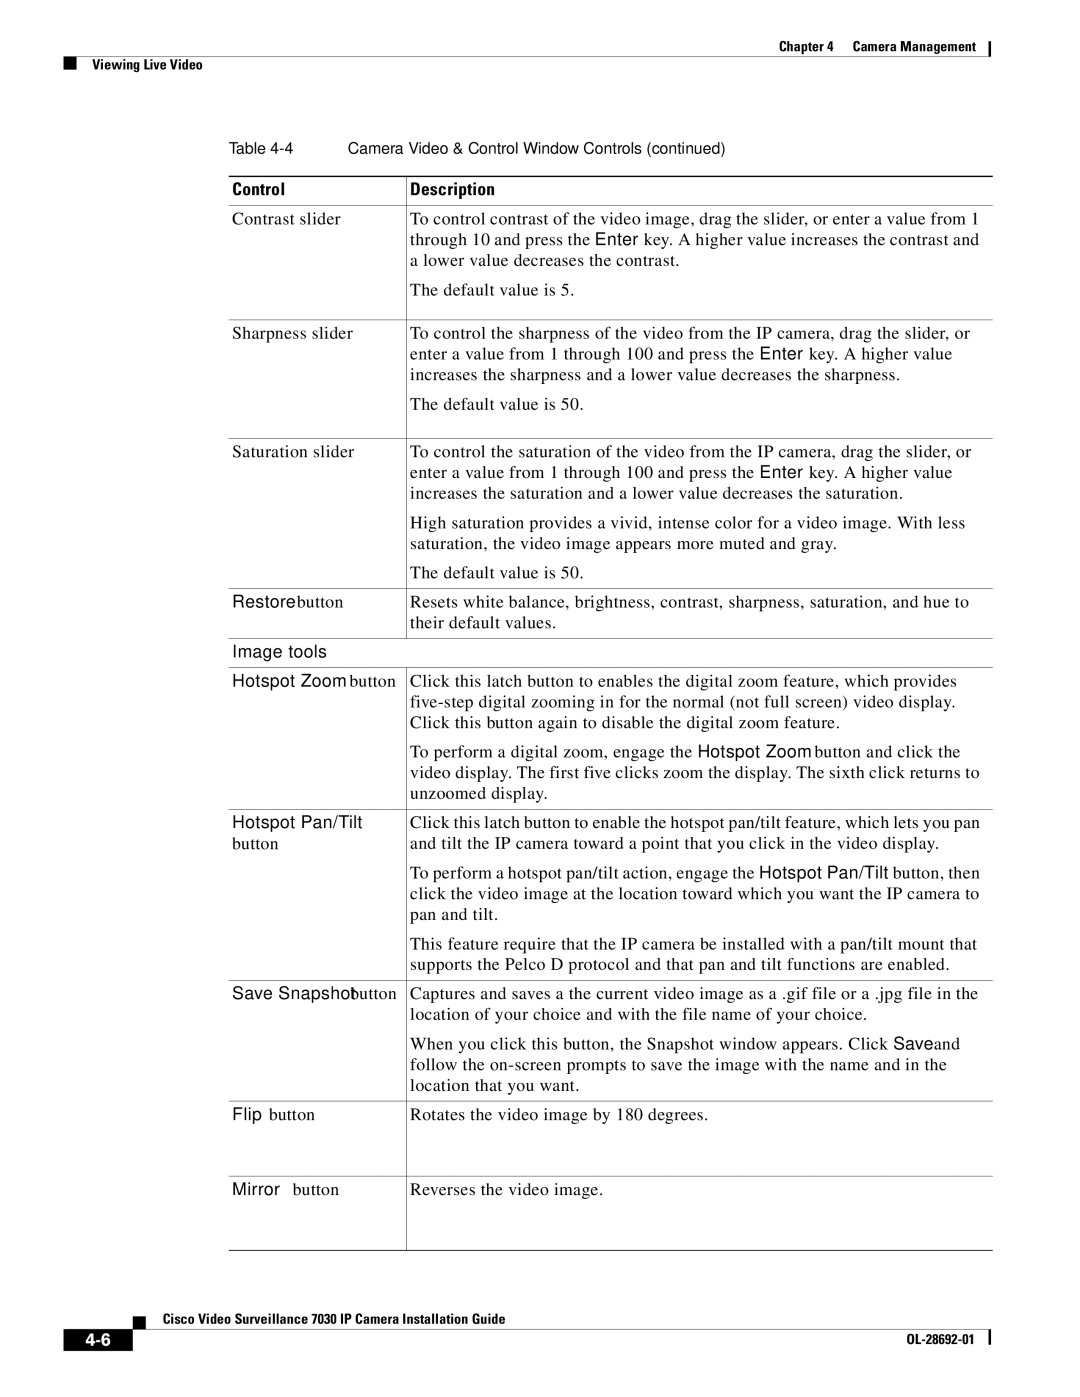
Table | Camera Video & Control Window Controls (continued) | |
|
|
|
Control |
| Description |
|
|
|
Contrast slider |
| To control contrast of the video image, drag the slider, or enter a value from 1 |
|
| through 10 and press the Enter key. A higher value increases the contrast and |
|
| a lower value decreases the contrast. |
|
| The default value is 5. |
|
| |
Sharpness slider | To control the sharpness of the video from the IP camera, drag the slider, or | |
|
| enter a value from 1 through 100 and press the Enter key. A higher value |
|
| increases the sharpness and a lower value decreases the sharpness. |
|
| The default value is 50. |
|
| |
Saturation slider | To control the saturation of the video from the IP camera, drag the slider, or | |
|
| enter a value from 1 through 100 and press the Enter key. A higher value |
|
| increases the saturation and a lower value decreases the saturation. |
|
| High saturation provides a vivid, intense color for a video image. With less |
|
| saturation, the video image appears more muted and gray. |
|
| The default value is 50. |
|
|
|
Restore button |
| Resets white balance, brightness, contrast, sharpness, saturation, and hue to |
|
| their default values. |
|
|
|
Image tools |
|
|
|
| |
Hotspot Zoom button | Click this latch button to enables the digital zoom feature, which provides | |
|
| |
|
| Click this button again to disable the digital zoom feature. |
|
| To perform a digital zoom, engage the Hotspot Zoom button and click the |
|
| video display. The first five clicks zoom the display. The sixth click returns to |
|
| unzoomed display. |
|
| |
Hotspot Pan/Tilt | Click this latch button to enable the hotspot pan/tilt feature, which lets you pan | |
button |
| and tilt the IP camera toward a point that you click in the video display. |
|
| To perform a hotspot pan/tilt action, engage the Hotspot Pan/Tilt button, then |
|
| click the video image at the location toward which you want the IP camera to |
|
| pan and tilt. |
|
| This feature require that the IP camera be installed with a pan/tilt mount that |
|
| supports the Pelco D protocol and that pan and tilt functions are enabled. |
|
| |
Save Snapshot button | Captures and saves a the current video image as a .gif file or a .jpg file in the | |
|
| location of your choice and with the file name of your choice. |
|
| When you click this button, the Snapshot window appears. Click Save and |
|
| follow the |
|
| location that you want. |
|
|
|
Flip button |
| Rotates the video image by 180 degrees. |
Mirror button
Reverses the video image.
Cisco Video Surveillance 7030 IP Camera Installation Guide
|
| |
|