Cisco Systems AIRANT5114P2MN Installing the Optional Mounting Bracket Kit, Wall Mounting

Models: AIRANT5114P2MN

1 14
Download 14 pages 59.16 Kb
Page 11
Image 11
Installing the Optional Mounting Bracket Kit

Installing the Antenna

Installing the Optional Mounting Bracket Kit

Using an optional antenna mounting bracket kit, the AIR-ANT5114P2M-N antenna can be mounted directly on an access point in a strand mount or pole mount environment. The antenna bracket kit contains four bracket sections and fasteners that you can assemble in multiple configurations to position and aim the directional antenna in a range of positions. For more information on mounting the antenna with the optional mounting bracket, refer to Installing Antenna Brackets on Cisco 1550 Series Outdoor Mesh Access Points.

Mounting on a Vertical Surface

The antenna can be wall mounted. Hardware is not included for wall-mount installation.

Follow these steps to mount your antenna on a vertical surface.

Step 1 Remove antenna and mount kit from packaging.

Step 2 Attach antenna mount bracket to the back of the antenna as shown in Figure 1, applying a maximum nut-tightening torque of 55 in-lbf (6.2 Nm).

Step 3 Attach elevation adjustable bracket (B) as shown in Figure 2 and loosely secure hardware. The carriage bolt square holes must be on the inside.

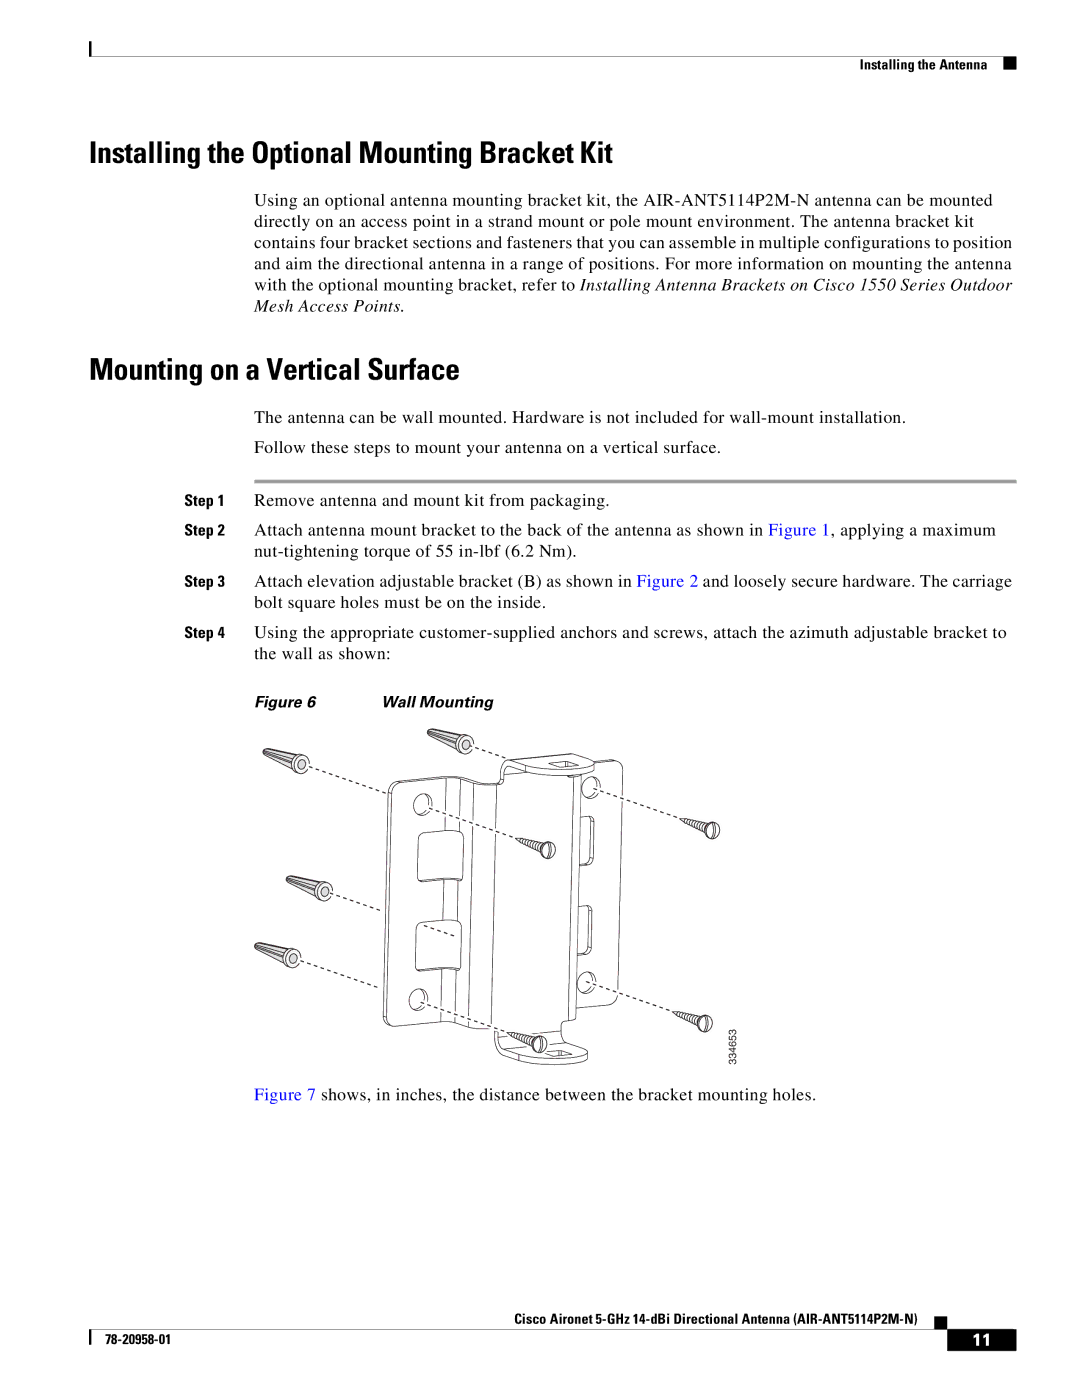
Step 4 Using the appropriate customer-supplied anchors and screws, attach the azimuth adjustable bracket to the wall as shown:

Figure 6

Wall Mounting

334653

Figure 7 shows, in inches, the distance between the bracket mounting holes.

Cisco Aironet 5-GHz 14-dBi Directional Antenna (AIR-ANT5114P2M-N)


78-20958-01

11


Page 11
Image 11
Cisco Systems AIRANT5114P2MN Installing the Optional Mounting Bracket Kit, Mounting on a Vertical Surface, Wall Mounting